

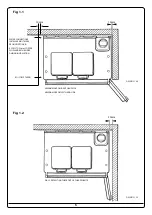
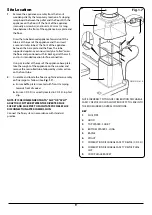


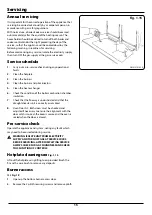

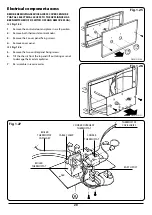
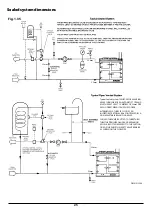

17
Cooker
(see
Fig. 1.19
and
Fig. 1.20
)
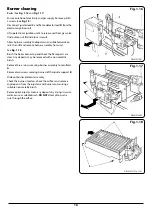
Remove solenoid connector plug
M
.
Undo union nut
N
.
Undo two screws
P
.
Remove the burner, complete with controls, from the unit
(See
Fig. 1.20
).
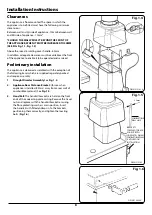
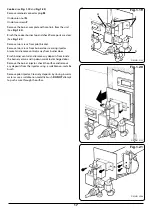
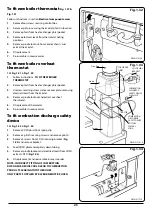
Brush the cooker burner top and check flame ports are clear.
(See
Fig. 1.21
)
Remove two screws from pilot bracket.
Remove two screws from burner door, securing injector
bracket and remove controls away from burner door.
Brush burner venturi and remove any deposits from inside
the burner venturi and tip downwards to discharge debris.
Remove the burner injector, check the orifice and remove
any deposits from the injector using, a suitable non- metallic
brush.
Remove pilot injector. Clean any deposits by rinsing in warm
water or use a suitable non-metallic brush.
DO NOT
attempt
to push a wire through the orifice.
DESN 512132
DESN 512966
DESN 512133
Fig. 1.19
Fig. 1.21
Fig. 1.20
M
P
N


