5
Step 5: Installing the supply valve
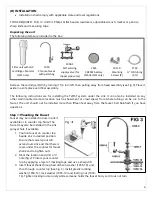
The self-piercing supply valve (1008-1) can be installed on copper or CPVC rigid plastic
pipe of 3/8" to 1" diameter. NOTE: If your piping is PEX or any other softer material, DO
NOT USE this supply valve as it can cause a water leak. For PEX, you can purchase
appropriate fittings at the same store where you purchased this unit or you can order
the supply valve kit (model CK514) online directly from
www.rainfreshstore.com
IMPORTANT:
Before you install supply valve, confirm the cold water pipe by running
hot water through your kitchen faucet. Touch both pipes under the sink to verify cold
water pipe and turn off the faucet.
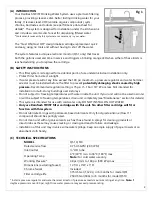
Orient saddle valve with outlet threads pointing towards INLET (marked by
grey collet and arrow pointing towards it).
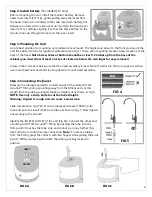
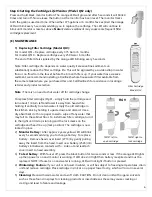
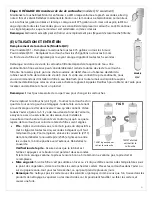
Back off handle on saddle valve to retract piercing tip. Make sure
piercing tip is flush with or slightly protruding from rubber gasket as
shown in Fig. 7. If it is sticking out too far gently push it against
something flat to push it back in flush with the rubber gasket.
Unscrew the bolts to separate the back plate from the supply
valve.
With rubber gasket in position clamp entire assembly (Fig 8) to
pipe using bolts provided. Tighten bolts, keeping brackets
parallel until rubber gasket is firmly compressed.
CAUTION: DO
NOT OVERTIGHTEN. Do not turn handle yet
.
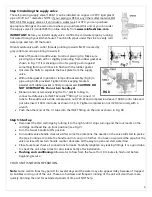
Measure and cut remaining length of ¼” plastic tubing to
connect saddle valve to INLET Acculink
TM
fitting. To connect ¼”
tube to the saddle valve, slide compression nut (726-0) and compression sleeve (1008-3) onto tube and
put tube insert (1603) into tube as shown in Fig. 8. Tighten compression nut (720-0) securely with a
wrench.
Push the other end of the ¼” tube into the INLET fitting on the unit as shown in Fig. 6B.
Step 5: Start up
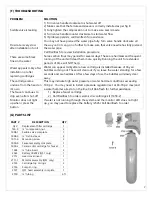
Reconnect the QLV cartridge by turning it to the right until it stops turning and the lock marks on the
cartridge and head line up (lock position) (see Fig 9).
Turn the faucet handle to ON position.
Turn saddle valve handle clockwise. After some free rotations, the needle on the valve will start to pierce
the pipe. Continue to rotate the handle until it can go no further. You have now pierced the pipe, but the
valve is closed. Now turn handle counter clockwise all the way to open and start water flow.
Close faucet and check all connections for leaks. Carefully retighten any leaking fittings. It is a good idea
to check the unit a few times for slow leaks shortly after installation.
Flushing and conditioning:
Allow water to flow from the faucet for 10 minutes to flush unit before
beginning service.
YOUR UNIT IS NOW IN OPERATION.
Note:
Some carbon fines may persist for several days and the water may also appear milky because of trapped
air bubbles coming out of the unit. These are harmless and frequent running of the unit will clear them more
quickly. Running the unit for extended periods of time will NOT help.
FIG 8


