3
(D) INSTALLATION
Installation shall comply with applicable state and local regulations
TOOLS REQUIRED:
Drill, ½” drill bit, Philips & flat-head screwdrivers, adjustable wrench, marker or pencil, a
sharp knife and measuring tape.
Unpacking the unit
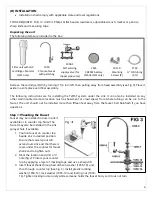
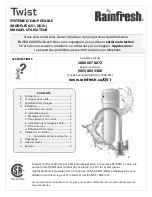
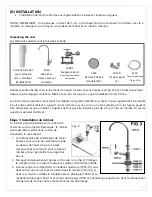
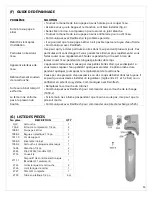
The following items are included in the box:
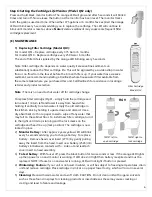
Remove the cartridge (QLV) by turning it 1/4 turn left, then pulling away from head assembly (see Fig 9). Place it
aside in a safe place until final assembly.
The following instructions are for installing the TWIST system under the sink. It can also be installed on any
other wall mounted remote location (such as basement or crawl space) from where tubing can be run to the
faucet. The unit should not be installed more than fifteen feet away from the faucet. Call Rainfresh if you have
questions.
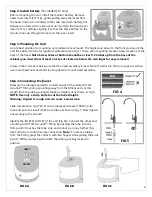
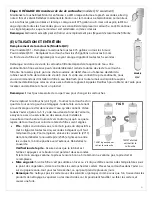
Step 1: Mounting the Faucet
Faucet may be installed in hole in sink if
available or in counter top. Note: The
faucet may also be installed in the sink
sprayer hole if available.
1.
Position faucet on counter top
beside sink in desired position.
Ensure that swivel spout will
extend over sink and that there is
room under the counter for faucet
shank and to tighten nuts.
2.
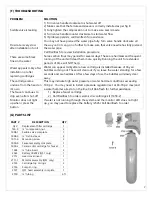
Mark the location and drill a ½”
hole (fig 2). Protect your counter
top by applying a layer of masking tape and use a sharp drill.
3.
Insert faucet shank through escutcheon washer (1050-10), and
then through counter top (See Fig. 3). Install plastic locating
washer (1050-12), lock washer (1050-13) and locking nut (1050-
14). Tighten locking nut securely while someone holds the faucet body so it does not turn.
2730
¼” OD tubing
(6 ft)
1011-0
Mounting
Screws (2)
2545
CR2032 battery
(Model QS1 only)
1008-1
Self-piercing
supply valve (for
copper pipes only)
1050
Chrome faucet
with parts bag
Filter unit with QLV
car Monitor
(QS1 only)


