
54
EN
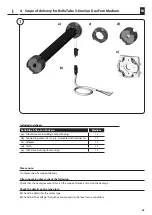
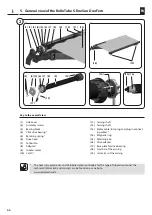
(3)
(2)
(4)
(17)
(2)
(7)
(3)
(18)
14
15
16
17
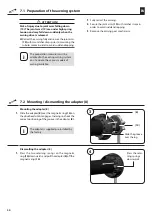
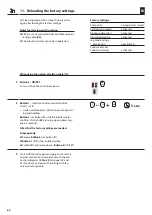
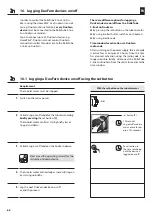
The screws must be flush.
Tighten the
bearing block.
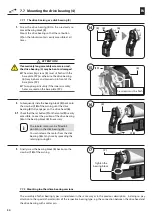
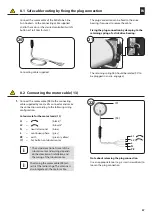
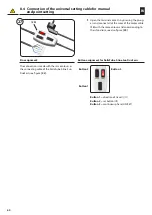
7.7 Mounting the drive bearing (4)
7.7.1 The drive bearing as a click bearing (4)
1.
Screw the drive bearing
(4)
to the previously re-
moved bearing block
(3)
.
Mount the drive bearing so that the set button
(7)
on the tubular motor is easily accessible at all
times.
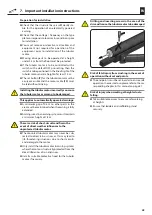
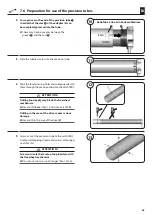
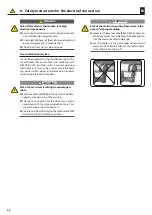
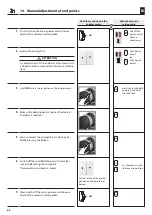
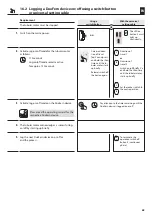
7.7.2 Mounting in other drive bearing versions
ATTENTION!
If excessively long assembly screws are used,
the drive bearing (4) may be bent or damaged.
◆
The assembly screws
(2)
must sit flush with the
base plate
(17)
as otherwise the drive bearing
(4)
may be bent and pressed up in front of the
base plate
(17)
.
◆
This applies particularly if the inner assembly
holes are used on the base plate
(17)
.
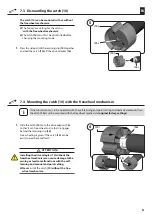
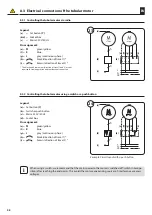
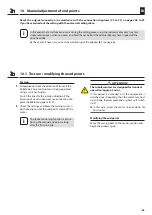
2.
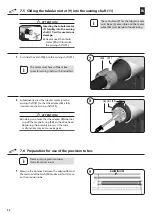
Subsequently slide the bearing block
(3)
back onto
the crossbar
(18)
of the awning until the drive
bearing
(4)
fully engages on the drive head
(6)
.
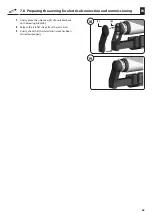
2.1
Check that the set button
(7)
on the motor
(9)
is easily
accessible. Correct the position of the drive bearing
(4)
on the bearing block
(3)
if necessary.
i
The tubular motor can be fitted in 4
positions in the click bearing
(4)
.
You can release the motor from the click
bearing
(4)
at any time by spreading the
retaining spring
(5)
.
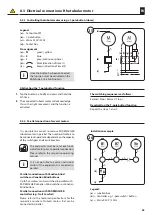
3.
Finally screw the bearing block
(3)
back onto the
crossbar
(18)
of the awning.
The assembly of other bearing types is undertaken in the same way as in the previous description. In doing so, pay
attention to the special characteristics of the respective bearing type, e.g. the connection between the drive head and
the drive bearing with a cotter pin.


