background image


Residential Gas Hydronic Heating System

Residential Gas Hydronic Heating System

Residential Gas Hydronic Heating System

Residential Gas Hydronic Heating System

QVM 9


Series


                                                                      28

28

28

28

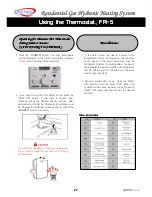
1)


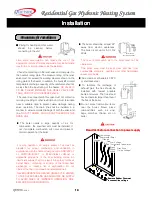
Check the flammability and rigidity of floor & wall
materials. Ensure that all minimum clearances to
walls, ceilings, overhangs, etc. have been met.

2) Freeze Prevention Device
   The units must be 

wired-in to a 115 volt

 electrical

circuit once they have been connected to water
piping and the circuit has been filled with water. If
the freeze prevention circuit starts due to a low-
water condition, the pump will begin running on

air

 and cause premature failure and will void the

warranty on the pump.

   Check to see if the unit is properly connected

and the piping is insulated properly.

   If the insulation has worn off or is not fitted, the

risk of freezing of piping and severe damage to
the unit is considerable. Thoroughly check the
piping insulation and replace where necessary.

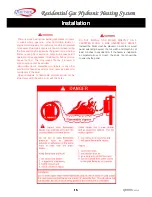
 Measures to prevent fire must be taken and

check that flue ducts are installed in compliance
with the instructions?

Test Operation and Checks

Test Operation and Checks

Test Operation and Checks

Test Operation and Checks

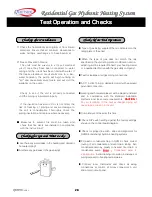
 Type of gas being supplied(the one indicated on the

rating plate of the units)

 When the type of gas does not match the one

specified on the unit rating plate, modification and re-
adjusting will be required(Consult your heating dealer
or a qualified technician with the gas utility company).

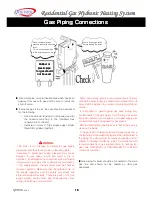
  Test for leakage at all gas piping connections.

 AC 115 volts 15 Amp. dedicated circuit with approved

grounded connection.

  Heating and hot water pipes must be properly installed

and in compliance with the standard installation
methods and local code requirements. 

CAUTION !

CAUTION !

CAUTION !

CAUTION !

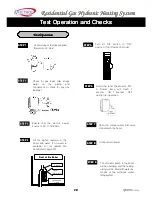
Any air remaining in the heat exchanger piping will
cause rapid corrosion in the unit.

  Completely vent the air at this time.

 Check DIP switch setting against the factory settings

shown on the control board diagram.

  Check for proper flue pitch, slope and alignment for

QVM 9(condensing) hydronic heating systems.

 Fill plastic condensate trap in QVM 9 check correct

routing of all condensate and vent drain tubing. Run
condensate drain by gravity to nearest floor drain or
condensate pump. 

Note! -

Note! -

Note! -

Note! - Condensed water is

slightly acidic.

 Avoid draining into piping in disrepair or

piping exposed to freezing temperatures.

 Connect room thermostat and check all wiring

connections at control, at molex connectors in unit
and at main circuit panel.

Checkup after Installation

Checkup after Installation

Checkup after Installation

Checkup after Installation

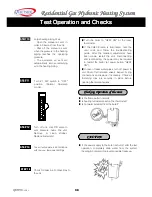
  Are there any water leaks in the heating and domestic

hot water piping?

  Are there any gas leaks in the gas piping?

Checking for Gas and Water Leaks

Checking for Gas and Water Leaks

Checking for Gas and Water Leaks

Checking for Gas and Water Leaks

Checks before Trial Operation

Checks before Trial Operation

Checks before Trial Operation

Checks before Trial Operation

Содержание 090W1-NG

Страница 1: ...a a a a at t t t t t t ti i i i i i i in n n n n n n ng g g g g g g g S S S S S S S Sy y y y y y y ys s s s s s s st t t t t t t te e e e e e e em m m m m m m m Homeowner s Book and Installation Manua...

Страница 2: ...ese buildups in the plate heat exchanger is not covered under the terms of this warranty This Warranty Does Not Cover 1 Installations by other than qualified heating contractors 2 Installations of equ...

Страница 3: ...rsonal injury or loss of life Do not store or use gasoline or other flammable vapors and liquids in the vicinity of this or any other appliance Extinguish any open flame Do not try to light any applia...

Страница 4: ...onnections 16 Installation of the Flue 18 Draining Condensed Water 21 About the FR 5 Thermostat 22 Installation of the Thermostat 23 Using the Room Thermostat FR 5 24 Test Operation and Checks 28 Rout...

Страница 5: ...sidential Gas Hydronic Heating System QVM 9 Series 2 2 2 2 Identifying the Components Identifying the Components Identifying the Components Identifying the Components Model QVM 9 090W1 NG Model QVM 9...

Страница 6: ...ICHAUTOMATICALLYLIGHTSTHEBURNER DONOTTRYTOLIGHTTHEBURNERBYHAND 9 TURNKNOBOFGASVALVETO OFF POSITION 6 WAIT AFEW MINUTES TO CLEAR OUT ANY GAS THEN SMELL FORGAS INCLUDINGNEARTHEFLOOR IF YOU DON TSMELLGAS...

Страница 7: ...Low Water Level Safety 7 Low Water Level Safety The water level in the heat exchanger is continuously monitored to prevent the boiler from operating if there is no water or a restricted flow of water...

Страница 8: ...atural gas to propane CAN ONLY BE PERFORMED CAN ONLY BE PERFORMED CAN ONLY BE PERFORMED CAN ONLY BE PERFORMED by a trained technician using approved QUIETSIDE parts In winter season the boiler should...

Страница 9: ...of Scalds Risk of Scalds Risk of Scalds Risk of Scalds USE ANTI SCALD USE ANTI SCALD USE ANTI SCALD USE ANTI SCALD VALVE S VALVE S VALVE S VALVE S IN HOT WATER SYSTEM TO REDUCE THE RISKS OF SCALDING A...

Страница 10: ...on demand There is no storage tank to hold hot water when there is no use for it The QVM 9 will only produce hot water when you use it instantaneously The modulating gas burner allows water to heat up...

Страница 11: ...as become blocked 11 Smart Re 11 Smart Re 11 Smart Re 11 Smart Re Start Start Start Start Should the unit s flame fail due to strong winds or low gas pressure the unit will automatically restart In co...

Страница 12: ...t Protection Overheat Protection Overheating burners or heat exchangers will automatically cut off the gas supply 7 7 7 7 Low Water Level Safety Low Water Level Safety Low Water Level Safety Low Water...

Страница 13: ...or your dealer Use the Use the Use the Use the selector switch selector switch selector switch selector switch according to the applications according to the applications according to the application...

Страница 14: ...r main burner flames causing fire or explosion Some local codes permit operation of gas appliances if installed 18 inches or more above the floor This may reduce the risk if location in such an area c...

Страница 15: ...ttach field piping to unit The heating pipe should be 3 4 and of type L copper or PEX Never use aluminum plastic or galvanized steel piping The pipe size used for supply supply supply supply heating w...

Страница 16: ...speciality plumbing supplier M M M Mixing ixing ixing ixing type valve type valve type valve type valve Controls the desired hot water temperature and ensures constant hot water temperature in the fau...

Страница 17: ...curves The flue should have a diameter larger than that of the flue of the boiler Do not place flammable items near the boiler Never place combustibles such as vinyl bags matches thinner etc on boile...

Страница 18: ...xplosion Some local codes permit operation of gas appliances if installed 18 inches or more above the floor This may reduce the risk if location in such an area cannot be avoided Flammable items press...

Страница 19: ...called drip leg must be incorporated in the piping The dirt leg must be readily accessible and not subject to freezing conditions Install in accordance with recommendations of gas supplier Refer to na...

Страница 20: ...ity fill The pump will run continuously and the low water level sensor will be automatically turned on off for 1 minute intervals Ensure that all water valves to unit are open Twist open approx 1 2 tu...

Страница 21: ...d Due to the extremely low flue temperatures the QVM 9 Series boiler may be vented using 3 schedule 40 venting materials Cut all lengths of pipe cleanly maintaining a 90 degree square edge Use long ra...

Страница 22: ...leaks Do not use any aluminum duct as an extension Use extension duct sets or elbows available through your Quietside distributor The flue duct which carries combustion waste gas should be firmly sec...

Страница 23: ...flue ensuring that it cannot be blocked by snow falling from the eaves Install the flue in a location where no opening exists within 20 from the flue so that exhaust gas cannot recirculate into the bu...

Страница 24: ...ed IMPORTANT The siphon reservoir in the boiler should be filled with water If no water is available do not operate the boiler The condensed water should not be used for drinking water Be sure to clea...

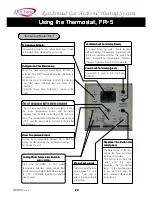
Страница 25: ...ould find that setting the thermostat to the water temperature sensing function will provide the best comfort We suggest trying them both The Air Temperature Mode The Air Temperature Mode The Air Temp...

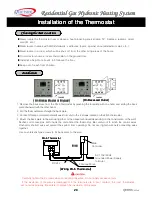
Страница 26: ...n Installation Installation Installation 1 Remove the back plate from the FR 5 thermostat by grasping the faceplate with one hand and sliding the back plate downward with the other hand 2 Pull the the...

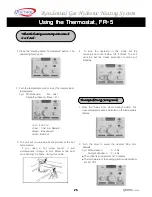
Страница 27: ...emperature Button and Room Temperature Button and Lamp green Lamp green Lamp green Lamp green The unit runs according to the room temp set by the room temperature button and the lamp indicates that th...

Страница 28: ...om temperature e g Winter Season Fcl Cast Spring Fall Season Base Fcl 4 To stop the operation in this mode set the temperature control below 104 Rad The unit will stop but the freeze prevention functi...

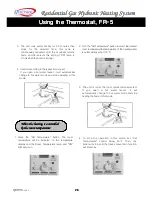
Страница 29: ...erating in this mode 1 Press the Set Temperature button The room temperature will be indicated on the temperature display and the Room Temperature lamp and ON light will go on 2 Turn the Set Temperatu...

Страница 30: ...rvice The two wires at the back of the room thermostat may be connected together for emergencies A specific heating water temperature will be automatically set and the unit will start To stop the unit...

Страница 31: ...t your heating dealer or a qualified technician with the gas utility company Test for leakage at all gas piping connections AC 115 volts 15 Amp dedicated circuit with approved grounded connection Heat...

Страница 32: ...source is AC 115V 60Hz STEP 5 STEP 5 STEP 5 STEP 5 Turn 1 DIP switch to ON position Trial Operation mode STEP 6 STEP 6 STEP 6 STEP 6 Install the room thermostat FR 5 Power lamp will flash 1 second ON...

Страница 33: ...vent in order to bleed air from the unit Shut off the manual air vent when the pressure in the heating piping reaches the operating pressure The automatic air vent will automatically remove remaining...

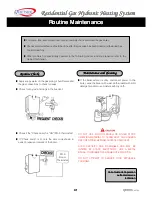
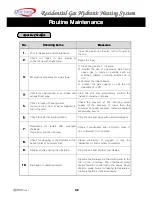
Страница 34: ...Check Lamp is lit note the error code shown to assist in repair and service of the boiler If the boiler exterior is dirty disconnect power to the boiler wipe the boiler with a wet cloth soaked with mi...

Страница 35: ...he unit and immediately contact the installer or service company 5 5 5 5 Check for lack of heating water Low volume or flow of water supplied to tub or faucets Check the pressure of the incoming water...

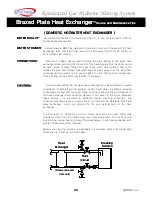
Страница 36: ...te heat exchanger being careful not to cause stress to other fittings and connections Check O ring on tube ends and replace if necessary CLEANING CLEANING CLEANING CLEANING In some applications the fl...

Страница 37: ...iltering impurities from the system When heating performance is decreased clean the filter by removing clip washing out and re inserting the filter Replace the clip THE WATER FLOWING OUT OF THE PRESSU...

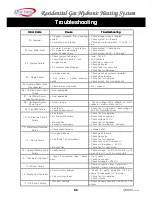
Страница 38: ...Heating Sensor Short Circuit Non applicable 07 Hot Water Sensor Wire Disconnected Non applicable 08 Hot Water Sensor Short Circuit Sensor failure Check voltage Pin 19 8 on 21Pin connector main contro...

Страница 39: ...failure 12 12 12 12 Flam e failure in com bustion 04 04 04 04 Pseudo flam e 13 13 13 13 Heating water S W failure Closed Air Type 05 05 05 05 Breakage of heating sensor 14 14 14 14 Gas alarm 06 06 06...

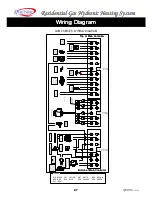
Страница 40: ...FOR FLAME DETECTOR GRY GRAY EV 2 EV 1 THREE WAY VALVE 1 BLK RED HOT WATER 2 BLK BLU HEATING WATER BLU BLU IGNITION TRANS AC115V 60Hz AC 115V 60Hz GRN EARTH 2 8 7 1 13 PIN 9 3 10 12 11 5 4 13 6 5 7 6 8...

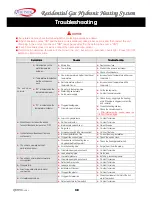
Страница 41: ...Notapwatersupply Fill theheatingwater Contact theservicecenter The unit does notwork 01 isindicatedonthe temperature indicator Clogged heatingpipe Circulation pumpfailure Checkforanycloggingintheheat...

Страница 42: ...loded Views Exploded Views 3 4 5 2 6 7 8 9 10 31 32 11 12 44 18 19 14 13 15 16 17 20 21 22 23 62 34 26 27 28 29 41 63 30 35 33 36 37 39 38 45 43 46 54 42 40 52 49 53 50 59 Room Thermostat Model FR 5 1...

Отзывы: