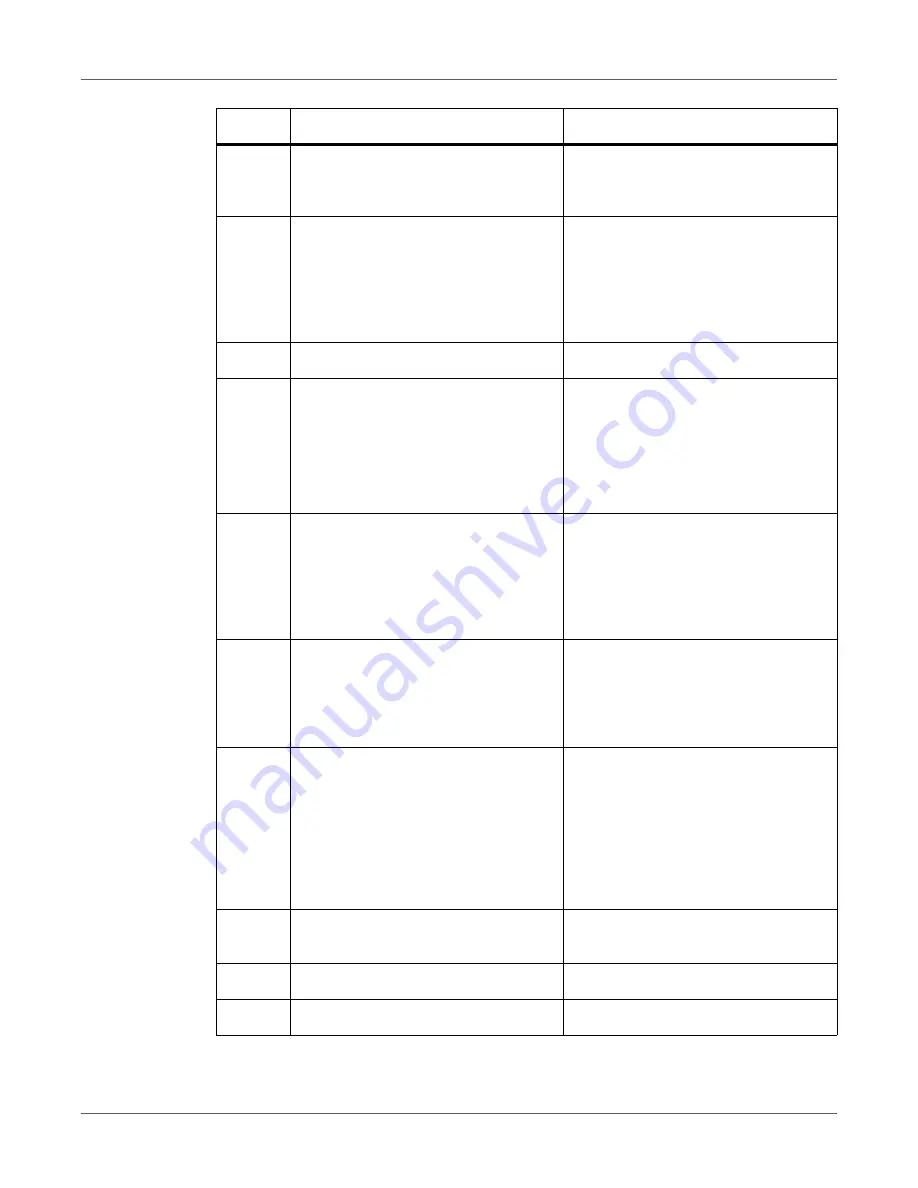
Control Panel
QL-300 User Guide
70
4
OK
button (menu button)
Executes the currently selected menu
item or applies the setting being con-
figured.
5
HELP
button
• Displays the Help Screen.
• This button lights orange when you
can refer to help messages
describing the error that has
occurred and providing information
about how to clear the error.
6
BACK
button
Goes back to the previous screen.
7
ATTENTION
lamp
Indicates the printer's status.
This lamp is unlit when the status is
normal.
An error causes this lamp to light or
flash orange.
8
Scroll buttons
▲
and
▼
(menu but-
tons)
• Use these buttons to select menu
screen items, and to scroll menu
pages forward or back.
• On a value input screen, these
buttons are used when inputting
values.
9
ON LINE
button
• Switches between online and
offline.
• This button is lit green while the
printer is online and unlit when
offline.
10
Numeric keypad (1 to 0, *, C)
• The numeric keypad is used when
inputting numeric values or
passwords.
• Pressing the * (Fn) key while the
standby screen is displayed
displays the “Function Number
Input” screen for inputting a number
that directly accesses menu items.
11
CANCEL
button
Cancels an ongoing print job or setting
operation.
12
FEED
button
Feeds paper.
13
UNLOAD
button
Unloads paper.
#
Part
Description
Содержание QL-300
Страница 1: ......
Страница 20: ...Installation QL 300 User Guide 20 2 Remove the top layer of packing materials...
Страница 21: ...Installation QL 300 User Guide 21 3 Remove the handles 4 pieces and then remove the top of the packing box...
Страница 23: ...Installation QL 300 User Guide 23 5 Cut and remove the bands that secure the printer 6 Remove the plastic bag...
Страница 28: ...Installation QL 300 User Guide 28 3 Remove the unwinder...
Страница 29: ...Installation QL 300 User Guide 29 4 Remove the plastic bag from the unwinder and then remove the accessories...
Страница 30: ...Installation QL 300 User Guide 30 5 Peel off the tape from two locations...
Страница 41: ...Installation QL 300 User Guide 41 Unwinder Black mark Gap sensor...
Страница 110: ...Printing QL 300 User Guide 110 4 Turn the two belt locking keys counterclockwise to release the lock...
Страница 113: ...Printing QL 300 User Guide 113 Caution Do not touch the belt surface or damage the belt...
Страница 262: ...Troubleshooting QL 300 User Guide 262 9 Turn the two belt locking keys counterclockwise to release the lock...
Страница 273: ...Troubleshooting QL 300 User Guide 273 24 Push down the fuser unit handle and firmly push it inside...
Страница 274: ...Troubleshooting QL 300 User Guide 274 25 Lift up the fuser and exit unit locking lever...
Страница 277: ...Troubleshooting QL 300 User Guide 277 29 Raise the blue lever and install the cutter unit...
Страница 329: ...Replacing Wear Items QL 300 User Guide 329 5 Turn the two belt locking keys counterclockwise to release the lock...
Страница 339: ...Replacing Wear Items QL 300 User Guide 339 4 Turn the two belt locking keys counterclockwise to release the lock...
Страница 342: ...Replacing Wear Items QL 300 User Guide 342 Caution Do not touch the belt surface or damage the belt...
Страница 343: ...Replacing Wear Items QL 300 User Guide 343 7 Remove the waste toner box from the back of the belt unit...
Страница 353: ...Replacing Wear Items QL 300 User Guide 353 8 Push down the fuser unit handle and firmly push it inside...
Страница 359: ...Cleaning QL 300 User Guide 359 2 Press down the flange locking lever 3 Remove the flange...
Страница 370: ...Cleaning QL 300 User Guide 370 5 Turn the two belt locking keys counterclockwise to release the lock...
Страница 378: ...Cleaning QL 300 User Guide 378 16 While supporting the fuser and exit unit with one hand lift up the fuser unit handle...
Страница 382: ...Cleaning QL 300 User Guide 382 23 Push down the fuser unit handle and firmly push it inside...
Страница 383: ...Cleaning QL 300 User Guide 383 24 Lift up the fuser and exit unit locking lever...
Страница 384: ...Cleaning QL 300 User Guide 384 25 Align the positions of the paper guide s edge 1 and the guide notch on the printer...
Страница 395: ...Cleaning QL 300 User Guide 395 5 Raise the cutter unit lock levers at both ends of the cutter unit...
Страница 401: ...Cleaning QL 300 User Guide 401 Cleaning the lower roller Cleaning the upper roller 12 Assemble the cleaned cutter unit...
Страница 432: ...Web Utility QL 300 User Guide 432 27 Click OK 28 Click OK to exit Customize IPsec Settings 29 Click OK...
Страница 456: ...Safety QL 300 User Guide 456...


