


Quantum PX506 and PX510 Unpacking and Installation Instructions
Document 81-81338-01 D01
June 2005
Installing the Library
33
Setting the Library Options
0
To set the library options:
1
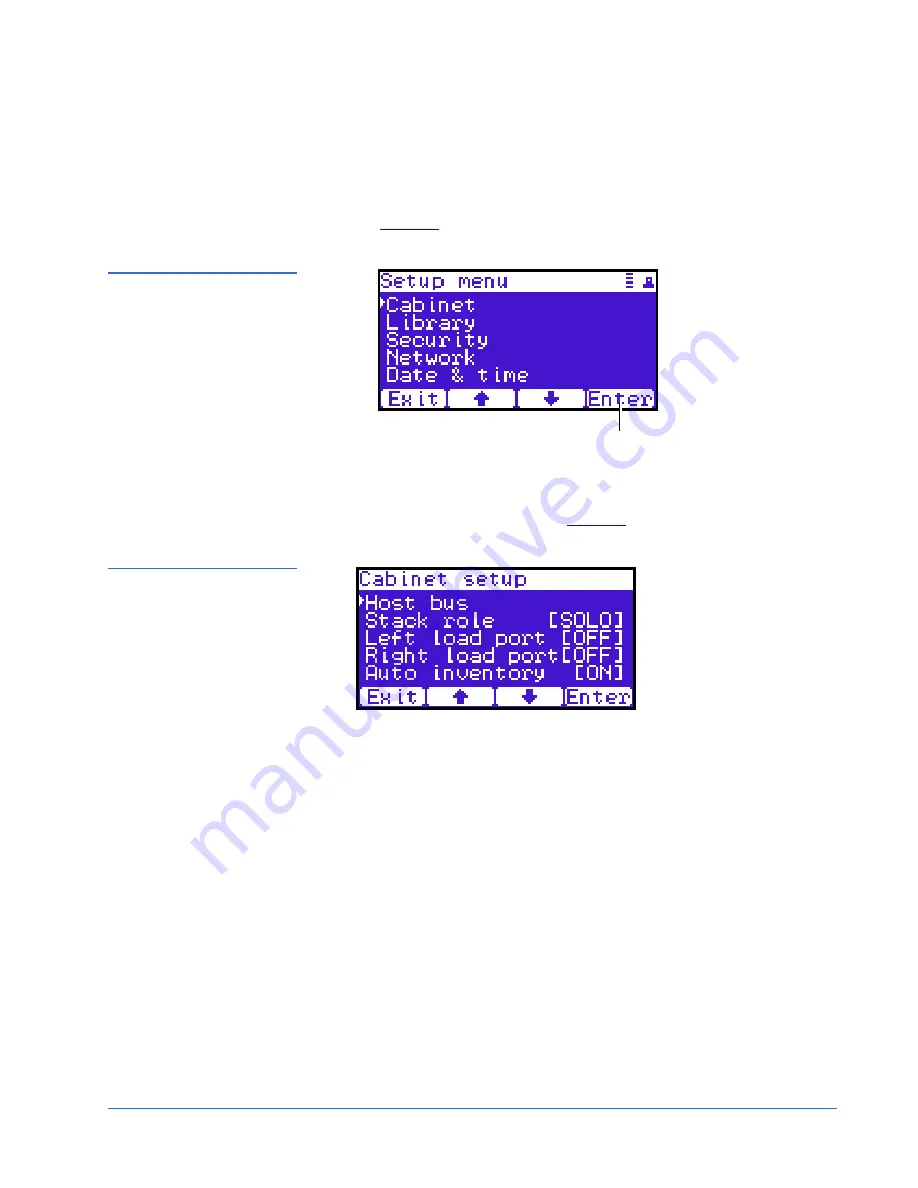
Press
Setup
from the
Home
screen. The OCP displays the
Setup
screen
(see
figure 27
):
Figure 27 Setup Screen
2
From the
Setup
screen, use the up and down arrows to highlight
Cabinet
and press
Enter
.
The
Cabinet
screen displays (see
figure 28
):
Figure 28 Library Options
Screen
3
The
Stack role
screen allows you to configure the library as a “Master” or
“Slave” in a multiple library stack. The library is configured “Stand
alone” by default. If this is a multiple library stack, use the up and down
arrows to highlight
Stack role
and press
Enter
and the OCP displays the
following information about the library:
Enter


