background image

Performing Initial Configuration

Quantum DXi6900-S Installation Guide

47

Figure 37: 

Login Window

 2.  On the 

Login

 window, select 

Administrator

, type 

password

 for the password, and click 

Login

.

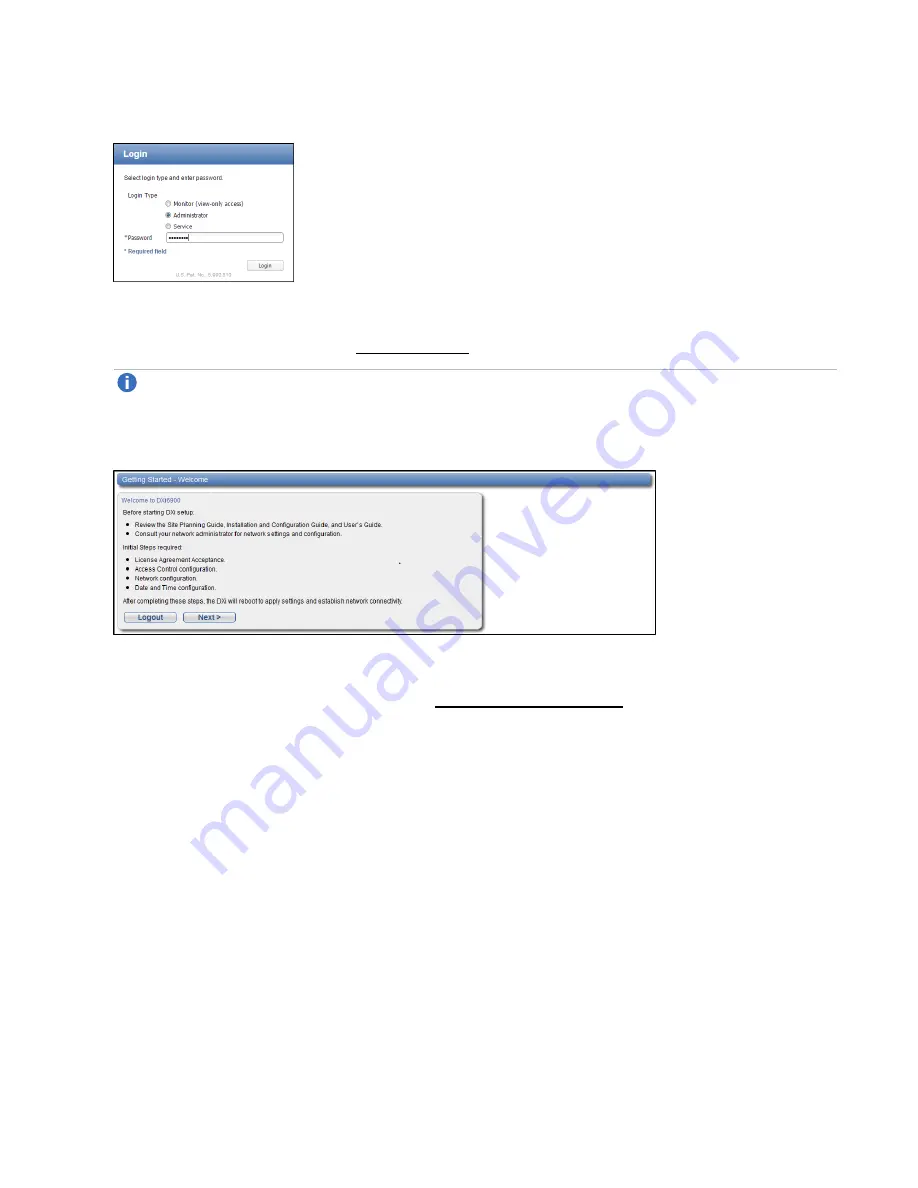
The 

Welcome

 page displays (see Figure 38 below).

Note: 

If a message on the page indicates the DXi is in Limited Mode, wait ten minutes, and then 

log on again.

Figure 38: 

Getting Started Wizard: Welcome

 3.  Read the information about the wizard, and then click 

Next

 to continue.

The 

License Agreement

 page displays (see Figure 39 on the next page).

Содержание DXi6900-S

Страница 1: ...onfiguration46 Troubleshooting 69 Contacting Quantum 71 This guide provides hardware installation and initial system configuration instructions for the Quantum DXi6900 S disk backup system For more in...

Страница 2: ...3 12U 374 TB 408 TB 576 TB 256 GB 2 4 14U 442 TB 476 TB 672 TB 256 GB 2 5 16U 510 TB 544 TB 768 TB 256 GB 2 6 18U 1 TB 1 000 000 000 000 bytes Usable storage capacity for installed Array or Expansion...

Страница 3: ...below and contains the rack requirements for the DXi6900 S components Table 1 DXi6900 S Rack Requirements DXi6900 S Node Array Module RBOD Expansion Module JBOD Height 2U 3 4 inches 8 7 cm 2U 3 4 inc...

Страница 4: ...not have Internet connectivity manually download a copy of the latest DXi software upgrade file to your Notebook computer before you begin the installation process The latest version of DXi6900 S soft...

Страница 5: ...ment for example box 1 of 3 MAKE SURE THAT YOU HAVE ALL BOXES IN THE SHIPMENT BEFORE YOU BEGIN THE INSTALLATION Table 1 on the next page provides an overview of the installation process for each DXi69...

Страница 6: ...X520 10 GbE Cards o Up to three Dual Port X540 10 GBase T Cards o Up to three 16 GB Fibre Channel Cards Note For all DXi6900 S Card options see Table 2 on the next page below 1 Unpacking the DXi6900...

Страница 7: ...hernet 2 x 16 Gb Fibre Channel 2 x 10 Gb Ethernet 2 x 10 Gb Ethernet 2 x 10 GbE SFP or 2 x 10 GBase T Ethernet ports Unpacking the DXi6900 S By following these unpacking instructions you help ensure t...

Страница 8: ...l Grounding strap Base Node kit Includes the following l C13 to C14 power cord 2 l North American power cord 2 l Cable CAT6 RJ45 non plenum blue solid 25 feet 3 Cable kit Fibre Channel HBA Includes th...

Страница 9: ...npacking the DXi6900 S Quantum DXi6900 S Installation Guide 9 Figure 1 Unpacking the DXi6900 S Node Item Description 1 Bezel key taped to back 2 Accessory Kit 3 Rack mount rails 4 DXi Node 5 Foam 6 Bo...

Страница 10: ...allation Overview on page 5 l X520 10 GbE network card up to 3 l X540 10 GBase T network card up to 3 l 16 GB Fibre Channel card up to 3 The following network cables ship with the optional network car...

Страница 11: ...located WARNING The DXi6900 S Array module and Expansion module including hard drives weigh 57 pounds 25 9 kg and 55 pounds 24 9 kg respectively A minimum of two people are required to lift the chassi...

Страница 12: ...Quantum DXi6900 S Installation Guide 12 Figure 3 Unpacking the DXi6900 S Array Module or Expansion Module 1 2 3 4 5 6 Item Description 1 Rack mount rails 2 Foam 3 Array Expansion module 4 End cap 5 Bo...

Страница 13: ...e 4 DXi Information Tag 1 2 1 Information Tag 2 Drive Slots 13 15 Empty Figure 5 DXi6900 S Information Tag Installing Components in the DXi6900 S Node If the DXi6900 S shipped with additional Node com...

Страница 14: ...e chassis 1 Set the Node on a flat stable surface 2 Make sure that no cables power Ethernet Fibre Channel or SAS are connected to the Node 3 Press and hold the power button on the front of the Node fo...

Страница 15: ...e Cover 1 2 3 Item Description 1 Latch release lock 2 Latch 3 Node cover 5 Lift the latch on top of the Node and slide the cover back 6 Grasp the cover on both sides and carefully lift the cover away...

Страница 16: ...ntum DXi6900 S Installation Guide 16 Figure 8 Inside the DXi6900 S Node 1 0 2 3 1 0 2 3 1 2 3 Item Description 1 Cooling shroud 2 Expansion card riser 2 l Optional X520 network card l Optional X540 ne...

Страница 17: ...ration Actions to Take DXi6900 S If ordered with the configuration install one of the following network card options in PCIe slots 4 5 and 7 l Dual port X520 10 GbE card optical or Twinax l Dual port...

Страница 18: ...x 10 Gb Ethernet 2 x 16 Gb Fibre Channel 2 x 16 Gb Fibre Channel 2 x 10 Gb Ethernet 2 x 16 Gb Fibre Channel 2 x 10 Gb Ethernet 2 x 10 Gb Ethernet 2 x 10 GbE SFP or 2 x 10 GBase T Ethernet ports DXi690...

Страница 19: ...rd 3 Metal slot cover 4 Expansion card connector 5 Expansion card riser 2 or 3 2 Remove the metal slot covers from the slots by sliding it out of the slot 3 Holding the network card by its edges posit...

Страница 20: ...card Closing the Node Cover To close the DXi6900 S Node cover 1 Lift the latch on the cover see Figure 11 below Figure 11 Replacing the Node Cover 1 2 3 Item Description 1 Latch release lock 2 Latch 3...

Страница 21: ...it easier to correctly cable the system and for safety reasons follow these recommendations when installing the DXi6900 S system in the rack l A rack is not included with the DXi6900 S A standard 40U...

Страница 22: ...s important for the chassis installation to locate the hole pattern in the rack rails You must allow 2U 3 4 inches or 8 7 cm of vertical space for the DXi6900 S Node and an addition 2U for each Array...

Страница 23: ...he bottom of the unit you are installing in the rack The bottom of each 1U space is at the middle of the narrowest metal strip between holes marked with a horizontal line on some rack cabinets Install...

Страница 24: ...4 9 kg respectively A minimum of two people are required to lift the chassis Caution Before proceeding ensure that all hard drive latches are completely closed Quantum recommends that you do not remov...

Страница 25: ...Expansion Module Installation 1 2 Item Description 1 10 32 x 3 4 in screw and nylon washer 2 Front of Array or Expansion Module Installing the DXi6900 S Node Installing the DXi6900 S Node Rack Mountin...

Страница 26: ...eed to remove the rails use a flat head screwdriver to lift the latch release button on the end piece midpoint and unseat each rail Figure 16 Node Rails Installation 1 2 3 4 Item Description 1 Latches...

Страница 27: ...e inner slide rails out of the rack until they lock into place see Figure 17 on the next page 2 Locate the rear rail standoff on each side of the system and lower them into the rear J slots on the sli...

Страница 28: ...tem Description 1 Rear rail standoffs 2 Rear rail J slots 3 Slide release lock button 4 Lock lever 5 Inner slide rails Cabling the DXi6900 S Follow these steps to cable the DXi6900 S 1 Connect each Ar...

Страница 29: ...er A on RBOD 1 b Connect port RBOD1 slot 3 on the Node to SAS port Ch 1 Controller B on RBOD 1 c Connect port RBOD2 slot 2 on the Node to SAS port Ch 1 Controller A on RBOD 2 d Connect port RBOD2 slot...

Страница 30: ...SAS expansion port 1 Controller B on RBOD 2 to SAS port 1 Controller B on EBOD 2 1 Figure 19 DXi6900 S SAS Cabling RBODs to EBODs ID Diag Port 1 ID Diag Port 1 Port 1 Port 2 ID Diag O O Port 1 Port 2...

Страница 31: ...roller A on the next EBOD in the sequence b Connect the SAS expansion port Controller B on the EBOD to SAS port 1 Controller B on the next EBOD in the sequence Figure 20 DXi6900 S SAS Cabling EBODs 1...

Страница 32: ...next page Note Quantum recommends connecting the Node and each Array and Expansion module power cord two per unit to a separate AC circuit to ensure system availability in case of a power failure Pow...

Страница 33: ...urce Primary AC Source Secondary AC Source Primary AC Source Secondary AC Source Ethernet Cables l Do not connect any Ethernet cables at this time You will connect them in a later procedure Fibre Chan...

Страница 34: ...th power switches on the back of each Expansion module EBOD see Figure 24 on the next page Wait until the seven segment display on the rear of the module displays 00 approximately 1 minute Note The se...

Страница 35: ...xpansion Module Rear Power Switches Figure 25 Powering on the Array Modules Port 1 Port 2 ID Diag O O Port 1 Port 2 ID Diag O O Array Module Rear Power Switches Figure 26 Powering on the Node System N...

Страница 36: ...ng another operating system a Access the Network Connections control panel To do this press the Windows key on the keyboard type view network connections and press Enter b Right click the network conn...

Страница 37: ...Click OK and then click Close f Wait at least two minutes for the computer to set the IP addresses on the local computer 4 Using a terminal emulation program that supports SSH like PuTTY connect to t...

Страница 38: ...re 3 More Tools Miscellaneous Tools 4 Pick to Order PTO Initial DXi assembly and configuration 8 Type the option number for Pick to Order PTO and press Enter The Pick To Order Menu displays see Figure...

Страница 39: ...d hardware and discovers the attached storage see Figure 31 below This can take several minutes Check the output for any errors or warnings If errors occur resolve them before continuing see Troublesh...

Страница 40: ...NetApp arrays Firmware Tuning controllers for Qarray1 Populating Encryption Info cache Next locate and record all hardware found Detecting begin Detecting date Detecting localnode Detecting name Detec...

Страница 41: ...f trays 1 Check NetApp Trays check for valid tray combinations 2 Check HBAs check for valid PCI slots and cards 3 On the Hardware Check Menu type the option for Check Memory and press Enter The system...

Страница 42: ...tual cards assigned to each PCI slot will depend on the configuration option selected for the DXi see Table 2 Make sure all of the installed expansion cards are detected If one or more expansion cards...

Страница 43: ...nd Is this correct y n 9 Verify that the number of Array Modules detected is correct then type y and press Enter The system begins background RAID initialization of the storage arrays see Figure 36 be...

Страница 44: ...ttributes for Volume TRAY_99_VOL_1 create TRAY_99_VOL_2 of size 15 756 TiB Creating TRAY_99_VOL_2 Setting additional attributes for Volume TRAY_99_VOL_2 Created Disk_Pool_0 Reserved space for 1 hotspa...

Страница 45: ...h d At the command prompt type the following command and press Enter sh opt DXi scripts service sh e Type the option for Pick to Order PTO and press Enter 12 On the Pick to Order Menu type the option...

Страница 46: ...e 61 l Taking Next Steps on page 66 Completing the Getting Started Wizard To complete the DXi6900 S Getting Started wizard 1 On the service laptop open a supported Web browser type 10 17 21 1 in the A...

Страница 47: ...e password and click Login The Welcome page displays see Figure 38 below Note If a message on the page indicates the DXi is in Limited Mode wait ten minutes and then log on again Figure 38 Getting Sta...

Страница 48: ...License Agreement check box and then click Next to continue Note If you do not accept the license agreement the DXi6900 S will not function The Access Control page displays see Figure 41 on page 51 Fi...

Страница 49: ...ork page displays see Figure 41 on page 51 IMPORTANT READ BEFORE CONTINUING Steps 8 12 below provide an example of configuring network settings on the DXi6900 S In this example the DXi6900 S is config...

Страница 50: ...network switch is not supplied with the DXi6900 S The DXi6900 S bonding settings must match the switch settings If the switch settings and the DXi6900 S settings do not match your system may become in...

Страница 51: ...Started Wizard Network 8 Under General enter the following network information as provided by your network administrator a Enter the Hostname used to identify the DXi6900 S system The Hostname cannot...

Страница 52: ...ver replication sources and targets and other information 9 Under IP Address Configuration Bonding Details configure each Ethernet port as a separate network device a If necessary click the Show link...

Страница 53: ...ss Configuration Routing Details unless directed by your network administrator Note If the DXi needs to communicate with another subnet that is not reachable using the default gateway a route must be...

Страница 54: ...IP address in step 5d above Otherwise you must specify the IP address of the timeserver pool For more information see the Quantum DXi6900 S User s Guide 6 68159 15 In the Timezone drop down box selec...

Страница 55: ...firm 18 Review the settings you selected to make sure they are correct If necessary click Previous to return to a previous step to make changes 19 After you have confirmed all settings click Finish A...

Страница 56: ...e Address box and press Enter The Login window displays see Figure 44 below Additional Information l For Web browsers the DXi6900 S supports Firefox 26 or higher Chrome 40 or higher or Internet Explor...

Страница 57: ...andsupport index aspx 2 Click Browse and select the software upgrade file on your computer downloaded in step 1 3 Click Upload 4 Click Start to begin the upload process Do not close the window until t...

Страница 58: ...e management console for the first time following the software upgrade This will ensure the remote management console displays correctly Continue with the next section to connect the Ethernet cables C...

Страница 59: ...C to LC optical cable type that are shipped with the DXi6900 S system Consult your 10GbE Optical switch SFP documentation for additional information on optical cable requirements Twinax Connect up to...

Страница 60: ...f the DXi6900 S Node The bezel snaps into place on the front of the Node to prevent the removal of the system from the rack see Figure 49 on the next page 1 If you have not already done so remove the...

Страница 61: ...he Capacity License A 34 TB storage capacity license is pre installed on the DXi6900 S at the factory For larger configurations you must install a license to enable the additional purchased capacity L...

Страница 62: ...ser navigate to the Utilities License Keys page in the DXi remote management console see Figure 50 below Note that the system serial number displays directly above the New Key box For information abou...

Страница 63: ...Licensed Feature page returns a storage capacity key 3 Switch to the Utilities License Keys page in the DXi remote management console see Figure 50 on the previous page 4 Enter the license key in the...

Страница 64: ...ble in all regions Locate the Data in Flight Encryption License Certificate that was included with the system and then complete the following procedure 1 Open two Web browser windows on a computer wit...

Страница 65: ...rowser enter the address for the License Key Management Web site see Figure 51 on page 63 http www quantum com licensekeys Figure 54 License Key Management Web Site 2 On the License Key Management Web...

Страница 66: ...page 62 4 Enter the license key in the New Key box and click Add 5 The Data in Flight Encryption license appears on the License Keys page Refer to the DXi6900 User s Guide for more information on enab...

Страница 67: ...for Status reports and one for Configuration reports Using the Configuration Wizards Use the Configuration Wizards on the Wizards menu to configure the DXi for backups and to configure additional feat...

Страница 68: ...e DXi refer to your backup application documentation l To learn more about operating theDXi6900 S refer to the QuantumDXi6900 S User s Guide Or access the online help from the remote management consol...

Страница 69: ...by typing shutdown and pressing Enter at the command prompt 2 Turn off both power switches on the back of each Array and Expansion module 3 Make sure all hard drives are inserted completely and all ha...

Страница 70: ...remote management console After attaching to a customer network you need to use the IP entered during Network Configuration see Getting Started Wizard Network on page 51 Try a different Ethernet cabl...

Страница 71: ...ual is limited by copyright law Making copies or adaptations without prior written authorization of Quantum Corporation is prohibited by law and constitutes a punishable violation of the law Artico Be...

Отзывы: