09
Installation
2.5.6 KMM KEYPAD/SENSOR CONNECTIONS
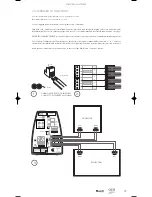
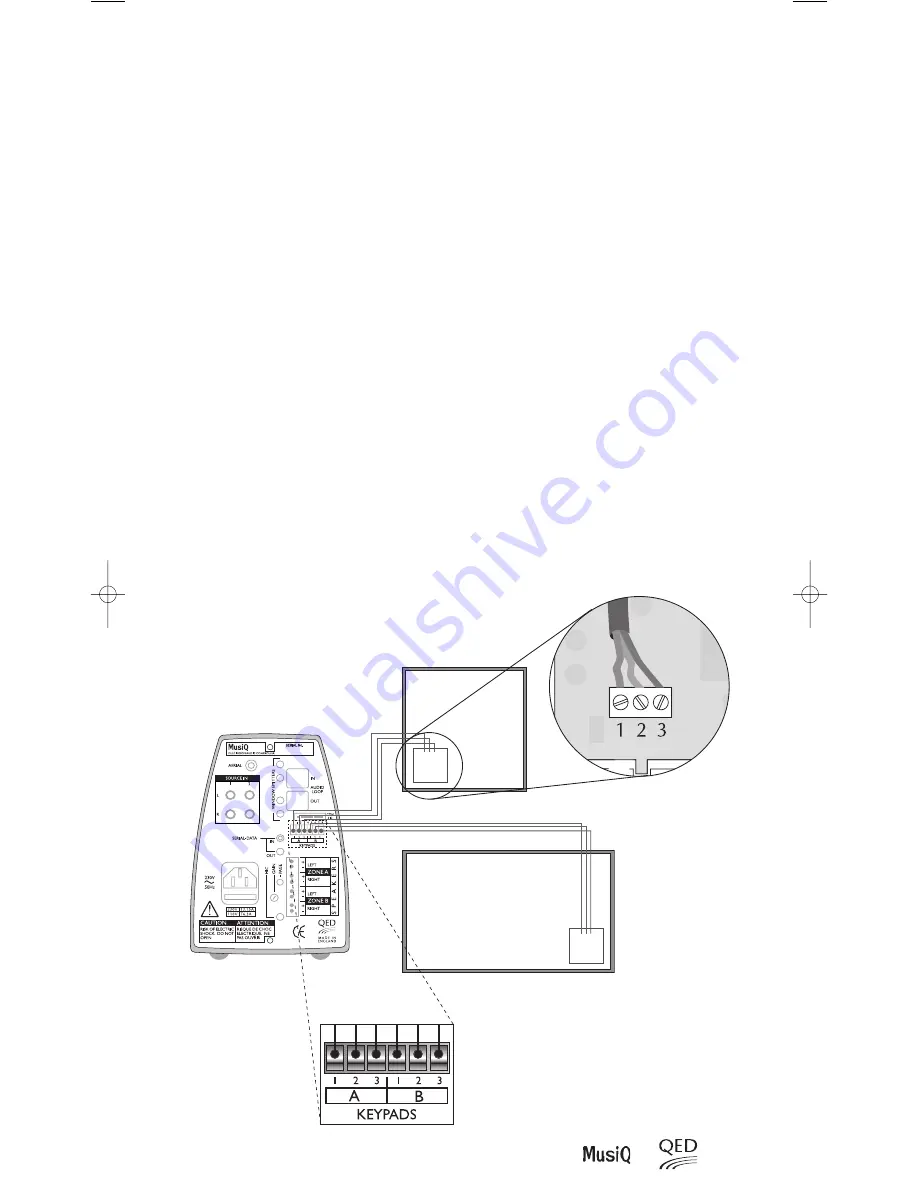
When using KMM Keypad/Sensors, route a three core cable (telephone cable is ideal for this purpose) from each remote
Zone to the rear of the MusiQ and connect as follows (see diagram below).
Note: The 6-way connector plug that locates into the Keypad socket at the rear of the MusiQ is inserted UPSIDE DOWN (Screws facing
downwards). Remember this when wiring the plug as the connections will be reversed when the plug is turned through 180°.
Do not take any notice of the 1 embossed on the 6-way connector plug.
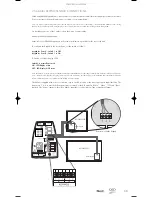
Setting the KMM Keypad Module:
At the rear of each KMM Keypad you will see two small two-way switches at the rear of the unit.
To configure the Keypad to the correct Zone, set the switch as follows:
Keypad for Zone A - Switch 1 to OFF
Keypad for Zone B - Switch 1 to ON
To Enable or Disable display LEDs
Switch 2 is normally not used
ON - LED display active
OFF - LED display NOT active
Note: The purpose of this switch is to disable the LED display on the KMM when connecting to a MusiQ RFS. With these MusiQ controllers any
control function issued from the front panel controls will not be reflected by the LED display on the KMM and hence the KMM will display
incorrect information. In this case disable the LED display to avoid confusion.
The KMM is supplied with a choice of button caps to enable selection of the most appropriate input labelling. The
buttons are ‘1’ & ‘2’ to match the front panel source controls of the RFS and also “Music”, “Video”, “CD” and “Tuner”
symbols. The “Music” symbol is ideal for a MusiQ input that is connected to a Tape or Auxiliary Output.
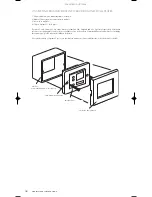
Rear view of KMM Keypad
KMM Keypad
ROOM TWO
ROOM ONE
KMM Keypad
123
123
MusiQ Manual (English) 10/1/03 2:18 PM Page 11
Содержание MusiQ RFS
Страница 1: ...M u s i Q ...
Страница 23: ...MusiQ Mode d emploi ...
Страница 24: ... Making Hi Fi go places Musik für das ganze Haus La Hi Fi en tous lieux ...
Страница 46: ...MusiQ Bedienungsanleitung ...


