background image


WEB OPERATION


QC40198/QC40196 User Manual 


90 | 

P a g e


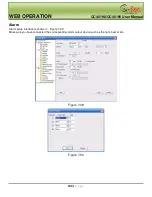
Encode  

Encode interface is shown in 

X454H 454H 454H

Figure 7-38. 


Figure 7-38 


Figure 7-39  

Please refer to the following chart for detailed information. 
 

Parameter  

Function  

Channel 

Here you can select a monitor channel. 

Channel Name   Displays current channel name. You can modify it. 

Compression  

H.264 

Main Stream 

Includes main stream, motion stream and alarm stream. You can 
select different encode frame rates for different recorded events.  

For example, you can use high frame rate to record important events, 
record scheduled events in lower frame rate and it allows you to set 
different frame rates for motion detection record and alarm record.  

Extra Stream  

Select extra stream if you enabled the extension stream to monitor.  

Содержание QC40198

Страница 1: ...QC40198 QC40196 User Manual 19 LCD Observation Systems Rev 12 2 2010...

Страница 2: ...ion or assistance with setup Please contact us using the following methods with questions about your Q See product Q See Products 8015 E Crystal Dr Anaheim CA 92807 Email Customer Service cs dpsi usa...

Страница 3: ...oblems caused by unauthorized modifications or attempted repairs 5 Environment This product works in a temperature range of 32 F to 104 F 0 C 40 C This combo DVR should be installed in a cool dry plac...

Страница 4: ...vice scope of our company 1 Equipment damage caused by improper operation 2 Improper equipment operation environment and conditions e g improper power extreme environmental temperatures humidity light...

Страница 5: ...form or by any means without our company s expressed written consent 1 Our products are under continual improvement and we reserve the right to make changes without notice No guarantee is given as to...

Страница 6: ...Installation Hard Drive Installation Hard Drive Installation 15 3 5 3 5 3 5 3 5 Connecting Power Supply Connecting Power Supply Connecting Power Supply Connecting Power Supply 16 3 5 1 Connecting Vid...

Страница 7: ...Setup and Alarm Activation 36 4 6 1 Alarm setup 36 4 7 4 7 4 7 4 7 Backup Backup Backup Backup 38 4 7 1 Detect Device 38 4 7 2 Backup Device 39 4 8 PTZ Control and Color Setup 40 4 8 1 Cable Connecti...

Страница 8: ...AUXILIARY MENU AUXILIARY MENU AUXILIARY MENU 70 6 1 6 1 6 1 6 1 Go to Pan Tilt Zoom Menu Go to Pan Tilt Zoom Menu Go to Pan Tilt Zoom Menu Go to Pan Tilt Zoom Menu 70 6 2 Intelligent Positioning Key 7...

Страница 9: ...About 117 7 7 7 7 7 7 7 7 Log out Log out Log out Log out 117 7 8 7 8 7 8 7 8 Un Un Un Un install Web Control install Web Control install Web Control install Web Control 117 8 8 8 8 SETUP MYQ SETUP MY...

Страница 10: ...ch as motion detection View Your Video Feed Online with No Service Fees View your DVR s live or recorded video footage on any Internet accessible computer with Internet Explorer Mozilla Firefox and Go...

Страница 11: ...DVR to record or not record Multiple Playback Options and Advanced Search Functions Supports real time recording on each channel independently Search through recorded files while you are playing live...

Страница 12: ...NC 1 0VP P 75 composite video signal output 1 ch HDMI output Supports simultaneous TV HDMI video output Video Standard PAL 625 line 50f s NTSC 525 line 60f s PAL 625 line 50f s NTSC 525 line 60f s Rec...

Страница 13: ...tup is 60 minutes Playback Repeat Way When hard disk is full system can overwrite previous video file When hard disk is full system can overwrite previous video file Record Search Various search engin...

Страница 14: ...input You can set normal open or normal close type to select the alarm type Alarm Output 2 channel relay output 2 channel relay output Alarm Relay 30VDC 2A 125VAC 1A activation alarm 30VDC 2A 125VAC 1...

Страница 15: ...ntication when shut down to make sure only those proper people can turn off combo DVR Right authentication when shut down to make sure only those proper people can turn off combo DVR General Power 100...

Страница 16: ...ime to turn off screen When the device is on press it for a long time to shut down the device 2 Power indication light 3 Infra red remote control signal receiver 4 Mode button Used to switch between P...

Страница 17: ...k input 13 USB port 2 2 2 2 2 2 2 2 Rear Panel Rear Panel Rear Panel Rear Panel The rear panel is shown below See Figure 2 2 Figure 2 2 Please refer to the following chart for detailed information Num...

Страница 18: ...or switch channel 4 Record Start or stop recording manually In record interface working with the direction buttons to select the channel to record 5 Auxiliary key In 1 ch monitor mode pop up assistant...

Страница 19: ...forward speeds and normal speed playback 10 Previous In playback mode playback the previous video 11 Backward Various backward speeds and normal speed playback 12 Stop In playback mode stop current p...

Страница 20: ...heckbox or motion detection status Click combo box to pop up drop down list In input box you can select input methods Left click the corresponding button on the panel you can input number English char...

Страница 21: ...menu one window four window nine window and sixteen window Pan Tilt Zoom color setting search record alarm input alarm output main menu Adjust Pan Tilt Zoom and color setting for current selected cha...

Страница 22: ...n the Box When you receive the combo DVR please check for any visible damage The protective materials used for the packaging of the combo DVR can protect it from most damage during transportation Open...

Страница 23: ...ce Device Device Installation Installation Installation Installation The DVR supports two installation modes desktop wall mount The default installation is the desktop type Refer to Figure 3 1 You wil...

Страница 24: ...d these instructions unless you replace or upgrade the hard drive 1 Insert the key in the lock and press down Turn clock wise 90 degrees to unlock 2 Loosen the two screws on the HDD cover 3 Remove the...

Страница 25: ...ned so that direct sunlight does not shine into it and away from flammable explosive substances Cameras and DVR should share the same grounding if possible to ensure normal operation of cameras Ensure...

Страница 26: ...d dry and away from high tension current Figure 3 4 3 6 2 Audio Output The audio output signal parameter is usually over 200mv 1K BNC It can directly connect to low impedance earphone active sound box...

Страница 27: ...for you to select normally open NO and normally closed NC 1 Alarm input a Please make sure alarm input is grounded b Grounding signal is needed for alarm input c When you are connecting two combo DVR...

Страница 28: ...device d The voltage between of A B lines of the camera should be less than 5v e Ensure the front end device is soundly grounded Improper grounding may result in chip damage 3 7 1 Alarm Input and Outp...

Страница 29: ...of combo DVR if you use external power to the alarm device Figure 3 8 3 7 3 Alarm Output Port 2 way relay alarm output NO contact Provides external power to external alarm device To avoid overloading...

Страница 30: ...controls instead of using the control pad on the front panel of the unit 3 9 3 9 3 9 3 9 RS485 RS485 RS485 RS485 When the combo DVR receives a camera control command it transmits that command up the c...

Страница 31: ...P a g e Figure 3 9 3 10 3 10 3 10 3 10 Other Interfaces Other Interfaces Other Interfaces Other Interfaces There are other interfaces on the combo DVR such as USB ports You can refer to X290H 290H 290...

Страница 32: ...ow mode Click Enter or left click mouse and you will see the login interface illustrated in Figure 4 1 Use the USB mouse front panel buttons remote control or keyboard to navigate through the system l...

Страница 33: ...rop down menu shown in Figure 4 3 you will be given several log out options See X294H 294H 294HFigure 4 4X Figure 4 4 The other way to log out is to press the power button on the front panel for at le...

Страница 34: ...ou to get to the manual record menu Right click mouse or in the main menu Advanced Manual Record In live viewing mode push record button on the front panel or record button on the remote control 4 2 2...

Страница 35: ...etting Schedule The corresponding indication light on front panel will turn on Figure 4 7 All channel manual record Click ALL next to Manual as Illustrated in Figure 4 8 When system is manual recordin...

Страница 36: ...types R Regular recording file A External alarm recording file M Motion detection recording file Figure 4 10 Please refer to the following chart for more information Number Function 1 Play 2 Backward...

Страница 37: ...el s video for that time 4 3 2 4 Digital Zoom When the system is in full screen playback mode drag your mouse on the screen to select a section and then left click mouse to digitally zoom in on that s...

Страница 38: ...there are video files on June 13th and June 14th Double click the date to view its file list Figure 4 11 4 4 4 4 4 4 4 4 Schedule Schedule Schedule Schedule After the system boots up it is in default...

Страница 39: ...s you to copy one channel setup to another After setting up channel 1 you can click the copy button and then paste the set up options of channel 1 to channel 2 or any other channel Once you are done a...

Страница 40: ...corresponding alarm occurs In Encode interface click snapshot button to input snapshot mode size quality and frequency see Figure 4 16 In General interface please input upload interval see Figure 4 14...

Страница 41: ...up corresponding FTP server Enable schedule snapshot Chapter 4 4 3 1 or activate snapshot Chapter 4 4 3 2 first now system can upload the image file to the FTP server Figure 4 19 4 5 4 5 4 5 4 5 Moti...

Страница 42: ...u can click the direction buttons to move the green rectangle to set the motion detection zone After you completed the setup please click ENTER button to exit current setup Click save button to save c...

Страница 43: ...anti dither time This is the time you would want the system to delay before starting recording on a motion alarm Alarm output when an alarm occurs system can upload alarm to the network Including the...

Страница 44: ...ps You can enable preset tour pattern activation operation when video loss occurs Refer to chapter 4 5 2 motion detection for detailed information Figure 4 25 4 5 4 Camera Masking When someone vicious...

Страница 45: ...p and Alarm Activation larm Setup and Alarm Activation Before operation please make sure you have properly connected any external alarm devices such as a buzzer Go to alarm setup interface In the main...

Страница 46: ...ccurs Such as go to preset tour pattern when there is an alarm Click select button to generate the interface illustrated in Figure 4 28 Figure 4 28 Period Click set button to generate the user interfa...

Страница 47: ...ng after motion stops Value ranges from 10 to 300 seconds System delays this long before turning off alarm and de activating output after external alarm is cancelled Tour Here you can enable tour func...

Страница 48: ...4 32 After you click backup button and system begins the backup the backup button will function as a stop button You can view the remaining time and process bar at the left bottom as shown in Figure...

Страница 49: ...mbo DVR input user name and password In the main menu click setting and then click Pan Tilt Zoom Control button The interface is shown in Figure 4 34 Here you can set the following items Channel selec...

Страница 50: ...ce below will be displayed See Figure 4 35 Here you can set the following items Speed value ranges from 1 to 8 Zoom Focus Iris Please click icon and to adjust zoom focus and iris Figure 4 36 In Figure...

Страница 51: ...smaller the zone you dragged the higher the speed Figure 4 38 Here is a chart for your reference Name Function key function Shortcut key Function key function Shortcut Key Zoom Near Far Focus Near Far...

Страница 52: ...4 39 4 9 1 Preset Setup As shown in Figure 4 36 uses eight direction arrows to adjust camera to the proper position Click the preset button and input preset number The interface is shown in Figure 4...

Страница 53: ...d in Figure 4 36 to modify zoom focus and iris Go back to the screen illustrated in Figure 4 43 and click end button and save your changes as any pattern number you wish so that you can easily utilize...

Страница 54: ...ure 4 36 click the page switch button to get the interface illustrated in Figure 4 45 From here you can set the auxiliary function The aux value is relative to the Aux button of the camera Figure 4 45...

Страница 55: ...nd Controls Operations and Controls Operations and Controls Operations and Controls 5 1 Menu Tree Account Advanced Auto Maintain TV Adjust HDD Mgmnt Abnormality Manual Rec Alarm Output Search Shutdown...

Страница 56: ...e 5 1 There are six icons search Information setting advanced backup and shutdown Move the cursor to highlight the icon then double click mouse to enter the sub menu Figure 5 1 5 3 5 3 5 3 5 3 S S S S...

Страница 57: ...ot beeline and solidus DST Here you can set DST time and date Enable DST function and then click set button You will see an interface shown in X358H358H358HFigure 5 4X Figure 5 4 Here you can set star...

Страница 58: ...dard There are two formats NTSC and PAL in North America we use NTSC Auto logout Here you can set the unit to automatically log out when a user account remains inactive for a specified time The value...

Страница 59: ...io Overlay Click overlay button you can see the interface shown in X362H 362H 362HFigure 5 7 X Figure 5 7 Cover area Privacy mask Here you can set privacy mask sections You can drag your mouse to set...

Страница 60: ...keyboard to control current device Baud rate You can select proper baud rate Data bit You can select proper data bit The value ranges from 5 to 8 Stop bit There are three values 1 1 5 2 Parity there a...

Страница 61: ...ure 5 10 to access the router settings Write down the gateway and subnet mask numbers GREEN arrows on Figure 5 10 so you can copy them into the network settings on the DVR Use the MENU on the DVR to g...

Страница 62: ...list supports up to 64 IP addresses Please note after you enable this function only the IPs listed below can access the DVR If you disable this function all IP addresses can access the DVR Figure 5 1...

Страница 63: ...ports TCP transmission only Port default value is 123 Update interval minimum value is 1 Max value is 65535 Unit minutes Time zone select your corresponding time zone here City Region Name Time Zone L...

Страница 64: ...fter rebooting open IE and input as below http DDNS server IP virtual directory name webtest htm e g http 10 6 2 85 combo DVR _DDNS webtest htm Now you can open DDNS Server web search page Figure 5 15...

Страница 65: ...service Install Ser U FTP SERVER first From start program Serv U FTP Server Serv U Administator Now you can set user password and FTP folder Please note you need to grant write rights to FTP upload u...

Страница 66: ...ress port and remote directory When remote directory is empty system will automatically create folders according to the IP time and channel User name and password is the account information for you to...

Страница 67: ...m supports up to 3 email boxes SSL enable System supports SSL encryption box Interval The send interval ranges from 0 to 3600 seconds 0 means there is no interval Please note system will not send out...

Страница 68: ...all your modifications here only apply to combo DVR local end You need to open web or client end to refresh channel name Time display You can select to display time or not when system is playing back...

Страница 69: ...igure 5 24X Please note all your modifications here apply to local end only You need to refresh web or client end to get the latest channel name System supports up to 25 digital characters Figure 5 24...

Страница 70: ...igure 5 26 Select all General Encode Schedule RS232 Network Alarm Detect Pan tilt zoom Display Channel name Please highlight icon to select the corresponding function After all the setups please click...

Страница 71: ...er to Chapter 4 3 Search 5 5 5 5 5 5 5 5 Advanced Advanced Advanced Advanced Double click advanced icon in the main window the interface is shown below See X382H 382H 382HFigure 5 27 There are seven f...

Страница 72: ...d drive error occurs system is shown as X You can select hard drive mode from the dropdown list such as read only or you can erase all data in the hard drive Note system needs to reboot to get all the...

Страница 73: ...u specify before turning off alarm and de activating output after external alarm ends Show message system can display the message in the local screen to alert you when alarm occurs Alarm upload System...

Страница 74: ...ement group and user No limit to group or user amounts For group or user management there are two levels admin and user The user name and group name can consist of eight bytes A name can only be used...

Страница 75: ...ous menu Figure 5 33 5 5 7 TV Adjust Here you can adjust TV output setup See X389H 389H 389HFigure 5 34 Please drag slide bar to adjust each item After the setup is complete click OK button system goe...

Страница 76: ...m time then reboot the system to solve this problem After system boots up if there is any problem system goes to HDD information interface directly Please note system does not ask you to force a solut...

Страница 77: ...operation data management alarm event record operation log clear etc Select start time and end time then click search button You can view the log files Use page up down button to view if there are mor...

Страница 78: ...setup is 65535 seconds Figure 5 40 5 7 5 7 5 7 5 7 Shutdown Shutdown Shutdown Shutdown Double click shutdown icon system displays a dialogue box for you to select See Figure 5 41 Logout menu user You...

Страница 79: ...the remote control The interface shown below will be displayed See X397H 397H 397HFigure 6 1X X397H 397HFigure 6 1X Click Pan Tilt Zoom the interface below will display See X398H 398H 398HFigure 6 2X...

Страница 80: ...on key function Shortcut key Function key function Shortcut key Zoom Near Far Focus Near Far Iris close Open 6 3 6 3 6 3 6 3 Preset Preset Preset Preset P P P Patrol atrol atrol atrol P P P Pattern at...

Страница 81: ...In X411H411H411HFigure 6 6X please input preset number in the blank and click preset button 6 3 3 Patrol Setup In X412H412H412HFigure 6 5X click patrol button The interface is shown in X413H 413H 413...

Страница 82: ...please go to X423H 423H423HFigure 6 10X and click left limit button Repeat the above procedureto set right limit Figure 6 10 6 3 8 Activate Border Function In X424H424H424HFigure 6 6X click auto scan...

Страница 83: ...eturn TTL value should be less than 255 Open the IE and then input combo DVR IP address System can automatically download latest web control and the new version can overwrite the previous one If you w...

Страница 84: ...t forwarding for you You do not need to buy this software Above the ad there is a link to skip the ad if you click on the link it will take you to the instructions which are free You can purchase the...

Страница 85: ...en you will see the following message Success I can see your service Figure 7 7 ii Go to the section below To access the DVR through Internet Explorer iii Otherwise if the ports are not open you will...

Страница 86: ...8 below that shows the IP address you need to use It will be in the space where the below example shows 76 254 183 54 Figure 7 9 NOTE If you cannot use HTTP port 80 or 37777 because it is being used b...

Страница 87: ...Figure 7 11 then click the Custom Level button GREEN box in Figure 7 11 then click on OK BLUE arrow in Figure 7 11 This will open a dialog box as shown in Figure 7 12 Once here scroll down to the Acti...

Страница 88: ...heckmarks in the options to allow active content to run on my computer and allow software to run or install even if the signature is invalid and remove the check for the option to check for signatures...

Страница 89: ...n 1 there are five function buttons configuration chapter 7 3 search chapter 7 4 alarm chapter 7 5 about chapter 7 6 log out chapter 7 7 Section 2 there are channel number and three function buttons s...

Страница 90: ...then left click and drag the mouse in the zone to zoom in right clicking mouse restores original status 2 Change show mode resize or switch to full screen mode 3 Local record When you click local rec...

Страница 91: ...k Click to select bidirectional talk mode There are two options DEFAULT G711a Please note the audio input port from the device to the client end is using the first channel audio input port During the...

Страница 92: ...ght direction keys there is a 3D intelligent positioning key Click 3D intelligent positioning key system goes back to the single screen mode Drag the mouse in the screen to adjust section size It can...

Страница 93: ...and then click start record button to begin PTZ movement Go back to Figure 7 11 to implement camera operation Then you can click stop record button Now you have set one pattern Preset In X441H441H441H...

Страница 94: ...fault button to use system default setup Figure 7 26 7 2 4 Picture Path and Record Path Click more button in X445H 445H 445HFigure 7 20 you will see the interface shown in X446H446H446HFigure 7 27 Fig...

Страница 95: ...there is a local user logged into the system menu or the Web logged in user has no right to reboot the device system pops up a dialogue box to alert you 7 3 7 3 7 3 7 3 Configure Configure Configure...

Страница 96: ...view local storage status and network status including free capacity and total capacity See X450H 450H 450HFigure 7 32 Figure 7 32 Log Here you can view system log See X451H 451H 451HFigure 7 33 Figu...

Страница 97: ...le operation Search You can select log type from the drop down list and then click search button to view the list Clear You can click this button to delete all displayed log files Please note system d...

Страница 98: ...e 7 25 Language You can select the language from the dropdown list Device needs to reboot to activate the change HDD Full There are two options stop recording or overwrite the previous files when HDD...

Страница 99: ...lays current channel name You can modify it Compression H 264 Main Stream Includes main stream motion stream and alarm stream You can select different encode frame rates for different recorded events...

Страница 100: ...pe There are two options VBR and CBR Please note you can set video quality in VBR mode only Quality The value ranges from 1 to 6 The level 6 is the best video quality Bit Rate In CBR the bit rate here...

Страница 101: ...Figure 7 28X Save You can click save button after you complete setup for one channel or you can complete the whole setup and then click save button Refresh Click this button to get device s latest con...

Страница 102: ...or snapshot type schedule snapshot motion detection snapshot and alarm snapshot Please select date Current setup applies to current day by default You can put a checkmark before the week to apply the...

Страница 103: ...1 and keyboard Function Console is to upgrade the program or debug via COM or mini terminal software Keyboard COM control protocol You can use keyboard to control combo DVR via COM Data Bit The value...

Страница 104: ...is 80 Default value is 37778 Maximum Network users The value ranges from 0 to 10 O means no users can access current device PPPOE Input the PPPoE user name and password you get from the IPS internet s...

Страница 105: ...etailed information Parameter Function SMTP Server Input server address and then enable this function Port Please input port value here User Name The sender email account user name Password The sender...

Страница 106: ...then enable DDNS function The private DDNS protocol means you use your self defined private protocol to activate DDNS function Server IP DDNS server IP address Server Port DDNS server port Domain Name...

Страница 107: ...he file length you upload to the FTP When setup is larger than the actual file length system will upload the whole file When setup here is smaller than the actual file length system only uploads the s...

Страница 108: ...shall be 123 The update interval ranges from 1 to 65535 Default value is 10 minutes Figure 7 48 You can refer to the following chart for time zone information City Region Name Time Zone London GMT 0...

Страница 109: ...8 QC40196 User Manual 100 P a g e Alarm Alarm setup interface is shown in X467H 467H 467HFigure 7 49 Make sure you have connected the corresponding alarm output device such as the light buzzer etc Fig...

Страница 110: ...ut for specified time after alarm ends The value ranges from 10 seconds to 300 seconds Alarm upload System can upload the alarm signal to the centre Including alarm centre Record Channel System auto a...

Страница 111: ...WEB OPERATION QC40198 QC40196 User Manual 102 P a g e Motion Detection The detection interface is shown in X468H 468H 468HFigure 7 51 Figure 7 51 Figure 7 52...

Страница 112: ...whole week Click OK button system goes back to motion detection interface please click save button to exit Anti dither System only memorizes one event during the anti dither period The value ranges fr...

Страница 113: ...l number so that system can backup motion detection snapshot file Copy This is a shortcut menu button You can copy current channel setup to one or more all channels Save You can click save button afte...

Страница 114: ...to the speed dome dial switch setup Stop bit Default setup is 1 Set according to the speed dome dial switch setup Parity Default setup is none Set according to the speed dome dial switch setup Save Y...

Страница 115: ...n Export system configuration to local PC Import Configuration Import configuration from PC to the system 7 3 3 Advanced HDD Management HDD management includes net storage management and local storage...

Страница 116: ...er Recover data after error occurs Please note system needs to reboot to activate current setup Alarm I O Here you can search alarm output status See X473H 473H 473HFigure 7 56 Figure 7 56 Important T...

Страница 117: ...he pop up dialogue box in local end Refresh Search alarm output status Record Record control interface is shown in X474H 474H 474HFigure 7 57 Figure 7 57 Please refer to the following chart for detail...

Страница 118: ...P a g e Account Here you can add remove user or modify password See X475H475H475HFigure 7 58 Figure 7 58 Auto Maintenance Here you can select auto reboot and auto delete old files from the dropdown l...

Страница 119: ...ed information Parameter Function Channel It is the monitor channel Snapshot mode There are two modes Timing and activation Frame rate You can select from the dropdown list The value ranges from 1f s...

Страница 120: ...tiple choices Normal Out The corresponding alarm activates output channel when alarm occurs There are three channels Latch The alarm output can delay for the specified time after alarm stops Then syst...

Страница 121: ...ss See X478H 478H 478HFigure 7 62 Figure 7 62 7 4 7 4 7 4 7 4 Search Search Search Search Click search button you can see an interface is shown in X479H 479H 479HFigure 7 63 Select record playback mod...

Страница 122: ...x shown in X480H 480H 480HFigure 7 59 then you can specify file name and path to download the file s to your local pc Figure 7 64 Now the system begins download and the download button becomes stop bu...

Страница 123: ...le first and then click playback button to view the video Download type Download by file Select the file s and then click download button Download by time Download the recorded file s within your spec...

Страница 124: ...WEB OPERATION QC40198 QC40196 User Manual 115 P a g e 1 Play 2 Pause 3 Stop 4 Slow play 5 Fast play Figure 7 67 Playback device IP address and channel number Playback control bar...

Страница 125: ...ystem sends alarm when disk is full Disk error System sends alarm when disk error occurs Camera masking System sends alarm when camera is viciously masked Encode alarm System sends alarm when peripher...

Страница 126: ...log out button system goes back to log in interface See X485H485H 485HFigure 7 70 You need to input user name and password to login again Figure 7 70 7 8 7 8 7 8 7 8 Un Un Un Un install install insta...

Страница 127: ...ddress Enabling DDNS on your Q See DVR system will allow you to connect to your device through a DDNS host such as myq see com In order to facilitate this ability on your Q See DVR system you must fir...

Страница 128: ...available and list an IP address Figure 8 2 Verify that this is your current IP Address by going to www myipaddress com and checking that it is the same address listed in your confirmation screen Fig...

Страница 129: ...tton and then the EXIT button at the bottom of the Network Setup Screen and your DDNS setup is complete Figure 8 5 DDNS Type You can select Q SEE DDNS from the dropdown list Server IP You can use ping...

Страница 130: ...d list Dopod C730 HTC Touch HKC Pearl HTC6800 HTC6900 HTC6850 P3450 P4550 S1 S420 S730 Touch LG KC1 KS20 830 838 900 Athena C800 C858 CHT 9000 CHT 9100 D600 D802 D810 E806c M700 MUSE P800W U1000 Mio A...

Страница 131: ...201 sis file that is in the Symbian folder on the CD included with the DVR to the phone The folder also includes a User s Guide with instructions on how to install and use the program Android Supporte...

Страница 132: ...tion is loose Please contact Q see for help Updated firmware using wrong file 3 Combo DVR often automatically shuts down or stops running Possible causes Input voltage is not stable or it is too low H...

Страница 133: ...uses Video quality setting is too low Program read error bit data is too small There is mosaic in the full screen Please restart the combo DVR to solve this problem Hard drive data cable error Hard dr...

Страница 134: ...s For Windows 98 or Windows ME user please update your system to Windows 2000 sp4 or later Or you can install client end software of lower version ActiveX control has not been enabled Video card drive...

Страница 135: ...le causes Alarm setup is not correct Alarm output has been opened manually Input device error or connection is not correct 20 Alarm function is not working Possible causes Alarm setup is not correct A...

Страница 136: ...ve the audio video signal cable RS232 or RS485 cable Always shut down the device properly Please use the shutdown function in the menu or you can press the power button on the front panel for at least...

Страница 137: ...to calculate the storage capacity i m which is storage of each channel needed unit Mbyte i m i q i h i D 2 In the formula i h means the recording time for each day hour i D means number of days for w...

Страница 138: ...Cruzer Freedom 2G Kingston DataTraveler 1G Kingston DataTraveler 2G Kingston DataTraveler 1G Kingston DataTraveler 2G Maxell USB Flash Stick 128M Maxell USB Flash Stick 256M Maxell USB Flash Stick 51...

Страница 139: ...tested successfully with the combo DVR Please confirm the drive is formatted as FAT32 Manufacturer Model Port Type Type Sony DRX S50U USB DVD RW Sony DRX S70U USB DVD RW Sony AW G170S SATA DVD RW Sams...

Страница 140: ...750G SATA Seagate Barracuda 11 ST3500320AS 500G SATA Seagate Barracuda 7200 11 ST31500341AS 1 5T SATA Seagate Pipeline HD 2 ST3320311CS 350G SATA Seagate SV35 2 ST3160815SV 160G SATA Seagate SV35 2 S...

Страница 141: ...0G SATA Western Digital Caviar SE16 WD7500KS2 750G SATA Western Digital Caviar SE16 WD5000KS2 500G SATA Western Digital Caviar SE16 WD4000KD2 400G SATA Western Digital Caviar SE16 WD3200KS2 320G SATA...

Отзывы: