background image

PureLink by Dtrovision 


12 

1920x1080i @59 

1920x1080i @60 

1920x1080p@50 

1920x1080p @59  1920x1080p @60  800x600 @60 

1024x768 @60 

1280x1024 @60  1360x768 @60 

1366x768 @60 

1400x1050 @60  1600x1200 @60 

1440x900 

@60 

1920x1200 @60 

-


Select Output # using CREATE (Up) and PREVIEW (Down) buttons then Press ENTER button 

-


Select Resolution using CREATE (Up) and PREVIEW (Down) buttons 

-


Press ENTER button to save 

2. DVI-U input port signal selection (DVI, VGA, YPbPr) 

PS-6300S has two DVI-U Input ports and user can select among three different signal types depending on 

the needs (DVI, VGA, or YPbPr) 

-


Select Input # using CREATE (Up) and PREVIEW (Down) buttons then press ENTER button 

-


Select signal type (DVI, VGA or YPbPr) using CREATE (Up) and PREVIEW (Down) buttons 

-


Press ENTER button to save 


3. DVI-U output port signal selection (DVI, VGA, YPbPr) 

PS-6300S has one DVI-U Output port and user can select among three different signal types depending on 

the needs (DVI, VGA, or YPbPr) 

-


- Select signal type (DVI, VGA or YPbPr) using CREATE (Up) and PREVIEW (Down) buttons 

-


Press ENTER button to save 


4. PIP mode setting   

PS-6300S offers PIP function for sharing two information at the same time.   

PIP feature is available on output #3. 

-


Enable/disable PIP mode using CREATE (Up) and PREVIEW (Down) buttons then press ENTER 

-


Select PIP input using CREATE (Up) and PREVIEW (Down) and INPUT buttons 

-


Press ENTER button to save 

5. HDMI output audio selection   

PS-6300S  has  total  eight  (8)  available  audio  inputs;  four  (4)  HDMI  embedded  audio  and  four  (4) 

balanced/unbalanced audio Inputs and user can select audio inputs or mute the audio. 

Содержание PS-6300S

Страница 1: ...PureLinkTM 535 East Crescent Avenue Ramsey NJ 07446 USA Tel 1 201 488 3232 Fax 1 201 621 6118 E mail sales purelinkav com www purelinkav com For order support please contact your local dealer For technical support please contact us at support purelinkav com ...

Страница 2: ... 8 2 2 Specification 8 Chapter 3 Operational guidelines 3 1 Main Menu User Guide 11 Chapter 4 Communication Code Configuration 4 1 Control Programmer s Guide 15 4 2 Overview 15 4 3 Command Code Formats 15 4 4 General Rules for Command Codes 14 4 5 Command Ack Value Response 18 4 6 Example Command Codes 19 Chapter 5 Firmware updates instruction Warranty Information 5 1 Firmware Update Instruction 2...

Страница 3: ...th a 3 wire grounding type plug a plug having a third grounding pin This pin will only fit in to a grounding type power outlet If you are unable to insert the plug in to the outlet contact your electrician to replace your obsolete outlet Air vents should be kept clean and unobstructed at all times Please refrain from using frayed power cords and damaged wall outlets Do not place any heavy objects ...

Страница 4: ...and or CPU Boards and Power Supplies used Council Directive 93 68 EEC with Matrix Dtrovision LLC 535 E Crescent Ave Ramsey NJ 07446 201 488 3232 declares under sole responsibility that the product identifies with 93 66 EEC of the Council Directive Low Voltage Equipment Safety Each product marketed is identical to the representative unit tested and found to be compliant with the standards 1 3 What ...

Страница 5: ...Auto Scaling with Seamless Switching The PS 6300S offers as a standard feature built in auto scaling on all the outputs minimizing latency and providing seamless switching when multiple contrasting display devices are used With the scaling feature built in the PS 6300S eliminates the cost of individual outboard scalers and ensures the best resolution and picture quality on each display regardless ...

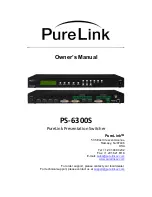
Страница 6: ...isplay 1 5 Front View The PS 6300S chassis is mountable on 19 standard rack with brackets On front panel there are some function keys and a status display window placed as shown in Figure 1 1 Front Panel Figure 1 1 POWER Main power switch ON OFF DISPLAY View menu and system mode MENU Navigate menu and control options ENTER Save select desired setting CANCEL Revert to previous setting CREATE Progra...

Страница 7: ...with VGA and YPbPr signal with appropriate cable AUDIO INPUTS 4 x Balanced Un balanced analog audio 5 pin phoenix connector AUDIO OUTPUTS 3 x Balanced Un balanced analog audio 5 pin phoenix connector 1 7 Installation Guidelines The following installation settings are recommended for optimal performance Operational temperature should be 30 C or below Operational humidity should be 60 or below Opera...

Страница 8: ...tandard rack type case 1U HDCP compliant Enhanced quality and color of signals 3 channel digital output support HDMI x2 DVI U x1 Audio insertion extraction and break away Control through 3 different methods Control directly with front panel push buttons Control via RS 232C COM port Control via LAN TCP IP It has an instantaneous noise protection circuit in input and output ports therefore it can pr...

Страница 9: ... 60Hz 1280x960 60Hz 1280x1024 60Hz 1360x768 60Hz 1366x768 60Hz 1400x1050 60Hz 1440x900 60Hz 1600x900 60Hz 1600x1200 60Hz 1680x1050 60Hz 1920x1080 24Hz 1080p24 1920x1080 25Hz 1080p25 1920x1080 50Hz 1080p50 1920x1080 60Hz 1080p60 1920x1200 60Hz 2048x1080 24Hz plus any other resolution allowed by HDMI up to 165MHz pixel clock Input Resolutions HDMI Interlaced 720x480 30Hz 480i 720x576 25Hz 576i 1920x...

Страница 10: ...Input Signal Types HDMI analog 2 channel Formats Analog Stereo 2 channel Formats HDMI Dolby Digital Dolby Digital EX DTS DTS ES DTS 96 24 up to 8ch PCM Analog to Digital Conversion 24 bit 48kHz Typical of 3 analog output channels Output Signal Type and Format Stereo 2 channel Digital to Analog Conversion 24 bit 48kHz Differential 4 0 V Typical of 2 HDMI output channels Output Signal Types HDMI For...

Страница 11: ...to reverse a selection and return to the previous menu 3 2 Menu button Press a menu button to view the sub menu and available sub menu list follows 1 Output scaling timing setting 2 DVI U input port signal selection DVI VGA YPbPr 3 DVI U output port signal selection DVI VGA YPbPr 4 PIP mode setting Output 3 5 HDMI output audio selection 6 Analog audio output audio selection 7 EDID 8 RS232 communic...

Страница 12: ...Pr using CREATE Up and PREVIEW Down buttons Press ENTER button to save 3 DVI U output port signal selection DVI VGA YPbPr PS 6300S has one DVI U Output port and user can select among three different signal types depending on the needs DVI VGA or YPbPr Select signal type DVI VGA or YPbPr using CREATE Up and PREVIEW Down buttons Press ENTER button to save 4 PIP mode setting PS 6300S offers PIP funct...

Страница 13: ...mpty slots that can be used to upload and save EDID data from any external display device Select Internal EDID using UP Create and Down Preview buttons Select Input where selected EDID data will be saved on to Multiple Inputs can be selected at once Press enter button to save P will display on the LCD when EDID is successfully saved F will display on the LCD when EDID is NOT successfully saved ii ...

Страница 14: ... controlled through the 10 100 base Ethernet port using a command line interface There are four values that need to be set for LAN communication IP address Gateway address Subnet mask and Mac address Please use below button indication to configure LAN settings Output 1 To move cursor Create button Numbers going up Preview button Numbers going down Please use Enter button to save the setting Note P...

Страница 15: ...button to change numbers 9 a To go from left and right use Out1 and Out2 buttons b To change numbers up and down use Create and Preview buttons c To move to the second set of numbers on the ip address Press In2 button d To the third set of numbers on the IP address Press In3 button f To the fourth set of numbers on the IP address Press In4 button to move Note Data will not go higher than 255 for a...

Страница 16: ... Command Code Formats A command code is a series of command characters and numbers used to send commands to the system Commands include basic formulas for creating and disconnecting switches as well as for verifying the status of switches In a command code each character is either general command e g C for connect or an identifier that indicates what the following number designates e g O and the n...

Страница 17: ... begin with Start byte All s end with End byte All s will be executed when Enter is entered The correct Router ID must be entered in a command code Systems will not react to the command if a wrong Router ID is entered The Factory Default Router ID is set to 01 and the universal Router ID is 99 Systems will react to the command whenever universal Router ID is entered in command code Command codes t...

Страница 18: ...us Status command this must precede input and output specification 1 0x44 0x64 D D Disconnect Disconnect command for both Video and Audio this must precede input and output specification 1 Space Separates the numbers within entries that contain multiple numbers 1 Range Specifies a range of numbers in entries containing multiple numbers 1 0x49 0x69 I I Router ID check Router ID check command check ...

Страница 19: ...ne at a time as noted below in the table The complete command has executed successfully when all of the entered characters including s which stands for status appear If a command character is not accepted a different character than the one entered appears and all or part of the command has not been executed Ack Acknowledge Value Response Table The following table shows ack value response character...

Страница 20: ...command for routing a switch The characters and numbers that follow the C command tell the system which inputs and outputs to connect The last character is found at the end of a command code which tells the system to execute the command For example the command code 255CI01O01 can be interpreted as follows Starting the command code 255 Router ID is 255 C Create connection on I01 Input 01 to O01 Out...

Страница 21: ...nect Command Codes Action 255DI01O00 Disconnect Input 1 to no Output 00 255DI00O01 02 03 Disconnects Outputs 1 2 and 3 255DI00O01 03 Disconnects output 1 2 and 3 255DALLIO Disconnects all inputs and outputs HDMI Output Audio Select Command SA HDMI source audio B1 Balanced IN1 B2 Balanced IN2 B3 Balanced IN3 B4 Balanced IN4 S0 or B0 or MU Not connected Mute Command Codes Action 255HAALLSA ALL HDMI ...

Страница 22: ...mand Codes Action 255SAS1 Connect All of HDMI Source audio from HDMI input 1 255SAMU Mute audio to HDMI Source audio PIP setting command Start Router ID 001 Command M PIP ON OFF S1 S0 Input number I01 End Enter MS0 PIP ON MS1 PIP OFF I01 Input select I01 I06 Example Command Codes Action 999MS1I01 PIP ON INPUT 1 999MS1I03 PIP ON INPUT 3 999MS0I01 PIP OFF Connection Status Check A connection status ...

Страница 23: ...ut 3 255 ALLIO Check all Input and Output connection status Router ID Check User can confirm the router s Current ID setting Universal Router ID is 999 Example Command Codes Action 999I000 Check Router s ID Firmware Version Check User can confirm router s current firmware version Example Command Codes Action 999 version Check Router s Firmware version ...

Страница 24: ...B Plug firmware update USB cable between the unit and your PC Make sure the unit is powered on C Run Megaload program Firmware update procedure follows 1 2 Load firmware file on both Flash and EEprom 3 Setup comport and speed Baudrate speed must be matched with baud rate speed on PS 6300S unit 4 Open the port 5 Click send reset button It may take few minutes to update the firmware ...

Страница 25: ...ct or part to replace the defective item 3 Refund to customer the purchase price paid for the defective product All products that are replaced become the property of PureLink Replacement products may be new or reconditioned Repaired or replacement products or parts come with a 90 day warranty or the remainder of the warranty period PureLink shall not be responsible for any software firmware inform...

Отзывы: