PSA IntelLink INT17WSK Скачать руководство пользователя страница 11

14.2.1.1   

 Language

The system language can be changed. In the System menu, move cursor selection to 
“Language”, press  

  button to enter the “Language” menu. Press  

  button again; 

the arrow icons on both sides will change colour. Press  

  &  

  to change the system 

language. Press  

  button again to confirm change. Then press  


button to return to 

previous menu.

14.2.1.2   

 Time

The Time settings adjusts the system date and time and what will be displayed in Standby 
mode.

Press  

  over a highlighted item to change its setting. Use the  

  or  

  to change  

its value, then press  

  again to confirm changes. Once completed, press  


to return  

to the System menu.

1.    The Clock Switch controls whether the clock is displayed in Standby mode.  

When turned off, the Standby screen will be all black, without a clock display.  
However, the digital photo frame will still be displayed (if turned ON).

2.    Set the display format of the clock in “Date Format”.

3.    The Time is displayed in 24-hour format only.

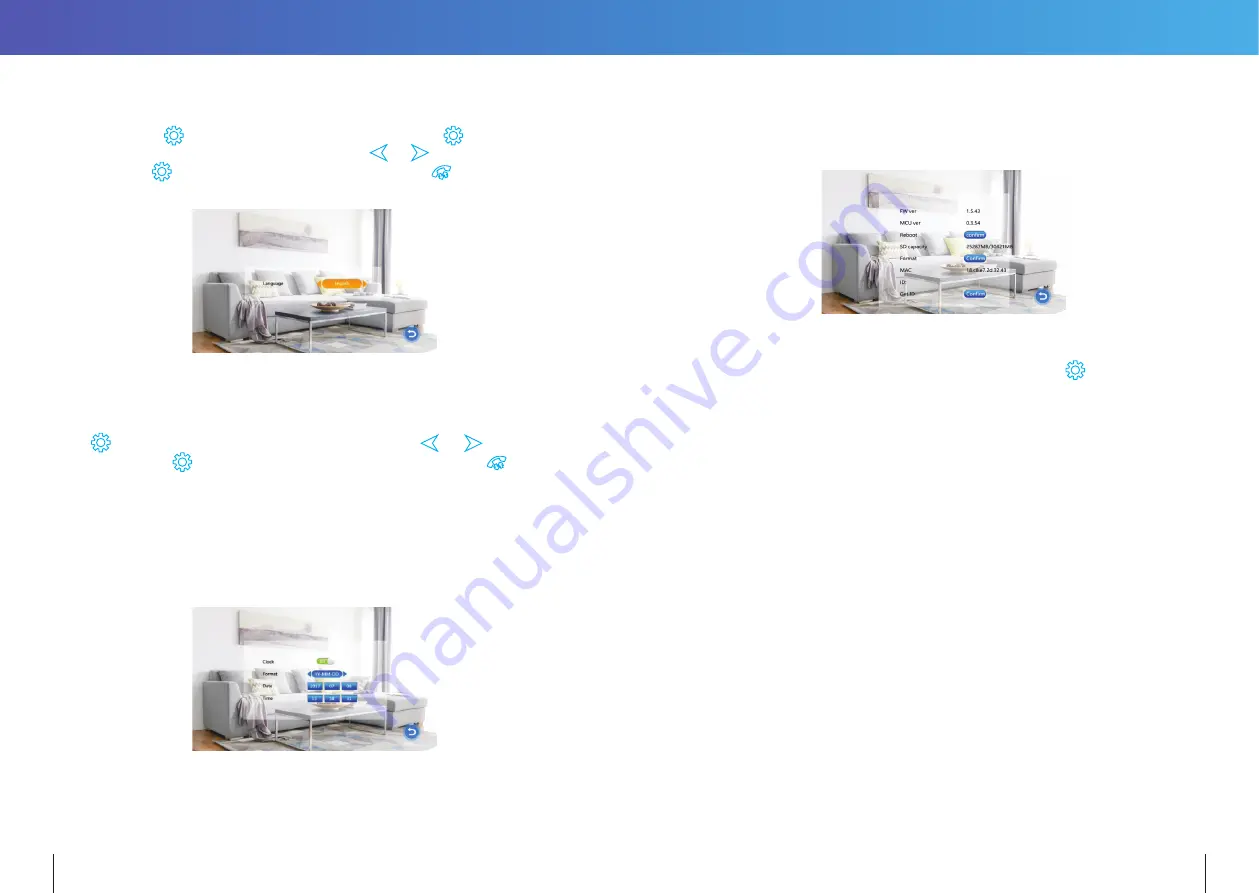
14.2.1.3    System information

Select “System Info” icon to enter the “System Information” menu. This screen shows the 
software version, MCU version, and microSD card free space. It includes options to Restart/
Reboot the Monitor and Format the microSD card.


Note:

 Supports MicroSD cards with write speeds over 10MB/s and memory size up to 32GB.

[Restart Device]:

  To restart the Monitor, select “Confirm” and press   

. Select “Yes” to 

the pop-up prompt to “Reboot device?”. Otherwise, select “No” to exit the 
window without rebooting.

[Format SD card]:

  Select “Format” button and press “Yes” to start formatting SD card. 

Otherwise, select “No” to cancel. NOTE: Formatting the MicroSD card  
will permanently remove any stored data on the MicroSD card.  
Please ensure there is nothing you want to keep before formatting.

[Read]:

  Select this to update manufacturer device ID information from a microSD card  

(if directed by our Technical Support team)

20

21

Содержание IntelLink INT17WSK

Страница 1: ...Model INT17WSK Video Intercom I N S T R U C T I O N M A N U A L...

Страница 2: ...oorbell is not answered a notification icon will be shown Note Date Clock feature must be activated Different ringtones for Door A Door B Support 32G MicroSD for pictures or video recording Picture me...

Страница 3: ...ECIFICATION Camera sensor 1 3 inch wide angle CMOS camera View angle 120 Definition Hor 960P LEDs for night IR LEDs 120 Power consumption 150mA max Power source Supplied from indoor unit Operation tem...

Страница 4: ...indicates the status of Door Station 14 Entry LED 2 LED indicates the status of Door Station Specification Display screen 7 TFT LCD screen Definition 7 1024x600 pixels CCTV camera input AHD CVBS only...

Страница 5: ...e indoor unit please follow these steps as below 7 INSTALLATION NOTE Keep intercom wires more than 30cm away from AC mains power to avoid interference The electric lock is not included in the package...

Страница 6: ...06 Note HD Monitor can accept AHD or CVBS analog signals If using HD monitor with CVBS analog door station you must reboot the monitor from the menu system after connecting the camera 10 11 The first...

Страница 7: ...s with installed MicroSD card an alarm will also trigger a snapshot or video recording depending on which setting is selected The recording time is 120 seconds or until button is pressed The monitor w...

Страница 8: ...cording will start from the beginning of a call and can be manually stopped by pressing Button For models with a MicroSD card installed and snapshot function active A snapshot will be taken at the sta...

Страница 9: ...receiving monitor to accept the incoming call Talking with visitor The electric lock can be opened End the call and return to standby mode 13 INTERNAL COMMUNICATION AMONG INDOOR UNITS At least 2 indoo...

Страница 10: ...ard are displayed instead 2 The USER Photo directory on the MicroSD card must be manually created Pictures stored in this directory will be displayed Note The directory name is case sensitive 14 2 MAI...

Страница 11: ...yed if turned ON 2 Set the display format of the clock in Date Format 3 The Time is displayed in 24 hour format only 14 2 1 3 System information Select System Info icon to enter the System Information...

Страница 12: ...djust the ring volume of the monitor Users can setup preferred ring volumes for three different times of day Ring durations can be adjusted from 10s to 45s Use to navigate or increase and decrease val...

Страница 13: ...M In Main Menu move the cursor to the Alarm option Then press button to enter the Alarm menu Alarm Record for recording Video or taking Snapshots For Video when an alarm is triggered the Indoor Monito...

Страница 14: ...aying music the playback modes can be switched Press to advance to the next playback mode The Playback Modes include Play In Sequence Single Play Single Cycle List Cycle Random Play Play In Sequence P...

Страница 15: ...pgrade file xxx dd is the program file in the update folder select upgrade file xxx dd and press to pop up the window Upgrade Select Yes and press to confirm upgrade and wait for the upgrade to succee...

Страница 16: ...from 0 to 50 Default 25 Refresh If Monitor has registered the wrong video format for a Door Station or camera no video would be displayed on the Monitor Tap R Refresh repeatedly to change the video s...

Страница 17: ...ce to con rm this default selection The Monitor will reboot itself to enter AP mode and start a temporary hotspot SmartLife Doorbell D Pairing Intercom to IntelLink App Steps for AP mode connection We...

Страница 18: ...inst the SmartLife Intercom in the WiFi menu See Fig 5 6 Figure 4 Figure 5 Figure 6 6 Switch back to the previous IntelLink App screen and the App should automatically start connecting with the IntelL...

Страница 19: ...ss See Figure 12 13 Figure 10 Figure 11 Figure 12 Figure 13 4 Enter the Login account info of a new member Select the sharing permission for this user either Administrator with full rights or as Commo...

Страница 20: ...other warranty express or implied loss or damage caused by failure to abide by the instructions supplied in the leaflets 4 To the extent permitted by law PSA Products Pty Ltd makes no warranty express...

Страница 21: ...17 Millicent Street Burwood VIC 3125 Australia Tel 1300 PSA PRODUCTS 1300 772 776 Fax 03 9888 9993 enquiry psaproducts com au psaproducts com au...

Отзывы: