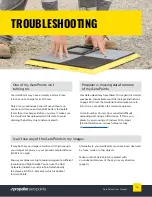
After you place each AeroPoint, press the button
to start recording. The light will turn on, indicating
AeroPoints are in “recording mode.”
Avoid placing AeroPoints beneath trees, walls,
buildings, power lines, or near running machinery or
site vehicles. For the best results, they should have an
unobstructed view of the sky in every direction above
a 15 degree angle (illustrated above).
Avoid placing AeroPoints where they will be disturbed
by people, animals, or vehicles. (You should notify site
manager/personnel that AeroPoints are in use.)
AeroPoints will begin recording data 60 seconds after
you press the button to start. Avoid adjusting the
position of an AeroPoint after this time.
If you change your mind about the position
of a AeroPoint and want to start over, that’s fine.
Just push the button once to stop recording, move
your AeroPoint, then push button again to start
recording.
Made a mistake?
15°
15°
Important: AeroPoints (and/or AeroStencil marks)
should have an unobstructed view of the sky in ever
direction above a 15˚ angle.
Each AeroPoint should be left in place
to record at least 45 minutes of data.
To maximize recording time, we recommend
carrying out preflight drone checks and
safety routines after you lay out AeroPoints,
and packing up your drone before collecting
AeroPoints.
Be aware that AeroPoints will automatically turn
themselves off (sleep mode) after five hours.
Collect AeroPoints in reverse order to how you
laid them out (i.e. pick up the last-placed AeroPoint
first; finish with the one you placed first).
Press the button on each AeroPoint to finish
recording before you pick them up.
AeroPoints can store GPS data from at least
100 surveys before requiring upload.
Data from separate locations will
be automatically grouped in your portal.
During your flight
After your flight
9
AeroPoints User Manual
Содержание AEROPOINTS
Страница 1: ...USER MANUAL...


