UltraTrak SX4000, SX8000 & RM8000 User Manual
32
Drive Replacement
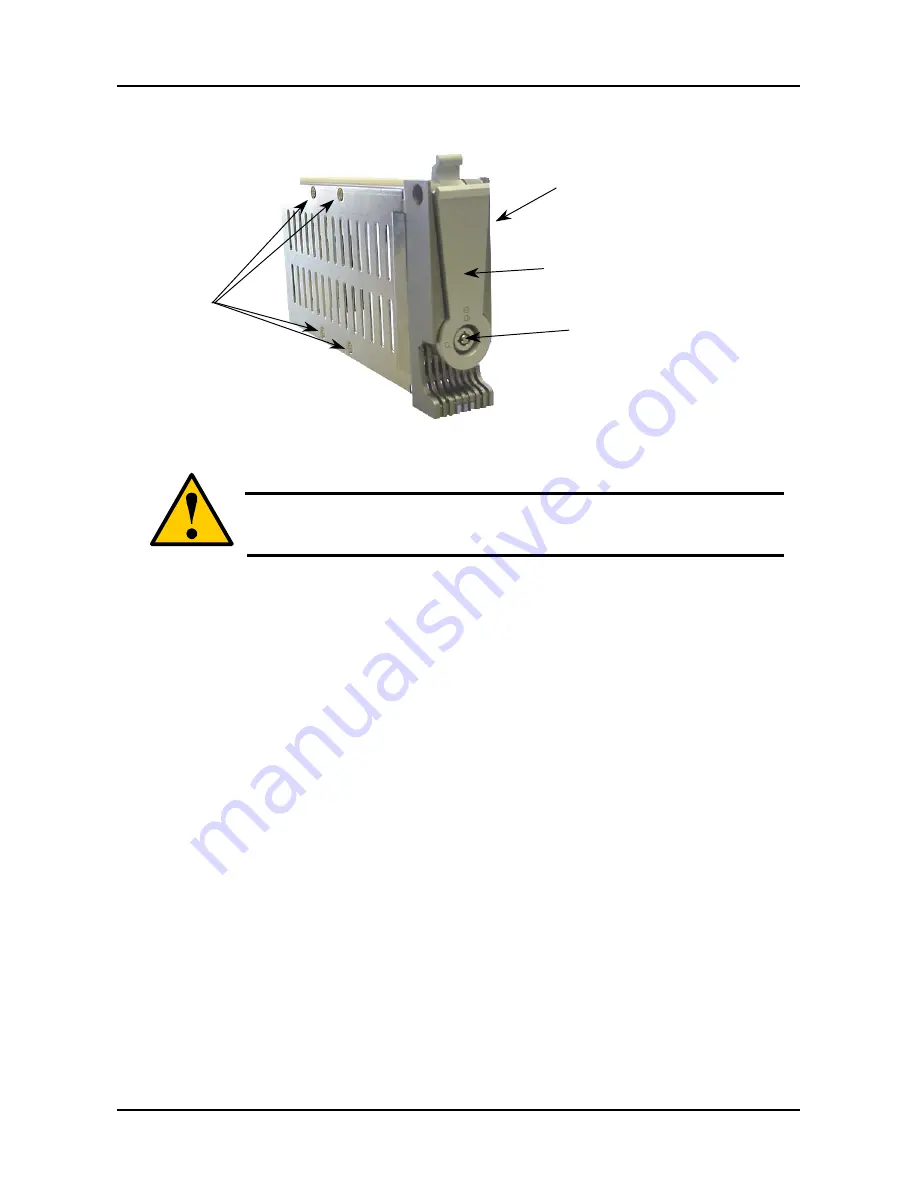
4 screws
The bottom of the disk drive sets
into the mounting assembly.
Secure the disk drive in place
with four screws.
Drive Carrier Latching Mechanism
Drive Carrier Lock
Figure 13. Drive Carrier
Caution
Do not replace the bad drive while reconstruction of the hot spare drive is
in progress. Wait until the System LED and all the drive LEDs (except
the failed drive) are green before replacing the failed drive.
Do the following to replace an ATA hard drive:
1. Open the Front Panel Door on the UltraTrak.
2. Remove the hard drive you wish to replace from the UltraTrak by unlocking
the Drive Carrier lock and sliding out the Drive Carrier.
3. Unplug the power cable and the ATA data cable from the old hard drive.
4. Remove the four screws that secure the hard drive to the Drive Carrier and
remove the old hard drive from the Drive Carrier.
5. Prepare to install the new hard drive by ensuring that the jumpers on the
new hard drive are set for single or master operation. Consult the drive
manual for the proper settings.
6. Attach the Drive Carrier power cable to the new hard drive.
7. Attach the Drive Carrier ATA data cable to the new hard drive.
8. Lower the new hard drive into the Drive Carrier so that the screw holes on
the bottom line up.
9. Insert screws through the holes in the Drive Carrier and into the bottom of
the new hard drive. Tighten each screw; be careful not to over tighten.
10. Slide the assembled Drive Carrier back into the UltraTrak and lock the Drive
Carrier lock.
Содержание ultratrak RM8000
Страница 1: ...UltraTrak SX4000 SX8000 RM8000 User Manual Version 8 0 Rev A ...
Страница 2: ...ii ...
Страница 74: ...UltraTrak SX4000 SX8000 RM8000 User Manual 68 ...
Страница 94: ...UltraTrak SX4000 SX8000 RM8000 User Manual 88 ...


