background image

Using the Apollo Cloud App

54

Return to “

Table of Contents

Click here to get help online

4. 

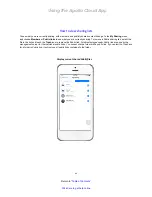
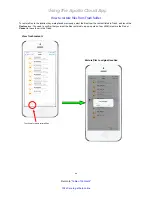
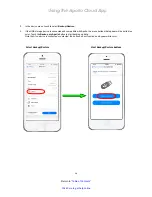
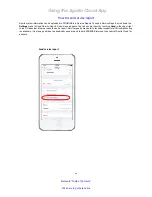
Choose a folder to use for the restore. Backup folders are labeled according to date. Touch 

Next 

to begin the 

restore process.

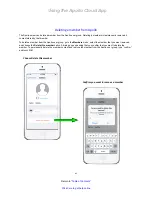
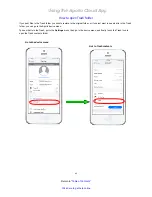
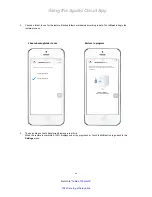
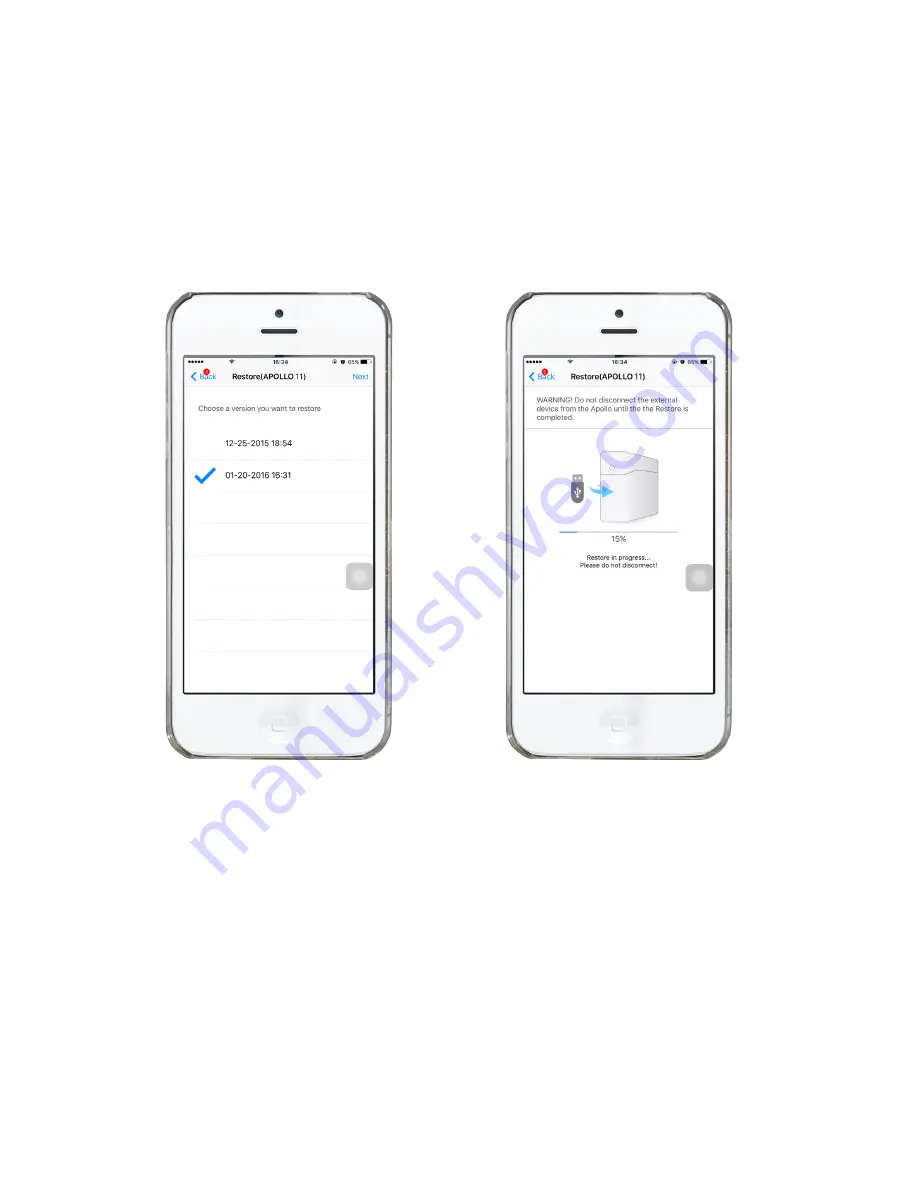
5.  The percentage of data transferred displays in real time. 

When the restore is completed, 100% displays under the progress bar. Touch the 

OK 

button to go back to the 

Settings 

menu. 

Choose backup folder to use

Restore in progress 

Содержание Apollo

Страница 1: ...Product Manual Version 2 0 2016 PROMISE Technology Inc All Rights Reserved ...

Страница 2: ... launch Apollo Cloud App 7 Claiming Apollo automatic method 9 On screen introduction 11 Claiming Apollo QR code scanner method 13 Claiming Apollo manual setup 16 Apollo Cloud mobile interface 19 Apollo Cloud first login 19 How to add content create folders manage files 21 Adding photos from iPhone 21 Files by category 23 File management shortcuts 23 How to Copy Move and Rename files 24 Using Favor...

Страница 3: ...tore files from Trash folder 46 How to permanently delete files 47 USB drive operations with Apollo 48 USB drive requirements for Apollo Backup and Restore 48 Backing up Apollo content to USB storage 49 Restoring content from a USB storage device 53 Uploading content from a USB storage device 55 Apollo Maintenance 57 How to view device status information 57 How to change device name 58 Dim brighte...

Страница 4: ... handling files 74 Drag and drop file transfers 74 Changing the device name in Apollo Utility 75 Using Selective Sync in Apollo Utility 76 Viewing events in Apollo Utility 77 Viewing software version and Settings 78 Uploading content from a USB storage device 79 Using the Apollo for Apple Time Machine backup 81 Navigating the Apollo Utility user interface 83 Using the Apollo Utility desktop icons ...

Страница 5: ...upload AND download for Apollo is 4Mbits sec 2 Any one or more of the following devices Smart phone iPhone iOS 8 or later Android Android 4 4 or later Tablet iPad iOS 8 or later Android Android 4 4 or later Computer Mac OS X 10 8 or later Windows Vista 7 8 10 Carefully unpack the box and make sure the Apollo package contains the following items One Apollo cloud server One Ethernet cable One AC pow...

Страница 6: ...re it will be able to connect to the Internet USB 3 0 port You can use this to back up data on your Apollo Connect to a USB memory device to transfer back up data Power insert Use the AC power adapter shipped with your Apollo Reset button Press to restart the Apollo Link Speed LED Green light is 100 Mbps Amber light is 1000 Mbps Link LED Yellow light indicates a connection If there is no connectio...

Страница 7: ...med A white light indicates the device is connected and operating A white light flashing quickly on and off flashing on for about 0 3 seconds once per second means it has just completed reporting to the public server and the management software is loaded and ready A white light flashing on and off slowly flashing on for about 1 5 seconds every second interval indicates there is activity on the Apo...

Страница 8: ...adapter power cord to the power insert on the back of the device Plug the other end of the adapter into a suitable power source Connecting the network cable Use the included Ethernet cable to connect to the network port on the back of the device Connect the other end to a networking device that allows the Apollo to connect to the Internet such as a broadband router or office Ethernet LAN that is c...

Страница 9: ...Hardware Setup 5 Return to Table of Contents Click here to get help online Example hardware setup for Apollo ...

Страница 10: ... App on your iOS or Android device or Mac or Windows computer Instruction for downloading the App are included below Once you have the App installed use the App to locate and claim your Apollo There are three different methods available for claiming the Apollo The automatic method is the most convenient Most users will be able to use this method Please read Claiming Apollo automatic method on page...

Страница 11: ...llo Cloud App To claim the Apollo using your iOS or Android device first download the APP from the Apple Store Google Play or go to http www promise com Apollo Downloads Run the App you will see the login screen Touch on link labeled Find it to begin the claiming procedure Apollo Cloud App Login Apollo Cloud App icon ...

Страница 12: ...ot listed see next page or not recognized please skip ahead to use one of the alternative methods for claiming the Apollo You can use the QR scanner embedded in the Apollo Cloud App and scan the QR code included in the Apollo package please see instructions in Claiming Apollo QR code scanner method on page 13 If you are unable to scan the QR code you can manually enter the Serial Number and Key Co...

Страница 13: ...ter your email address and a password you want to use for access to Apollo This will be the account information you will use as the Apollo owner to login and manage the device The password must be at least 6 characters in length and contain at least one numeral Make sure to create a password that is difficult to guess Notice there is a blank box that states you agree to the Promise Apollo Privacy ...

Страница 14: ...s the Apollo owner If you do not see the email check your spam folder It might be mistaken by your email service to be an advertisement 4 Type the validation code in the space provided and touch Next 5 That s it If you have typed the validation code correctly you should be logged in and ready to start using Apollo Type validation code you received via email Success Now a brief introduction to Apol...

Страница 15: ...nu The Camera Roll will automatically upload the contents of the Camera Roll photos on your phone Then any photos you take will be uploaded automatically when the phone has a connection to the Apollo Next you see the file type categories applied to files Files are categorized automatically in the case of Photos Videos and other types of Files text pdf etc or use Create Folder to add file folders u...

Страница 16: ...oud App 12 Return to Table of Contents Click here to get help online The finale introduction tip displays the Share icon used for sharing files with other Apollo members or other contacts Introduction tip 3 Share content ...

Страница 17: ...t is embedded in Apollo Cloud App exclusively for this purpose If your mobile device has a working camera it will be able to use this method Please locate the QR code on a card included with your Apollo then follow these steps to complete the QR code scanner method for claiming the Apollo 1 If you do not see your Apollo device listed in the Choose your Apollo menu touch to select I don t see my Ap...

Страница 18: ...e account information you will use as the Apollo owner to login and manage the device The password must be at least 6 characters in length and contain at least one numeral Make sure to create a password that is difficult to guess Notice there is a blank box that states you agree to the Promise Apollo Privacy Policy If you wish to see the policy touch Promise Apollo Privacy and the text of the poli...

Страница 19: ...n code in the space provided and touch Next 8 That s it If you have typed the validation code correctly you should be logged in and ready to start using Apollo 9 The first time you successfully access the newly claimed Apollo you are greeted with a series of on screen introductory tips to help you become familiar with the Apollo interface see next page To skip the introduction touch Skip at the bo...

Страница 20: ...ached to the bottom of the device housing with the Serial Number and Key code printed on it in small font You might need a magnifying glass to read it Keep in mind that the Serial Number and key code are case sensitive so they must be entered exactly as they appear on the key card or on the bottom of the Apollo device Follow these instructions if you do not see the Apollo listed when you are asked...

Страница 21: ...nter the Serial Number and Key code exactly as they appear written on your Key card or on the bottom of the Apollo device housing Then touch Next The remaining steps are now exactly the same as if the Apollo had been discovered automatically Enter Serial Number and Key code Serial Number Key code Touch Next ...

Страница 22: ...box indicating you agree to the policy Then touch the Next button 5 Check your email account for the validation code Use this to verify your account and bind your email address as the Apollo owner If you do not see the email check your spam folder It might be mistaken by your email service to be an advertisement 6 Type the validation code in the space provided and touch Next 7 That s it If you hav...

Страница 23: ...cument are from the iPhone the Android interface is nearly identical in appearance but there is no functional difference between the two versions Apollo Cloud first login In addition of uploading content from your iPhone the Apollo Cloud App be used to transfer content from other Cloud storage such as Google Drive One Drive or any other public cloud service you can access with your iOS mobile devi...

Страница 24: ...er public cloud service you can access with your Android mobile device Use the Add document feature to transfer files from the public cloud to Apollo Android Apollo Cloud main menu Add photos videos etc from your Android phone Access files by category All files Favorites Photos and Videos Go to Settings menu to change device name invite members read notifications etc Toggle Select Select All to ch...

Страница 25: ... the Photo Albums menu to open the folder and view thumbnails of the content How to add content create folders manage files You can start manually adding content from your mobile device or computer by touching Add content near the top of the Apollo Cloud main menu The procedures for adding video photos and other files and nearly identical The first example provided shows how to add photos from an ...

Страница 26: ...ing photo files scroll up and down through the folder When you have chosen the files you want touch Complete to being uploading The time it takes to upload depends on the amount of data photos you selected and the speed of your WiFi or Wireless Data connection A maximum of up to 100 photo video files can be selected for upload Document files can be selected one at a time for upload Select photos t...

Страница 27: ...ment shortcuts For any file that you see in the Apollo Cloud interface you can choose to make a comment assign or remove Favorite status or send it to the Trash The shortcut for these actions is hidden To reveal the shortcut touch and hold in the on the right edge of the file row then swipe the shortcuts to the left as they appear All files and folders File menu icons Reveal shortcuts to Favorite ...

Страница 28: ... you see in the Apollo Cloud interface you can choose to make a comment assign or remove Favorite status or send it to the Trash The shortcut for these actions is hidden To reveal the shortcut touch and hold in the on the right edge of the file row then swipe the shortcuts to the left as they appear Copy Move Rename menu links Rename file ...

Страница 29: ...es menu or in Camera Roll see File management shortcuts or open a folder select the files you want to make Favorites and touch the Favorite icon at the bottom of the menu The files you made Favorites will now appear in the Favorites folder Important Files placed in the Favorites category are downloaded and stored on your mobile device and therefore will use storage space Keep this in mind when you...

Страница 30: ...n range of a WiFi connection to the Internet but your mobile device must support a wireless Internet data connection via a 3G and 4G network Wireless Internet data transfer is enabled separately in the same place you enable automatic uploads from your Camera Roll You should only enable this if you cannot use a local WiFi connection to access the Internet since there are typically usage fees for th...

Страница 31: ...e right Note that Camera Rolls must be enabled in order to use the Cellular Data network Important Cellular Data capability must available and enabled on your mobile device in order to use this feature The ability to use the Cellular Data network is controlled by the operating system If your mobile service includes this feature you will need to enable it in the Settings menu of your mobile device ...

Страница 32: ...ct the fellow Apollo members that can view videos or pictures that are shared Users also have the option to share their own user content with the public Adding new members In addition to sharing files and folders the Apollo owner can send invitations for membership to share space on the Apollo This is an exclusive privilege of the Apollo owner To add a new member to the Apollo user group follow th...

Страница 33: ... Table of Contents Click here to get help online 2 Touch Add new member enter a name for the new Apollo member to whom you will send an invitation and select OK to create the new member account Select Add new member Enter name for new member ...

Страница 34: ...line 3 Now you are asked to send an invitation to the new member In the new menu the member name appears with a message telling you that the member invitation link has been copied to the clipboard You can choose a messaging or email program to send it Choose method to send invitation ...

Страница 35: ...iving the invitation the new member can activate the link in the message this will bring up a web referral menu where the recipient can choose to go to the App Store or Google play to get the Apollo Cloud App If the App is already installed then activating the link launches the App The new member then must login and create a password similar to the Apollo setup procedure for claiming the Apollo Au...

Страница 36: ...ently remove all content stored by that member To delete a member from the Apollo user group go to the Members menu select the member that you want removed and choose the Delete option A dialog pops up asking that you confirm that you want to delete the member To permanently delete the member content and remove the member from the Apollo user group type confirm and touch OK Confirm you want to rem...

Страница 37: ...w Apollo members that can view videos or pictures that are shared Users also have the option to share their own user content with the public Adding new members In addition to sharing files and folders the Apollo owner can send invitations for membership to share space on the Apollo This is an exclusive privilege of the Apollo owner To add a new member to the Apollo user group follow these steps 1 ...

Страница 38: ... Table of Contents Click here to get help online 2 Touch Add new member enter a name for the new Apollo member to whom you will send an invitation and select OK to create the new member account Select Add new member Enter name for new member ...

Страница 39: ...line 3 Now you are asked to send an invitation to the new member In the new menu the member name appears with a message telling you that the member invitation link has been copied to the clipboard You can choose a messaging or email program to send it Choose method to send invitation ...

Страница 40: ...iving the invitation the new member can activate the link in the message this will bring up a web referral menu where the recipient can choose to go to the App Store or Google play to get the Apollo Cloud App If the App is already installed then activating the link launches the App The new member then must login and create a password similar to the Apollo setup procedure for claiming the Apollo Au...

Страница 41: ...Return to Table of Contents Click here to get help online Sharing folders and files with members Follow these steps 1 Go to the Apollo device menu then select My Sharing to view the Share To menu Share To menu Go to the device menu ...

Страница 42: ...Link list displays by default select one or more Apollo members for sharing 3 Set sharing permission Sharing with members can be read only members cannot change files or upload to folders or read write members can upload and change files Select a member from the list Set sharing permission for folder ...

Страница 43: ...Table of Contents Click here to get help online 4 Select the Send button to send the invitation s to share the folder or files A pop up message informs that the invitation s are on their way 5 Click OK to close the menu Click OK to close menu ...

Страница 44: ... to individual files The files can be viewed or downloaded The public link is automatically copied to your clipboard for pasting into a social media site or email You can also choose an App for sharing the link To create a public share 1 Go to the Apollo device menu then select My Sharing to view the Share To menu Share To menu Go to the device menu ...

Страница 45: ...Choose the App you wish to use for sharing the link Alternatively you can paste the link into an email or on a social media site The link is automatically copied to your clipboard when you touch Send 3 Follow the procedure for link sharing according to the App you selected Chose how to share ...

Страница 46: ...ic links to see what you are currently sharing To remove a Public sharing link select the file in the list and touch the Trash icon to remove the Public link Folders displayed under Public link are used by the management server for the individual public links You cannot share a folder with a public link If you select the Trash icon for a folder in Public link it will remove all public links contai...

Страница 47: ...ntent stored by that member To delete a member from the Apollo user group go to the Members menu select the member that you want removed and choose the Delete this member option A dialog pops up asking that you confirm that you want to delete the member To permanently delete the member content and remove the member from the Apollo user group type confirm and touch OK Confirm you want to remove a m...

Страница 48: ... The deleted files are sent to the Trash folder Files in the trash can be restored from the Trash to the original location or they can be permanently removed by the user Delete files send to Trash To remove files from any folder you control simply select the files by touching Select or Select All then touch the Trash icon at the bottom of the menu A menu pops up asking if you really want to delete...

Страница 49: ... Trash folder you wish to restore to the original folder or if you just want to see what is in the Trash folder you can go to the Apollo device menu To see what is in the Trash got to the Settings menu then go to the device menu and finally touch the Trash icon to open the Trash contents folder Got to Trash contents Go to the device menu ...

Страница 50: ... the location they were placed previously select the files from the content listed in Trash and touch the Restore icon You need to confirm that you want the files restored in a pop up menu Touch OK to restore the files or Cancel to leave them in the Trash Restore files to original location View Trash contents Touch here to restore selected files ...

Страница 51: ...y and click the Trash icon at the bottom of the menu If you remove these files at this point they cannot be recovered they are gone from Apollo Make sure this is content you do not want stored on Apollo If you want to permanently delete the files touch OK to delete the files or Cancel to leave them in the Trash Permanently delete files View Trash contents Touch here if you want to permanently remo...

Страница 52: ...SB storage dirve are available using the App or the Apollo Utility For the USB Upload function upload from USB drive to Apollo use the Apollo Utility Note that USB storage drive operations are available only to the Apollo owner USB drive requirements for Apollo Backup and Restore For Apollo Backup and Restore on USB storage functions the USB storage device must fit the following requirements File ...

Страница 53: ...ollo then follow these steps 1 Go to the Settings menu then the device menu in the App Click the Gear icon in the upper left corner of the main menu then find the link to the Apollo device menu The device menu link is the name of your Apollo unit Backing up Apollo content to USB storage Touch Gear icon Go to Apollo device menu ...

Страница 54: ...store 3 If the USB storage device is connected and compatible with Apollo the menu buttons that appear will be solid blue color Touch the Backup my Apollo button to start backing up data Note that if no device is connected or detected the buttons do not function and appear white color Select Backup Restore Start Backup Restore buttons ...

Страница 55: ...lo Cloud App 51 Return to Table of Contents Click here to get help online If no device is detected to use for backup the Apollo Cloud App menu asks you to check to make sure the device is connected No device detected ...

Страница 56: ... data there is to back up the longer it will take to complete the transfer For this reason it is recommended to use a USB 3 0 device since the transfer speed is much faster than legacy USB storage devices When the backup is completed 100 displays under the progress bar Touch the OK button to go back to the Settings menu Backup in progress Backup finished ...

Страница 57: ... to the Settings menu then the device menu in the App Click the Gear icon in the upper left corner of the main menu then find the link to the Apollo device menu The device menu link is the name of your Apollo unit 2 In the device menu touch to select Backup Restore 3 If the USB storage device is connected and compatible with Apollo the menu buttons that appear will be solid blue color Touch the Re...

Страница 58: ...he restore Backup folders are labeled according to date Touch Next to begin the restore process 5 The percentage of data transferred displays in real time When the restore is completed 100 displays under the progress bar Touch the OK button to go back to the Settings menu Choose backup folder to use Restore in progress ...

Страница 59: ...of data being transferred Upload time varies according to how much data is being transferred Keep this in mind if you are uploading a large amount of content To begin a USB Upload to Apollo attach a USB storage device to the USB port on Apollo and use the Apollo Utility to perform the steps below See also Using the Apollo Utility on page 68 1 Click the Settings icon in the top menu bar of the Apol...

Страница 60: ... bar appears this represents how much of the upload has been completed DO NOT DISCONNECT the USB storage device while the upload is in progress 5 When the USB upload is completed a message appears informing you that it is done It is now safe to disconnect the USB storage device USB upload in progress USB upload finished ...
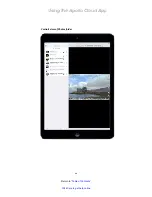
Страница 61: ...the appearance of the Apollo LED indicator and to update Apollo firmware How to view device status information To see some basic information about the Apollo go to the device menu go to Settings then touch the device name near the bottom of the menu If you are experiencing problems with the Apollo Cloud App go to this menu to see if the Apollo is online View device information Information displaye...

Страница 62: ...lt name or from any previously assigned name first go to the Settings menu Follow these steps starting in the Settings menu to change the device name 1 Touch the Apollo device name in the Settings menu to go to the device menu 2 Touch the Name of the Apollo in the device menu A new menu appears for changing the name Access name change menu Go to the device menu ...

Страница 63: ...ghten or turn off LED indicator If you want to change the brightness of the Apollo LED indicator or to turn it off go to the device menu select LED and choose the option you prefer from the list The LED settings choices are Bright Soft and Off If you have multiple Apollo devices you can use the LED control to determine the specific machine to which you are connected Enter new device name ...

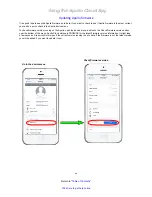
Страница 64: ...e Apollo device menu To check firmware version running on the Apollo open the device menu and touch the Check firmware version button near the bottom of the menu Apollo Cloud will query PROMISE for the latest firmware version information It might take a few seconds A report will inform you if the current version running is up to date If the firmware is not the latest version you will be asked if y...

Страница 65: ... get notifications Periodically the Apollo generates event notifications for system and device events such as a USB backup or a firmware change You can see these by touching the notifications link just below the owner avatar pic in the Settings menu View Apollo notifications Access notifications ...

Страница 66: ...ort scroll down the Settings menu to Send Service Report A new menu appears You can send a report by touching Send in the upper right corner It takes just a few seconds to send a report Service reports are useful to technical support staff if troubleshooting is necessary It is also a good idea to periodically send a report to help PROMISE improve the quality of Apollo Cloud for all users Send serv...

Страница 67: ...t of Apollo Cloud App To sign out of Apollo Cloud go to the Settings menu scroll to the bottom and touch Sign out You will need to login again the next time you want to use Apollo Cloud If you do not sign out you remain logged in even if you turn off your computer phone or tablet device Sign out ...

Страница 68: ... device is used the same way it is used on a smart phone The main difference is in appearance This section provides an introduction to the Apollo App as it appears on a tablet device Please see the relevant material presented in earlier sections to read how to setup and use the Apollo The procedures are the same for both types of mobile devices Login menu on iPad ...

Страница 69: ...blet the same way you use it on a smart phone Apollo Cloud App after login Go to Settings menu to change device name invite members read notifications etc Start adding photos videos etc from your iPhone Toggle Select Select All to choose photos videos and files that appear listed in this menu Access files by category All files Favorites Photos and Videos ...

Страница 70: ...Using the Apollo Cloud App 66 Return to Table of Contents Click here to get help online Portrait view of Photos folder ...

Страница 71: ...he same way as it does for a smart phone Use the management shortcut icons to make a Rename Move Copy assign or remove Favorite status or send a file to the Trash To reveal the shortcut touch and hold in the on the right edge of the file row then swipe the shortcuts to the left as they appear Move Rename Copy Assign remove Favorites status Send file to Trash File management icons ...

Страница 72: ...oud Utility and login the same way you do on a mobile device If you are using the utility to claim a new Apollo the procedure is the same as the claim procedure for a mobile device except there is no QR Code Scanner option Please see Claiming Apollo automatic method on page 10 for a description of the claim procedure for the Apollo To begin the discovery and claim procedure for a new Apollo click ...

Страница 73: ...y launch on system start up or enable disable pop up messages for significant events concerning the Apollo These settings can be changed later in the Settings menu See Viewing software version and Settings on page 78 for details Important When you first login you are offered the option to change the location of the Apollo folder on your system or accept the default location Once the Apollo folder ...

Страница 74: ... versions The main differences are how the different operating systems present icons and menu access for applications in general For Windows an Apollo icon appears in the System Tray and in Mac the Apollo icon appear in the Dock as well as in the menu bar on the top of the desktop in default Mac settings Home Settings Events Apollo Utility icon in Dock on Mac Apollo Utility icon in Windows System ...

Страница 75: ...llo Utility Open sync folder View sync records You can also view the current Firmware version running on the Apollo as well as the current software version of the Apollo Utility The name given to the Apollo device is set by the Apollo owner This name is also used for the sync folder for all Apollo users Right click on Apollo Utility icon in Mac Menu Bar Right click on Apollo Utility icon in Window...

Страница 76: ... copy content create folders delete content etc You can also add content with Apollo Utility from the Home menu Or open the sync folder by right click on the desktop icon When you create folders here those folders are eligible for synchronizing to the Apollo See Using Selective Sync in Apollo Utility on page 76 for details on how to include folders for syncing To add content or create a new folder...

Страница 77: ...uickly locate a file or folder using a keyword search Just type a keyword search term in the Search entry field and press the Enter key Sorting content to view in the Apollo Utility Sorting content in Apollo works the same as it does in your operating system Choose the category Name Size Last Modified etc for sorting at the top of the menu File search on Apollo Sorting files and folders ...

Страница 78: ...opy and paste You can copy from your Mac or Windows computer and paste into a folder on Apollo or copy and paste from Apollo to a location on your computer The keyboard shortcuts are standard for the operating system you are using Operation Windows Mac Copy file to clipboard Ctrl C C Paste file from clipboard Ctrl V V Drag and drop file transfers You can also drag and drop files to copy from your ...

Страница 79: ... happens the sync folder for all members will change to that name To change the device name and the sync folder name follow these steps 1 Click the Settings icon in the top menu bar of the Apollo Utility user interface 2 The top level menu in Settings displays 3 Click on the Edit icon in the Name row of the menu display A new menu pops up 4 Type in the preferred device name for Apollo 5 Click the ...

Страница 80: ... automatic syncing of content between the Apollo Utility and Apollo folder on your computer follow these steps 1 Click the Settings icon in the top menu bar of the Apollo Utility user interface 2 Choose the Selective Sync option in the side bar 3 Click to check mark folders in the Apollo folder you want to synchronize 4 Click the Save button to complete ...

Страница 81: ...n to Table of Contents Click here to get help online Viewing events in Apollo Utility Click the Events icon in the top menu bar to view Events and Invitations Only the Apollo owner can view the Apollo Events menu Members will see only the Invitations list ...

Страница 82: ... Settings To see what version of the Apollo Utility is installed click the Settings icon in the top menu bar and choose the SW version and Settings option This menu is also where you can change default settings to enable or disable automatic launch of the Apollo Utility on system startup and automatic pop up notices for Apollo events ...

Страница 83: ...e amount of data being transferred Upload time varies according to how much data is being transferred Keep this in mind if you are uploading a large amount of content To begin a USB Upload to Apollo attach a USB storage device to the USB port on Apollo and use the Apollo Utility to perform the steps below See also Using the Apollo Utility on page 68 1 Click the Settings icon in the top menu bar of...

Страница 84: ... progress bar appears this represents how much of the upload has been completed DO NOT DISCONNECT the USB storage device while the upload is in progress 5 When the USB upload is completed a message appears informing you that it is done It is now safe to disconnect the USB storage device USB upload in progress USB upload finished ...
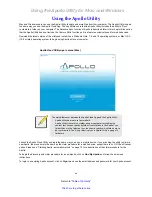
Страница 85: ...onfiguration The pre configured User ID is provided during the Time Machine setup procedure in the Mac OS You will use the Apollo Utility to get the User ID Follow the instructions here to set up Apollo for use as Time Machine in Mac OS 1 In Mac OS open System Preferences and click on the Time Machine icon to open the Time Machine configuration menu 2 Click on the Select Disk button A new menu app...

Страница 86: ... displayed Use this to get access to Apollo for the Time Machine backup 6 Return to the Time Machine setup dialog menu enter the User ID you just received in the Name entry field and enter the password used to for your Apollo account in the Password entry field Click on the Connect button to create the Time Machine configuration 7 If Time Machine is turned on it might be activated shortly after th...

Страница 87: ...rsions The main differences are how the different operating systems present icons and menu access for applications in general For Windows an Apollo icon appears in the System Tray and in Mac the Apollo icon appear in the Dock as well as in the menu bar on the top of the desktop in default Mac settings Home Settings Events Apollo Utility icon in Dock on Mac Apollo Utility icon in Windows System Tra...

Страница 88: ...Utility Open sync folder View sync records You can also view the current Firmware version running on the Apollo as well as the current software version of the Apollo Utility The name given to the Apollo device is set by the Apollo owner This name is also used for the sync folder for all Apollo users Right click on Apollo Utility icon in Mac Menu Bar Right click on Apollo Utility icon in Windows Sy...

Страница 89: ...y content create folders delete content etc You can also add content with Apollo Utility from the Home menu Or open the sync folder by right click on the desktop icon When you create folders here those folders are eligible for synchronizing to the Apollo See Using Selective Sync in Apollo Utility on page 76 for details on how to include folders for syncing To add content or create a new folder cli...

Страница 90: ... hard disk drive has failed Red Bright Long flash Fast pace Reserved for future use White Dim Short flash Slow pace Hard disk drive spin down HDD going to sleep mode White Dim Short flash Fast pace Hard disk drive spin up HDD waking up from sleep mode White and Green Bright ON steady Apollo is booted up and ready to be claimed Apollo not yet claimed White and Red Bright ON steady Network connectio...

Страница 91: ...nformation updates for the most efficient service and support Promise offers free phone and web support for the first 90 days after purchase of the product Additional charges may apply Promise offers local Phone Support for Apollo during normal business hours 7 days per week Please visit the Apollo support help desk portal at https getsupport promise com Home And click on the i HELP DESK link Tech...

Страница 92: ...ur schedule and needs When you contact Technical Support please have the following information available Product model and serial number A description of the problem situation Important You can find the Serial Number on a card that should have been included in the Apollo packaging or look on the bottom of the Apollo Tech Support and Warranty Click here to get help online ...

Страница 93: ...and in cartons on the date of purchase b is not transferable c is valid only when accompanied by a copy of the original purchase invoice d Is not valid on spare parts This warranty shall not apply to defects resulting from a improper or inadequate maintenance or unauthorized modification s performed by the end user b operation outside the environmental specifications for the product c accident mis...

Страница 94: ... be relied on to vary the terms of this limited warranty PROMISE s sole responsibility with respect to any product is to do one of the following a replace the product with a conforming unit of the same or superior product b repair the product PROMISE shall not be liable for the cost of procuring substitute goods services lost profits unrealized savings equipment damage costs of recovering reprogra...

Страница 95: ...oduct needs repair the technician issues an RMA Return Merchandise Authorization number Return ONLY the specific product covered by the warranty Do not ship cables manuals CDs etc You must follow the packaging guidelines for returning products Use the original shipping carton and packaging Include a summary of the product s problem s Write an attention line on the box with the RMA number Include a...

Отзывы: