


8
9
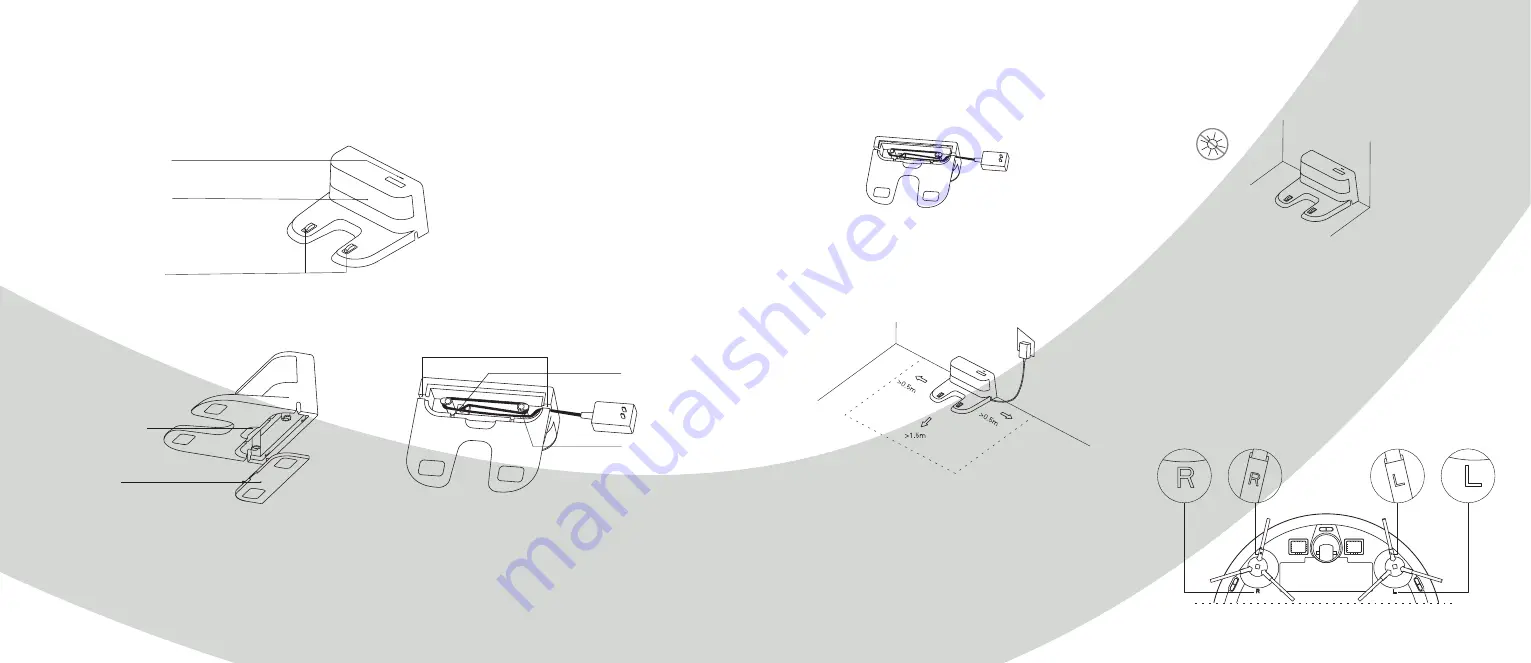
Product Introduction
Power indicator light
Signal emission area
Charging base pins
Catching groove
Cover plate
Wire slot
Power adapter
port
Wrapping post
Charging Base
Installation
Connect the power adapter to the charging base and wrap
the excess cable around the wrapping posts into the slot.
1.
2.
3. Installation of side brushes
To install the side brushes, make sure that the left side brush (L)
and the right side brush (R) correspond respectively, to the L
and R markings on the bottom of the robot. Press down the left
and right brush on either side until you hear a “clicking” sound.
Make the left side brush (L) and the right side brush (R)
correspond to L and R on the bottom case by pressing L and R
until you hear a "clicking" sound.
Place the charging base against the wall, according to the
illustration below. Make sure that there is 0,5m of free
space on both sides of the base and 1,5m of free space in
front of it.
Connect the power adapter to a wall socket. The charging
indicator will light up.
Note:
Do not move the charging base. If the charging base
I moved, the robot may lose its map and fail to return to the
charging base. When restarted, the host will rebuild and
motorize the map, but the rebuilt map may lose cleaning
information about forbidden areas, scheduled cleanings etc.
Do not place the charging base in direct sunlight as it will
interfere with recharging signals that will make the robot
unable to return to the charging base.
Содержание SMART HOME W411-E J300
Страница 1: ...1 PROKORD SMART HOME W411 E...
Страница 15: ...28 For a smarter way of life...


