


Installation and Wiring
58
5
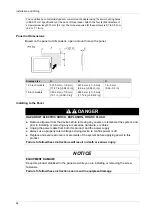
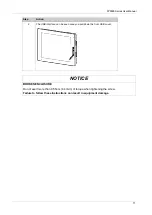
Using a Phillips screwdriver, gradually tighten (turn clockwise) the screws for
the fasteners (top, bottom, left, and right), alternating diagonally between
screws until all are secure. Be sure that the L-shaped part of the installation
fastener (2 in figure below) is completely vertical. The necessary torque is
0.5 N•m (4.4 lb-in).
NOTE:
If this product is not mounted properly, it may fall.
If the panel is thick (approx. 5 mm [0.2 in]), you may have trouble
straightening the L-shaped part of the installation fastener. If this happens,
push this product from the front as you tighten the screws.
1
Installation fastener
2
L-shaped part of the installation fastener
Number of Installation Fasteners
15-inch models:
Top - 2, Bottom - 2, Right - 2, Left - 2
12-inch models:
Top - 2, Bottom - 2, Right - none, Left - none
NOTICE
BROKEN ENCLOSURE
Do not exert more than 0.5 N•m (4.4 lb-in) of torque when tightening the fastener’s screws.
Failure to follow these instructions can result in equipment damage.
Step
Action
Содержание FP5000 Series
Страница 1: ...FP5000 Series User Manual FP5000 MM01 EN PDF_02...
Страница 6: ...6...
Страница 10: ...10...
Страница 22: ...Overview 22 KC Markings...
Страница 26: ...Device Connectivity 26...
Страница 30: ...Parts Identification and Functions 30...
Страница 48: ...Dimensions 48 FP 5600TPD External Dimensions 1 Front 2 Left 3 Bottom...
Страница 50: ...Dimensions 50 FP 5700TPD External Dimensions 1 Front 2 Left 3 Bottom...
Страница 52: ...Dimensions 52...
Страница 72: ...Installation and Wiring 72...
Страница 88: ...System Specifications and Launcher 88...