29
29
Owner’s Manual
Ov
er
vie
w
Ho
oku
p
Co
nn
ec
tin
g
to
a
Co
m
pu
te
r
Tu
to
ria
ls
Te
ch
ni
ca
l
Inf
orma
tion
Tro
ub
le
sh
oo
tin
g
and
W
arr
an
ty
So
ftw
ar
e:
Vi
rtu
al
St
ud
io
Liv
e
SL
R
em
ot
e,
and S
tudio O
ne A
rtist
Software: Virtual StudioLive and Studio One Artist
4
So
ftw
ar
e:
Vi
rtu
al
St
ud
io
Liv
e
and S
tudio O
ne A
rtist
29
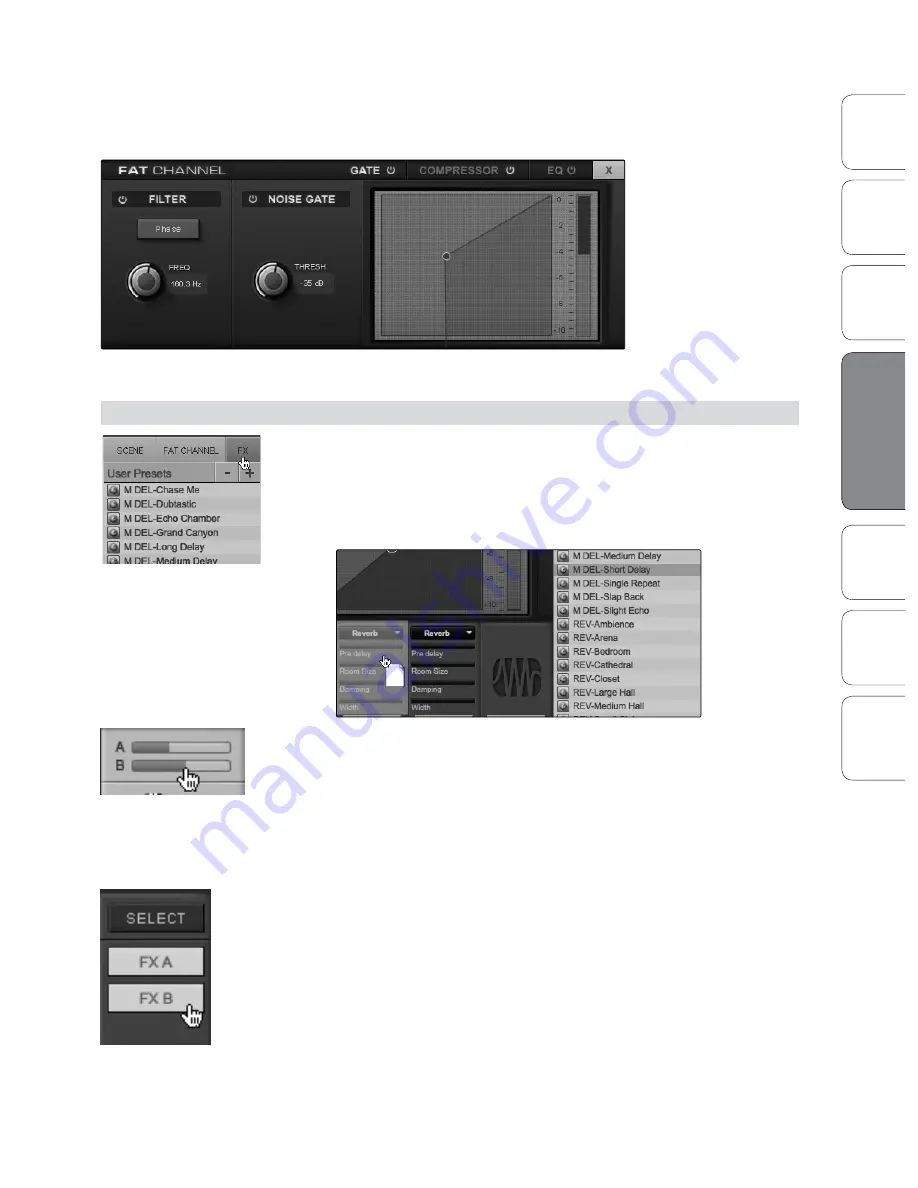
From the Fat Channel window, you will see three buttons: Gate,
Compressor, and EQ. To view each processor, simply click on its button.
(
The Fat Channel for the AudioBox 22VSL is pictured below)
STEP 4:
Creating an Effects Mix
Once you have your levels set and your Fat Channel processing dialed
in for each input, you can add reverb and delay to your monitor mixes.
To begin, you must first assign an effects preset to a bus. Click
on the FX tab and select one of the presets. To use that preset,
simply drag-and-drop it onto one of the FX buses (A or B).
An effects mix is created just like a mix for Outputs 3 and
4 on the AudioBox 44VSL: by using a channel send. The
A and B channel sends control the volume settings for
each channel to FX buses A and B, respectively.
To control the overall amount of the effects you will
hear in your mix, use the FX A and FX B faders. These
will raise and lower the 100% wet effects mix.
AudioBox 44VSL users:
It is important to mention both FX bus A and FX
bus B must be patched to an output pair in order to hear them in the mix.
On each of the output buses (Out 3&4 and Main), you will see buttons
labeled FXA and FXB. These buttons route the output of the FX buses
to the physical outputs on your interface. By default, both FX buses are
routed to all outputs.
Virtual Studio Live 4.1
Содержание AudioBox 22VSL
Страница 78: ...74 74...


