


9
© 2013 PreSens Precision Sensing GmbH
Fibox 4 & Fibox 4 trace
Installation
3 Installation
3.1 Set-up
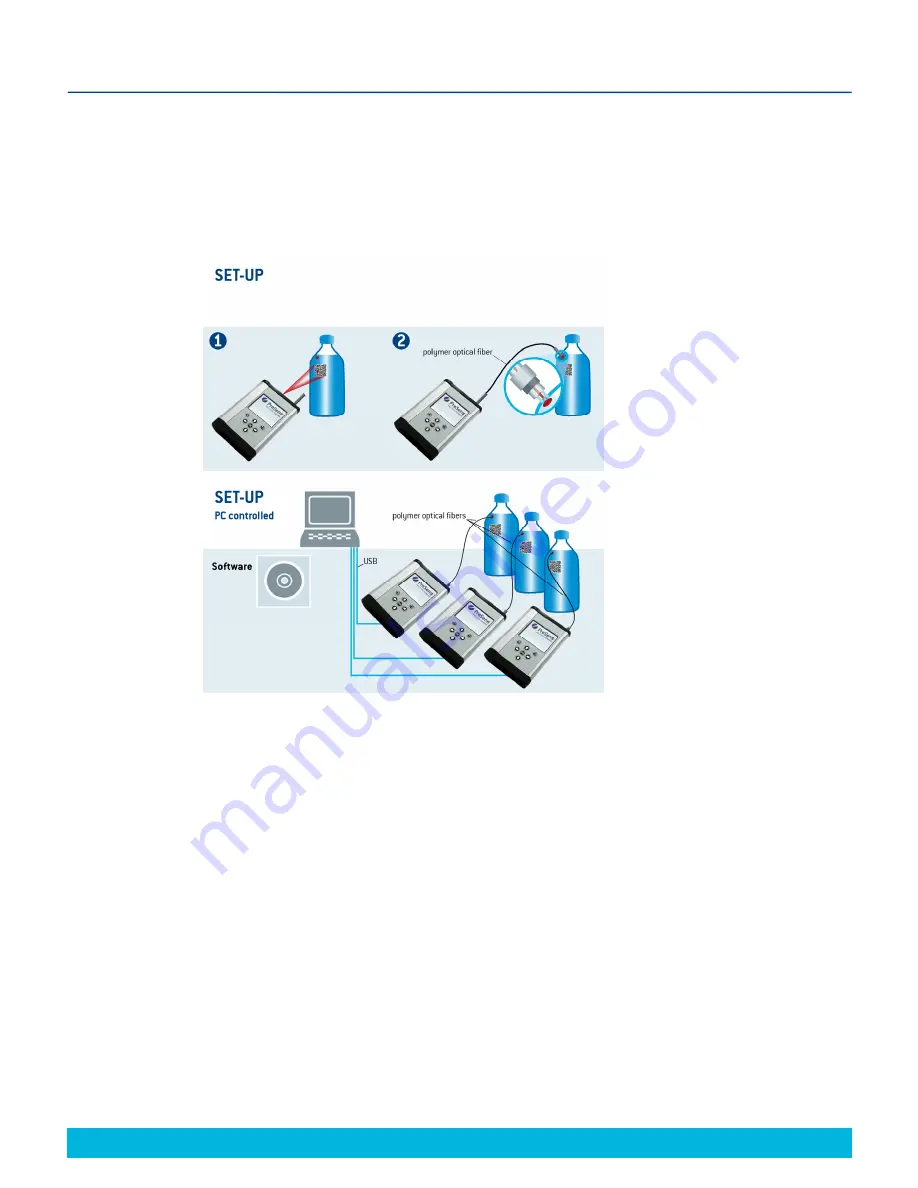
A typical set-up is shown in Fig. 7. After barcode scan and sensor recognition the sensor spot
is read out non-invasively via a polymer optical fiber which is connected to the transmitter.
The Fibox 4 & Fibox 4 trace are completely stand-alone devices, and have to be connected to
a PC / notebook for data transfer only. However the transmitters can be connected to a PC /
notebook via USB and controlled with the extended software version (see Fig. 7, bottom).
This software allows operating up to 10 Fibox 4 / Fibox 4 trace simultaneously (please contact
our service team for further information!).
The software is compatible with Microsoft
®
Windows
®
XP, Vista
TM
, 7, or 8
.
Remove the rubber cap from the optical sensor connector (SMA connector) and keep the cap.
After measurements or for storing the transmitter the rubber cap should be put back on to
keep the optical sensor connector clean.
!
It is recommended to clean the SMA connector with a dust free cleaning wipe or a
cleaning implement for SMA connectors before the measurement.
Fig. 7
Set-up for Fibox 4 & Fibox 4 trace. Top: Stand-alone use; bottom: PC controlled
use with the extended software, e. g. parallel control of 3 transmitters.
Содержание Fibox 4 trace
Страница 1: ...Fibox 4 Fibox 4 trace Fiber optic oxygen transmitters TRANSMITTERS Instruction Manual...
Страница 2: ......
Страница 4: ......
Страница 7: ......
Страница 59: ...54 2013 PreSens Precision Sensing GmbH Fibox 4 Fibox 4 trace Operation Fig 77 pdf file of multiple barcodes...