25
DMC Repair Manual
Parts Replacement
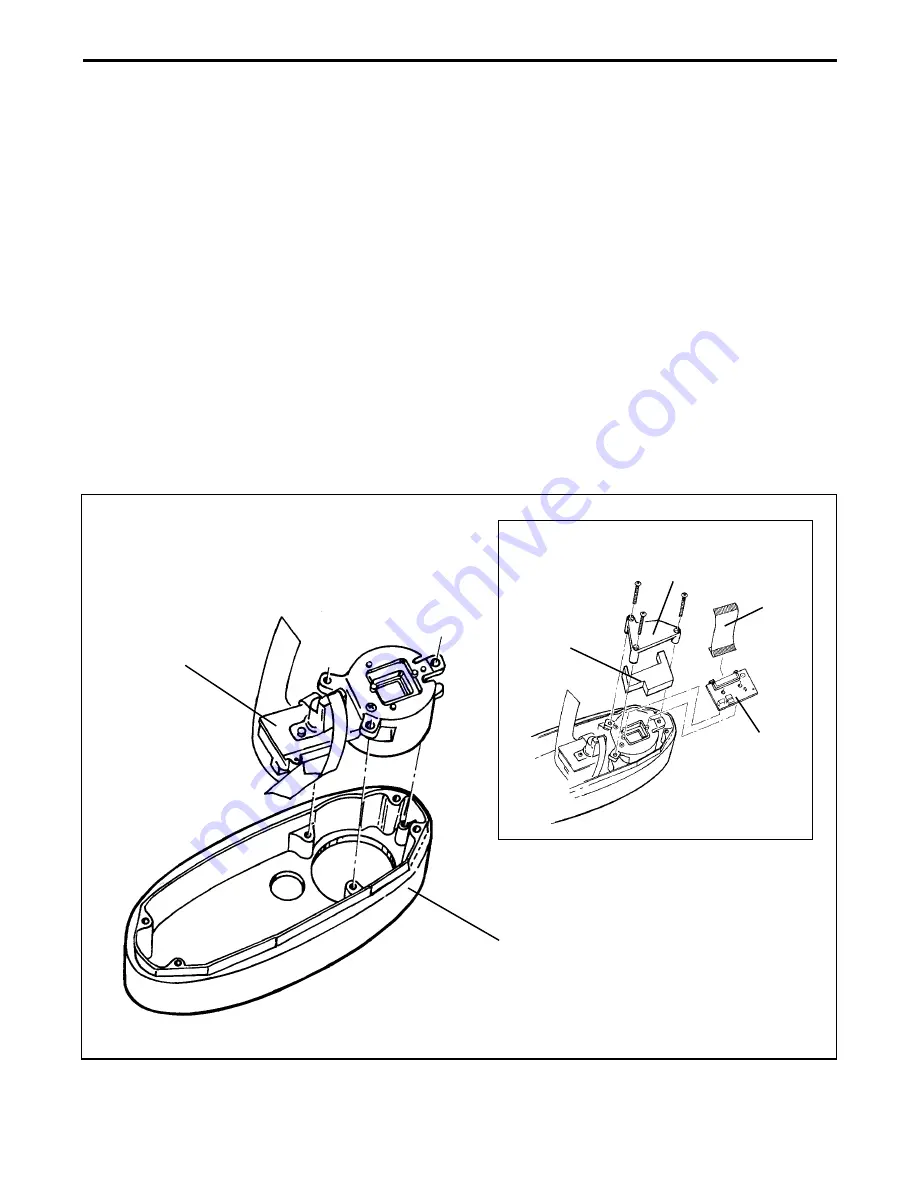
Optics Assembly (Figure 2-6)
Removal
1. Remove the bottom extrusion.
2. Remove the front panel and optics assembly.
3. Place the front panel and the optics assembly onto an anti-static mat.
4. Remove the three (3) screws securing the optics assembly to its front panel supports.
5. Remove the CCD retainer and the backing pad.
6. Lift off the CCD imager from the optical mount being careful not to scratch the CCD imager.
7. Lift out the optics assembly from the front panel.
Figure 2-6. Removing optics assembly
CCD Imager PC
Board
CCD Imager
Retainer
CCD Imager
Flex
Backing Pad
Front Panel
Optics
Assembly
Содержание Digital Microscope Camera
Страница 5: ...1 Camera Overview...
Страница 6: ...6 DMC Repair Manual Camera Overview 1 Camera Overview Contents Overview 7 Features 8 Specifications 11...
Страница 13: ...2 Parts Replacement...
Страница 37: ...3 Testing and Adjustment...


