Planmeca Proline EC Panoramic X-ray 25
TEMPOROMANDIBULAR JOINT EXPOSURE (P10)
User's manual
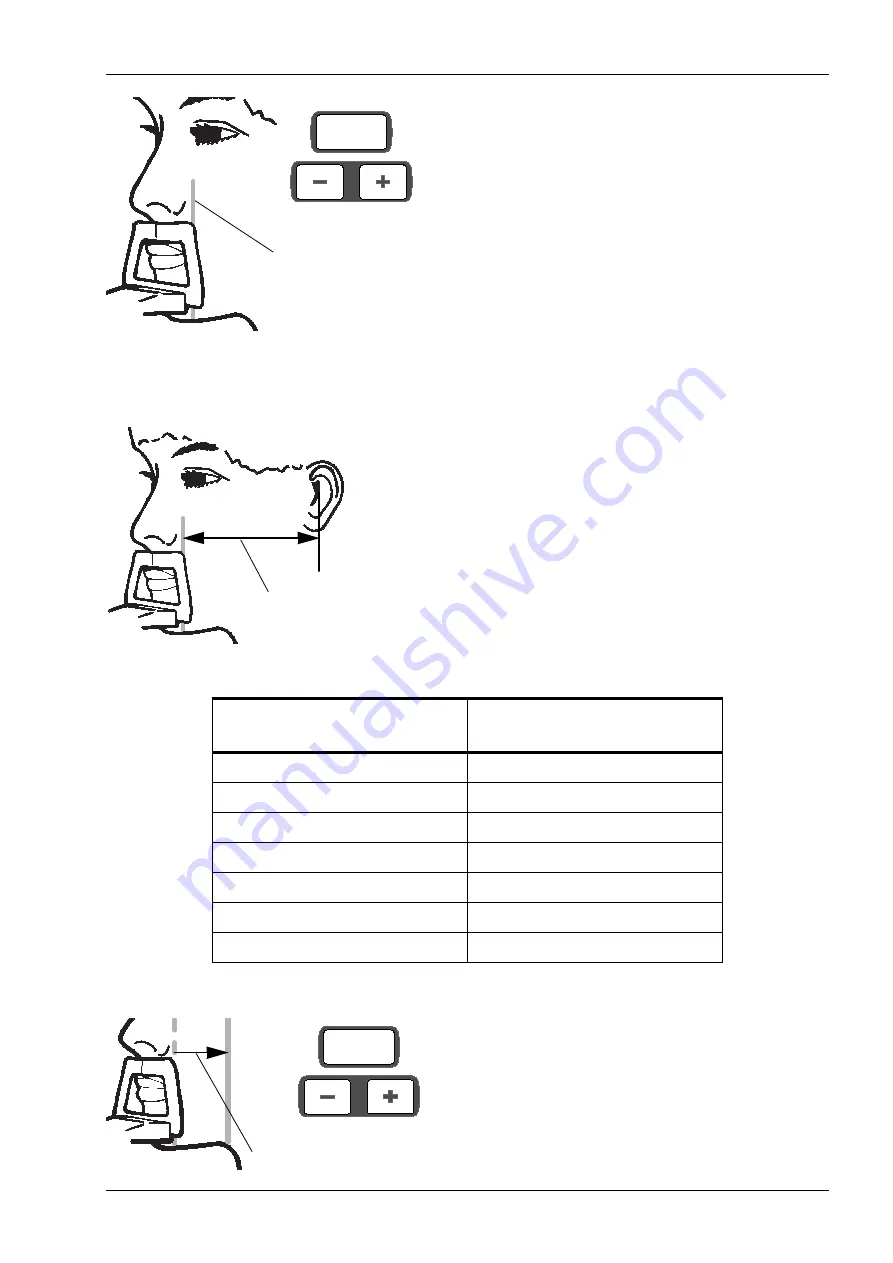
Position the apices of the patient’s upper central inci-
sors within the image layer (focal trough) of the unit.
To do this ask the patient to open their lips so that you
can see their teeth. Then press and hold either of the
focal trough positioning keys to move the patient posi-
tioning mechanism, and patient, backwards or for-
wards until the focal trough light, which indicates the
center of the focal trough, falls between the second
incisor and the canine. For an average patient posi-
tioning the teeth as described above will place the api-
ces of the upper central incisors within the focal
trough. The minus (-) key moves the patient forwards,
and the plus (+) key moves the patient backwards.
Note the number on the Focal trough positioning dis-
play.
Measure the distance from the focal trough light beam
to the center of the auditory meatus and then deter-
mine, from the table below, how much the patient must
be moved, backwards or forwards, to be correctly posi-
tioned for the temporomandibular joint exposure.
For example: If the number on the display was -04 and
the measured distance is 90 mm, you have to move
patient -8mm and the final position of the patient is
-12mm.
Press either of the focal trough positioning keys to
readjust the position of the patient according to the
measurements given in the table.
POSITIONING GUIDE FOR TEMPOROMANDIBULAR JOINT EXPOSURES
Distance from light beam to
auditory meatus
Adjustment to the position
of the patient
80 mm
+8 mm
85 mm
+4 mm
90 mm
0 mm
95 mm
-4 mm
100 mm
-8 mm
105 mm
-12 mm
110 mm
-16 mm
Focal trough light
mm
-04
Measure this distance
mm
Readjust patient position
-12
Содержание Proline EC Panoramic
Страница 1: ...Planmeca Proline EC panoramic USER S MANUAL Publication number 688043 Version 20 Published 2005 08 En...
Страница 2: ......
Страница 59: ......


