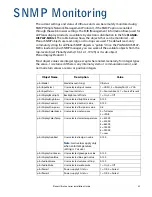


Planar UltraLux Remote Monitoring
Planar UltraLux Series Installation Guide
53
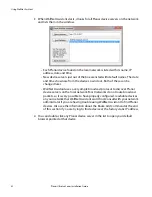
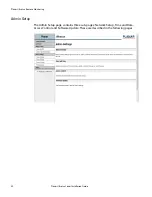
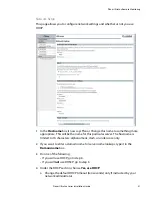
Date and Time
Use this page to change date and time information as needed.
1
Set the date and time manually in the box under the Manual Date and Time
section. The date format is very exact. Fill in the current date and time using
exactly the format shown on the page. Click
Set date and time
.
2
If you want to have the server periodically check the time from a network source,
fill in the NTP server name or address, and poll interval in the Date and Time
Server section. Click
Apply new date and time server settings
.
Note:
If you don’t have a preferred NTP server, then
www. pool.ntp.org
is a reasonable choice
for most installations.
3
Carefully read the instructions in the Local Time Zone section. Fill in the text box
and click
Set time zone
.
Note:
The start and end of daylight saving time default to the first Sunday of April and the
last Sunday of October. As of 2007, U.S. locales that observe daylight saving time must enter
start and end dates in this section. For example, EST5EDT,M3.2.0,M11.1.0 is correct for U.S.
Eastern time zone as of 2007.
Содержание UltraLux Series
Страница 1: ...Planar UltraLux Series...
Страница 58: ...On Screen Display Menus 58 Planar UltraLux Series Installation Guide Image Menu...
Страница 62: ...On Screen Display Menus 62 Planar UltraLux Series Installation Guide System Menu...
Страница 66: ...66 Planar UltraLux Series Installation Guide UltraLux Dimensions 70 Display Dimensions Front and Side Views...
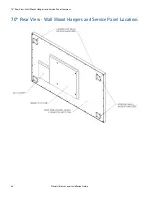
Страница 67: ...70 Display Dimensions Rear View Planar UltraLux Series Installation Guide 67 70 Display Dimensions Rear View...
Страница 75: ...80 Display Dimensions Rear View Planar UltraLux Series Installation Guide 75 80 Display Dimensions Rear View...