


Using WallNet Assistant
44
Planar UltraLux Series Installation Guide
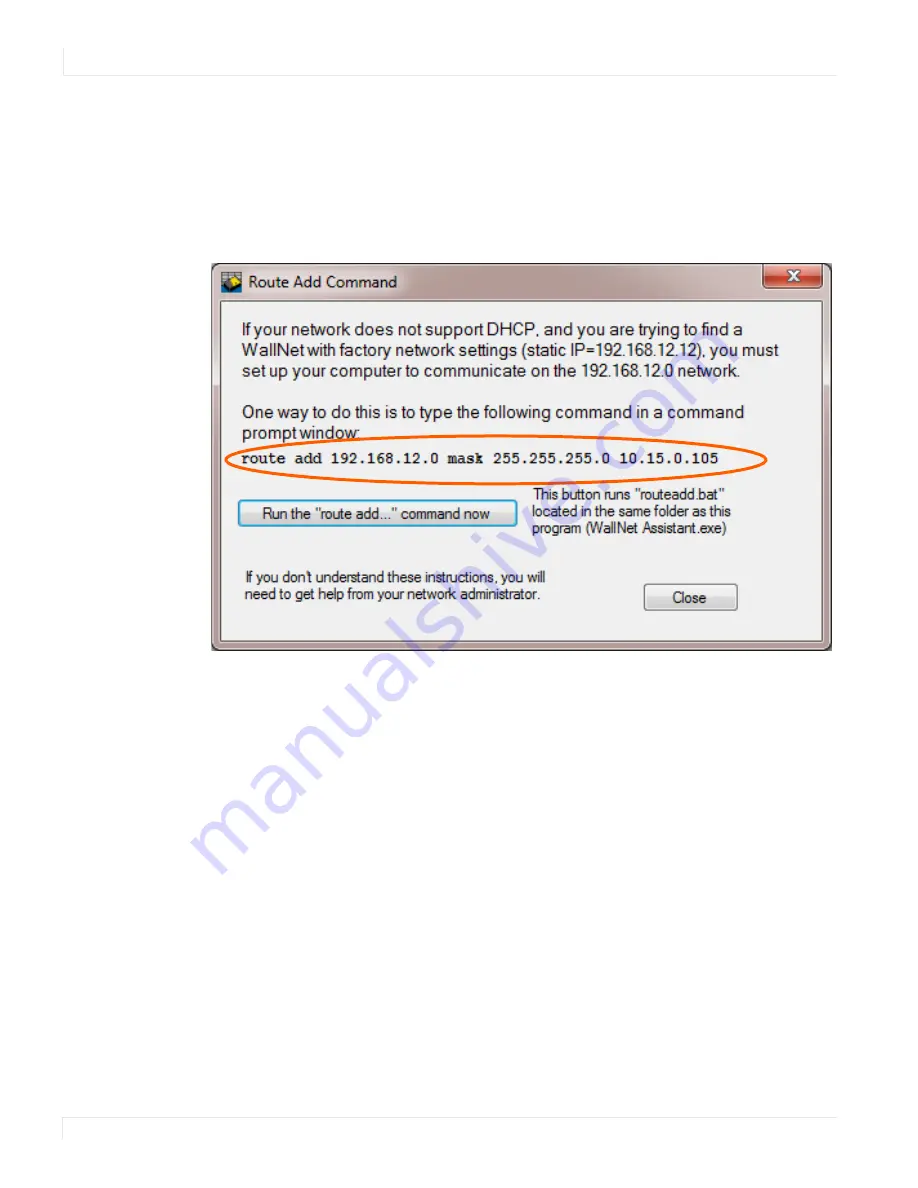
Route Add Command
If you are trying to connect to a Planar device server that you believe is at the factory
default IP address, and your computer is not on the 192.168.12.0 network, then you
can use the route add command to establish a connection from your computer to
that device server. This method only works if your computer and the Planar device
are connected to the same network switch or hub.
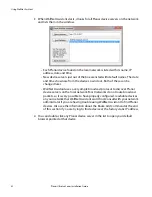
1
When you click the
Route Add Cmd
button, the route add command window (shown
above) opens.
2
The area circled in the example above shows the syntax of the route add
command. The final IP address on the command line must be the IP address of
your computer’s network interface that is connected to the same hub/switch as
the Planar device.
3
You can either type this command into a command prompt or click the
Run the
“route add...” command now
button to launch the routeadd.bat script, which will
run the command exactly as shown.
4
When the route add is successful, it establishes a temporary network route from
your computer to the 192.168.12.0 network. This allows your computer to
communicate with the Planar device server located at 192.168.12.12.
Содержание UltraLux Series
Страница 1: ...Planar UltraLux Series...
Страница 58: ...On Screen Display Menus 58 Planar UltraLux Series Installation Guide Image Menu...
Страница 62: ...On Screen Display Menus 62 Planar UltraLux Series Installation Guide System Menu...
Страница 66: ...66 Planar UltraLux Series Installation Guide UltraLux Dimensions 70 Display Dimensions Front and Side Views...
Страница 67: ...70 Display Dimensions Rear View Planar UltraLux Series Installation Guide 67 70 Display Dimensions Rear View...
Страница 75: ...80 Display Dimensions Rear View Planar UltraLux Series Installation Guide 75 80 Display Dimensions Rear View...