Page
15
of
33
NOTE:
Make sure the length of the newly formed fwd fuselage belly is exactly the length of the
original.
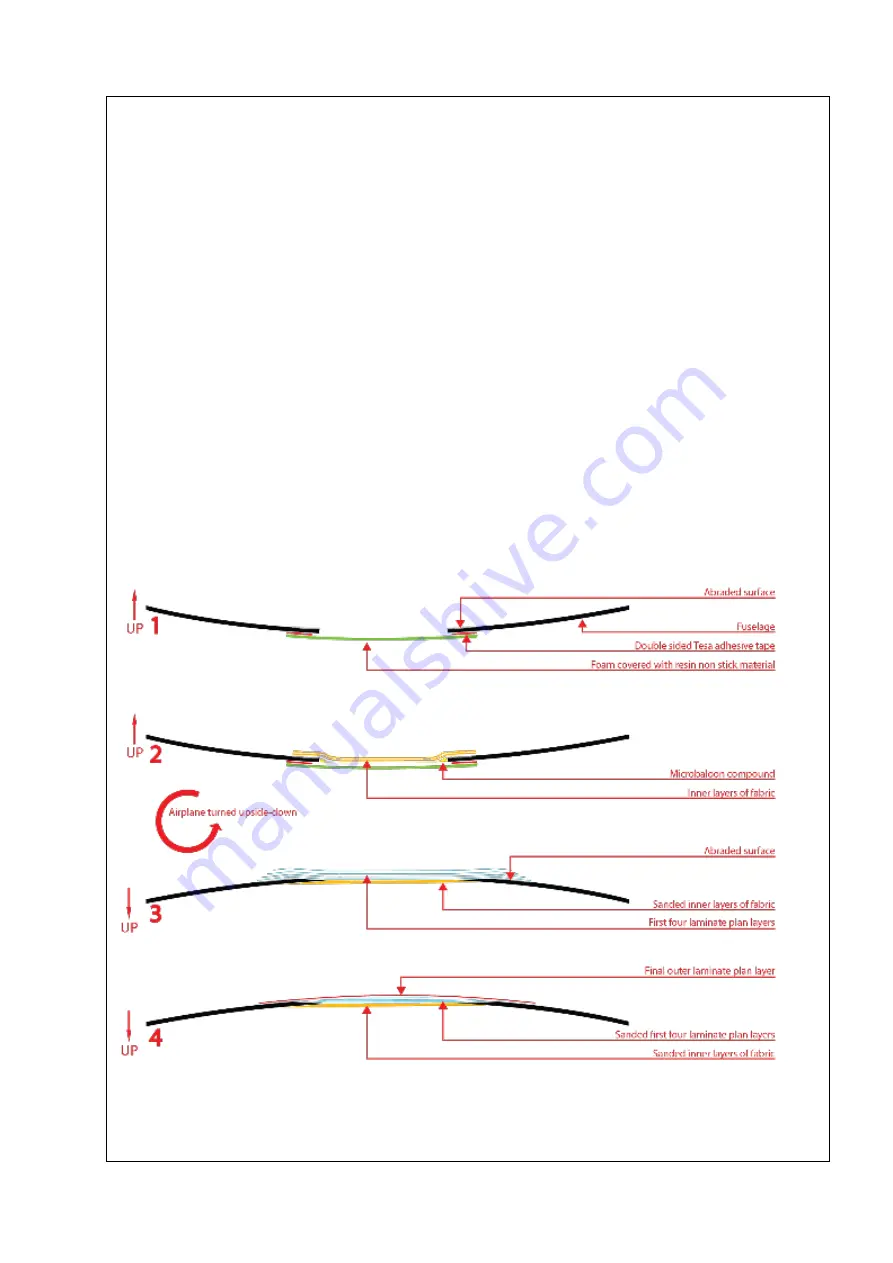
m. Apply the plies and resin over the crack and damaged area on the front edge of the
fuselage belly. Allow to cure for 8 hours at 56°C (Figure 07-003 step 2).
n. Sand the inside repair area to make it flush with the rest of the surface.
o. Turn the airplane upside down. Remove the support plate and sand the outside repair
surfaces. Apply 1:50 taper to the fuselage edges and sand until whole repair surface
(Fuselage edges, microbaloons and inner layers) is smooth (Figure 07-003 step 3).
p. Blow surface clean with compressed air, wipe away dust/debris with acetone and allow to
dry for 30 minutes.
q. Prepare some resin and according to the damage on the airplane bottom, cut the plies
according to the fuselage repair laminate plan.
NOTE:
The first repair ply laid up is always the biggest. Each ply that follows should be 7 mm
smaller than the last. The smallest ply should cover an area with a radius of at least 20 mm
around the damage.
Figure 07-003: Fuselage front edge belly repair


