7
Touch the following keys in the follow-
ing order.
The
“
Audio
”
screen appears.
8
Touch [A-EQ&TA Measurement].
The
“
A-EQ&TA Measurement
”
screen ap-
pears.
9
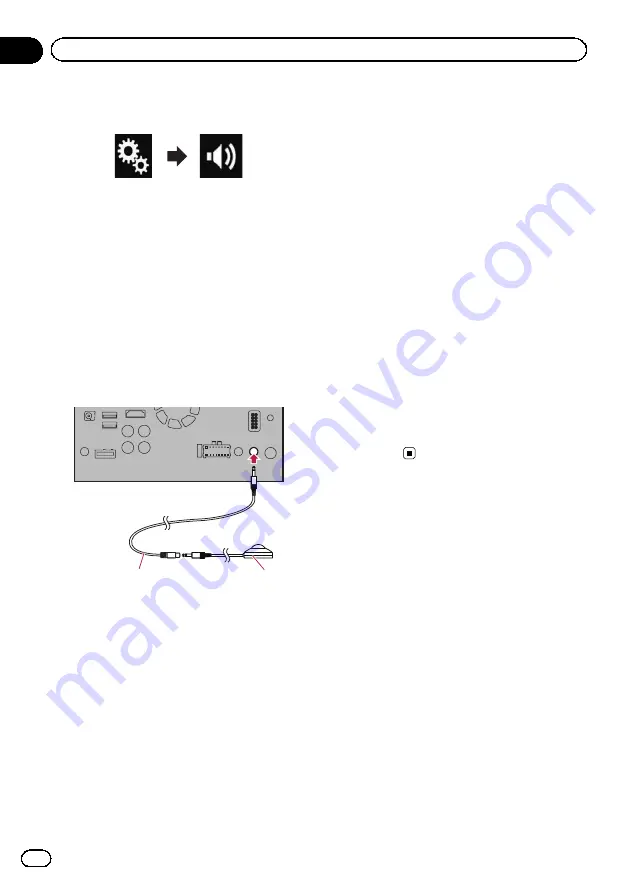
Connect the microphone for acoustical
measurement (sold separately) with this
product.
Connect the microphone with the mini-jack ex-
tension cable, and then plug it into the auxili-
ary input jack on this product.
=
For details of the operations, refer to the In-
stallation Manual.
1
2
1
Mini-jack extension cable
2
Microphone for acoustical measurement
(sold separately)
10 Touch [Front Left] or [Front Right] to se-
lect the current listening position.
11 Touch [Start].
A 10-second countdown starts.
p
The Bluetooth connection is disconnected
before the process starts.
12 Exit the vehicle and keep the doors
closed until the countdown finishes.
When the countdown finishes, a measure-
ment tone (noise) is emitted from the speakers
and the Auto EQ measurement begins.
13 Wait until the measurement is com-
pleted.
When Auto EQ is completed, a message is dis-
played indicating that the measurement is
completed.
p
If the vehicle
’
s acoustics cannot be mea-
sured correctly, an error message will be
displayed.
p
The measurement time varies depending
on the type of vehicle.
p
To stop the measurement, touch [
Stop
].
14 Store the microphone carefully in the
glove compartment or another safe place.
If the microphone is subjected to direct sun-
light for an extended period, high tempera-
tures may cause distortion, colour change or
malfunction.
Engb
96
Chapter
18
Audio adjustments
Содержание SPH-DA120
Страница 129: ...Engb 129 Appendix Appendix Appendix ...
Страница 130: ...Engb 130 ...
Страница 131: ...Engb 131 ...


