195
RS-232C Adjustment
5.5.4 ID Assignment
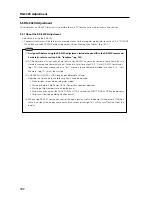
The ID is assigned from the PC.
Commands: <IDC> (ID CLEAR) ........ Clears the assigned ID
<IDS> (ID SET) ............. Assigns an ID
IDS is only effective when an ID is not assigned.
IDs are assigned starting from the panel closest to the PC.
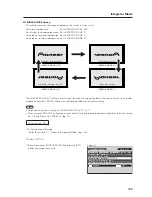
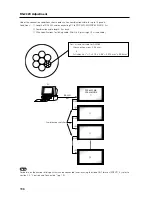
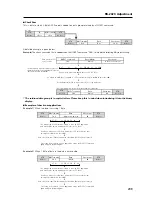
Example: Case of 4 displays (assigning IDs with the PC for the first time)
First, connect an RS-232C and combination cables. (Refer to section 5.5.3, “Combination cables” (pg. 194).)
By sending RS-232C commands in this order, it is possible to assign an ID for each panel.
When a panel has a PC-assigned ID, it can only receive commands containing the ID. Assign an ID before sending a
command.
Characters that can be used for an ID include, 0 - 9 and A - F (there is not distinction between upper case and lower case
letters).
An
∗
(asterisk) can be used as follows:
<
∗∗
IDC>: Clear the IDs assigned for all panels
<2
∗
IN1>: The input for which the first digit is 2 is set to INPUT1
Precautions when assigning IDs
Panels connected after a display’s ID has been cleared cannot be operated with RS-232C commands.
When the <
∗∗
IDC> command is sent, the IDs for all the sets from Set #1 to Set #4 are cleared. Only the first panel,
which is directly connected to the PC, can be controlled.
Send the command <01 IDS> to control the next panel. Continue setting IDs in this way for the remaining panels to
once again control the displays.
Note
When the IDs are set, when one or both of the IDs before a command is sent from the PC is an
∗
, there is no echo.
When sending more commands, wait 6 seconds before sending the next command.
Example)
When
∗∗
OOO and
∗
1OOO or 1
∗
OOO (OOO is the command) are sent from the PC, operation is performed
but there is no echo.
Set #4
ID = 04
Set #1
Set #2
Set #3
ID = 01
Sent commands:
1
<01 IDS>
2
<02 IDS>
3
<03 IDS>
4
<04 IDS>
ID = 02
ID = 03
PC
OUT
IN
OUT
IN
OUT
IN
‘
‘
‘
±
RS-232C connection
Содержание PDA-5003
Страница 81: ...81 Ceiling Mount Unit PDK 5012 ...

