Using the HDMI Control
13
78
En
Input selection for the HD AV Converter
In the HD AV Converter mode, you can select the “INPUT 1” to
“INPUT 5” on the HD AV Converter using
INPUT 1
to
INPUT 5
on the
remote control unit or
INPUT
on the right side of the flat screen TV.
Menu setting download
In the HD AV Converter mode, settings in the following menus for
the flat screen TV’s “INPUT 1” to “INPUT 5” are transferred to
“INPUT 1” to “INPUT 5” on the HD AV Converter connected:
• Picture quality settings in “Picture”
• Sound settings in “Sound”
• HDMI-related settings in “HDMI Input” for “Option”
Like the flat screen TV, these settings can be changed in each of
“INPUT 1”, “INPUT 2”, “INPUT 3”, “INPUT 4” or “INPUT 5” on the HD
AV Converter. If you exit the HD AV Converter mode after having
changed the settings, the changed settings are transferred to each
INPUT on the flat screen TV.
Note
• A Pioneer HD AV Converter is required to use the HD AV
Converter mode. Check the Pioneer Web site (see back cover)
for updated information on the HD AV Converter.
• When using an HD AV Converter, you also need to enter the
setting on the HD AV Converter. For details, refer to the
operation manual that came with the HD AV Converter.
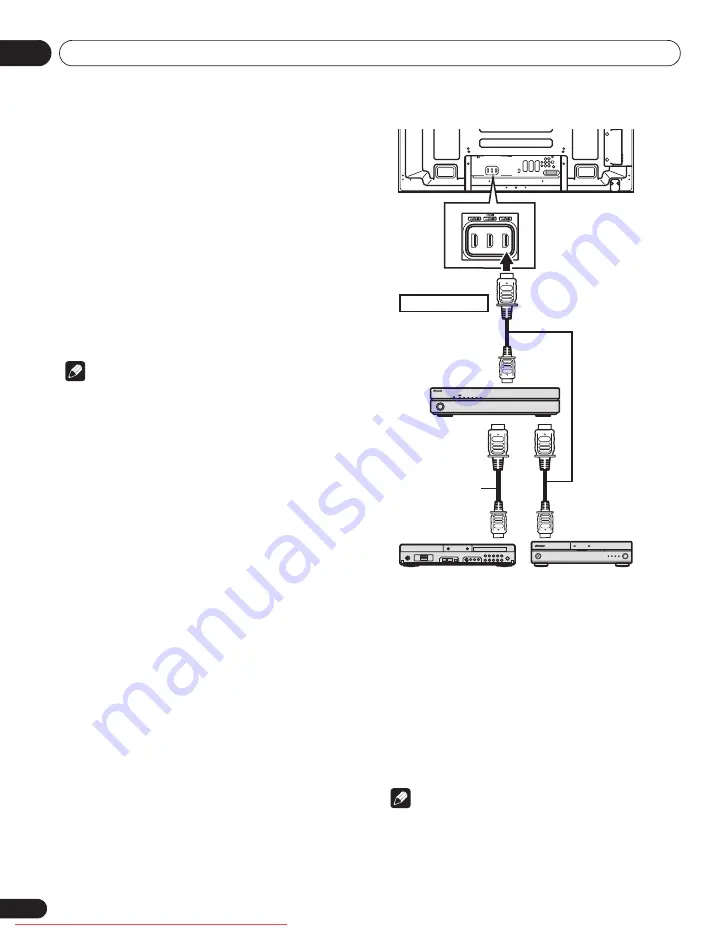
• Do not select “Enable” in the “HD AV Converter” menu if you do
not use an HD AV Converter.
• When selecting “Enable” for the “HD AV Converter” menu, be
sure to connect the HD AV Converter to INPUT 4 on the flat
screen TV.
• In the HD AV Converter mode, only video and audio signals that
are input from “INPUT 1” to “INPUT 5” on the HD AV Converter
connected to INPUT 4 on the flat screen TV will be displayed and
output. Do not connect other devices than a decoder to INPUT
1 to INPUT 3 or INPUT 5. When connecting a decoder, make
sure to use INPUT 1 on the flat screen TV. (see
• You cannot connect and use an AV system and HD AV
Converter at the same time.
• When using the HD AV Converter and a connected recorder/
player, always select the input using the HDMI Control menu.
Selecting the input using
INPUT 1
to
INPUT 5
on the remote
control unit or
INPUT
on the right side of the flat screen TV will
cause the recorder/player to fail to operate.
• In the HD AV Converter mode, do not connect any devices to
INPUT 6 on the HD AV Converter. You cannot select INPUT 6 on
the HD AV Converter.
Power On/Off Test
You can confirm if the Power On/Off control function is effective
between the flat screen TV and the connected device.
1
Press HOME MENU.
2
Select “Option” (
/
then ENTER).
3
Select “HDMI Control Setting” (
/
then ENTER).
4
Select “Power On Test” or “Power Off Test” (
/
then
ENTER).
A list containing devices appears when multiple HDMI devices are
connected to the HDMI terminals.
5
Select the desired device (
/
then ENTER).
6
Press HOME MENU to exit the menu.
Note
• Devices that can be checked for Power On/Off Test are those
connected to HDMI terminals as set in “Input Setting”.
• If the Power On/Off Test fails, check for the connection and
setting.
• The Power On/Off Test cannot be carried out on HD AV
Converters.
T
W
T
W
Connect to INPUT 4
Rear view
DVD recorder
BD player
HDMI compliant cable
(HDMI cable having the
HDMI mark)
HDMI compliant cable
(HDMI cable having the
HDMI mark)
HD AV
Converter
PDP-LX6090.book Page 78 Monday, February 25, 2008 10:08 AM


