onlinecomponents.com
P1 ENGRAVING UNIT
103072_00_en
PHOENIX CONTACT
9
Control Unit Functions and Indicators
The control unit is switched on at the back, the green LED
indicates that it is ready to operate.
The yellow LED indicates that the engraving spindle is
operating without any errors, in the event of an error the red
LED lights up and engraving is no longer possible. For
notes on troubleshooting, please refer to "Troubleshooting"
on page 13.
The control unit automatically controls the vacuum cleaner.
If required, the vacuum cleaner can be operated manually
via the ON and OFF buttons, e.g., to vacuum up any
residual particles following engraving.
Engraving Material
Engraving works in the same way as plotting.
•
Start the CMS-MARK-WIN software.
Setting the CMS-MARK-WIN Software to Engraving
Mode
•
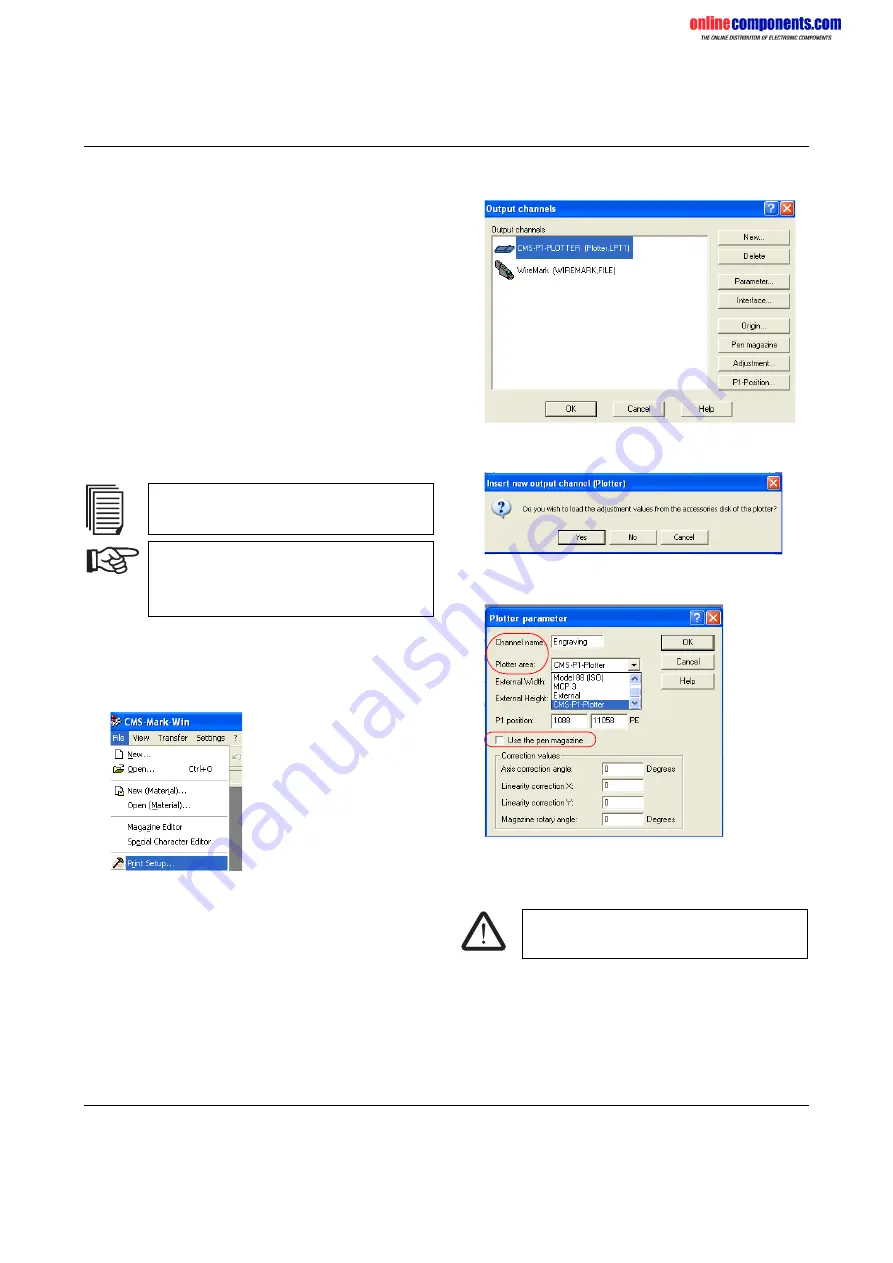
In the CMS-MARK-WIN software, select the "File...
Print Setup..." menu.
Figure 11
File... Print Setup
•
In the following dialog box, click on "New...".
Figure 12
Output channels
•
A dialog window appears, exit it by selecting "No".
Figure 13
Creating a new output channel (plotter)
•
Enter the following values for the plotter parameters.
Figure 14
Plotter parameters
•
Enter a name under "Channel name".
•
Select the "CMS-P1-Plotter" as the "Plotter area".
•
Confirm the parameters with "OK".
The procedure for the plotter is described in the
CMS-P1-PLOTTER-UM E user manual.
Please observe the following points for
engraving, which differ from plotting (see
"Setting the CMS-MARK-WIN Software to
Engraving Mode" on page 9).
Risk of damage to the device
Deactivate the "Use the pen magazine" option.


