onlinecomponents.com
P1 ENGRAVING UNIT
6
PHOENIX CONTACT
103072_00_en
Connection and Assembly on the CMS-P1-PLOTTER
Removing of the Pen Lowering Unit From the Plotter
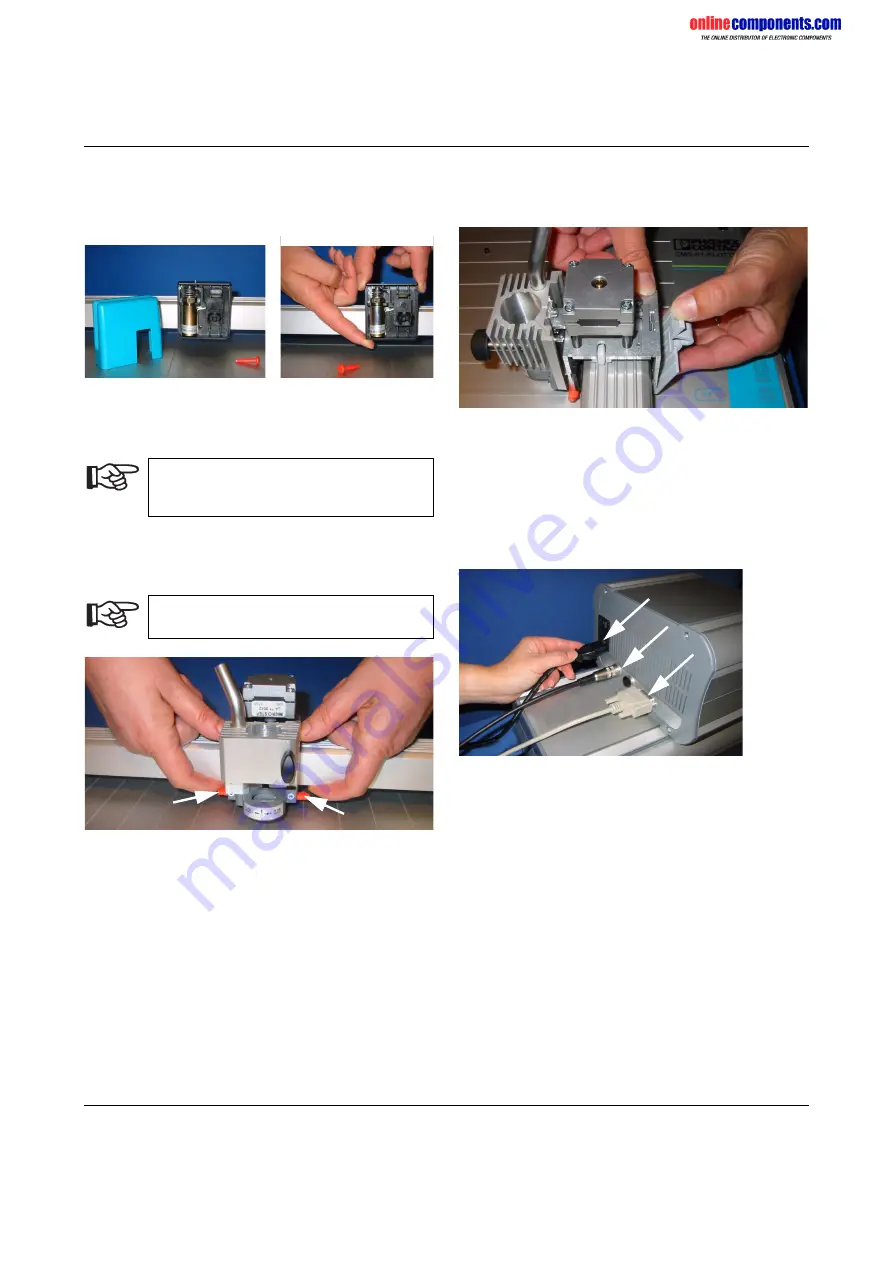
Figure 1
Removing the pen lowering unit
•
Remove the blue-green cover of the pen lowering unit
from the plotter and remove the red locking pin.
•
Loosen and remove the pen lowering unit by gently
"wobbling" it out of the guideway.
Fitting the Engraving Head
Figure 2
Fitting the engraving head
•
Press down on the engraving head as far as it will go
and stabilize the holder from below by applying counter
pressure, so that the plotter arm guideway is not
damaged.
•
So that the engraving head cannot work loose during
operation, close the red interlocking device on both
sides.
•
Check that it is secured correctly.
Figure 3
Attaching the counter bearing
•
Snap the counter bearing onto the engraving head
Setting Up the Vacuum Cleaner and Control Unit
•
Mount the control unit on the vacuum cleaner and
place the two behind the CMS-P1-PLOTTER.
Connecting the Connecting Cables
Figure 4
Connections to the control unit
•
Connect the control unit and vacuum cleaner using the
corresponding 4-pos. cable and tighten the
connections (connection A in Figure 4).
•
Connect the control unit to the CMS-P1-PLOTTER.
Use the gray connecting cable provided and tighten the
knurled screws (connection B in Figure 4).
•
Connect the mains cable provided to the control unit
(connection C in Figure 4).
The fine-wire fuse (4 A) is connected in addition to the
ON/OFF switch.
The pen lowering unit may be secured very
tightly. Remove it very carefully so as not to
damage the holder.
When fitting the engraving head, make sure
that the head is inserted in both guideways.
A
B
C


