


PSR-TRISAFE-S
4-12
PHOENIX CONTACT
103503_en_03
1.
Display the hardware editor ("Hardware Editor" in the "View" menu). If the auto-hide
function is enabled, position the cursor over the minimized window as shown in the
figure below.
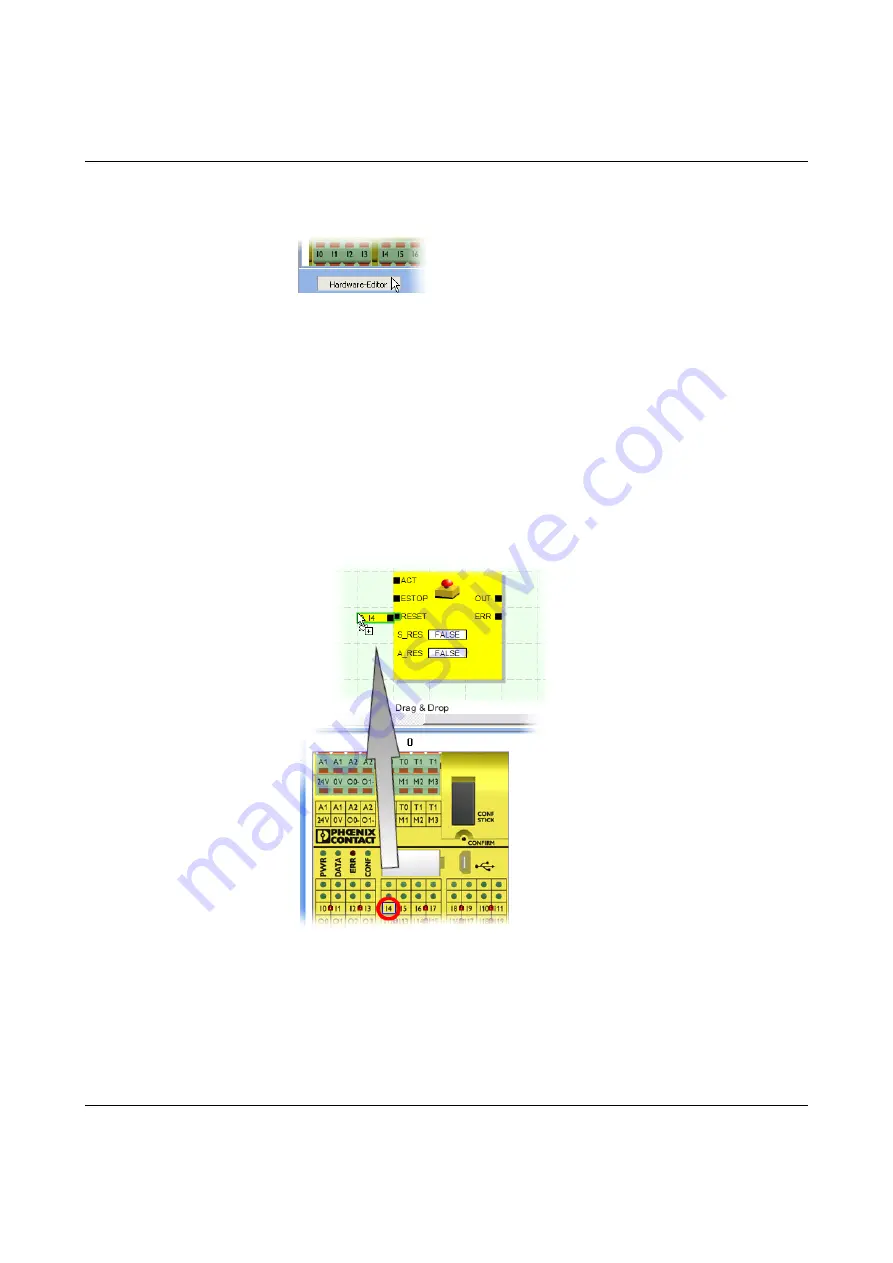
Figure 4-5
Opening the hardware editor with the auto-hide function enabled
2.
Drag the required (dual) input signal or output signal from the hardware editor into the
connection editor as follows (see Figure 4-6 on page 4-12):
–
Left-click on the required (dual) signal and hold the mouse button down. Please
refer to the information below on using dual signals.
–
Hold the left mouse button down and drag the (dual) signal from the hardware
editor directly to a free connection (or two free connections, in the case of a dual
signal) in the safety logic, then release the mouse button.
–
Alternatively, you can store signals at any free position in the connection editor.
The free signals must then be linked to free functional block connections manually
(see "Connecting objects" on page 4-14).
The (dual) signal is stored at the selected position (aligned with the grid) and, if
applicable, directly connected to the corresponding connection.
Figure 4-6
Inserting a signal in the connection editor
Содержание 2986229
Страница 2: ......
Страница 32: ...PSR TRISAFE S 2 16 PHOENIX CONTACT 103503_en_03...
Страница 50: ...PSR TRISAFE S 3 18 PHOENIX CONTACT 103503_en_03...
Страница 74: ...PSR TRISAFE S 4 24 PHOENIX CONTACT 103503_en_03...
Страница 88: ...PSR TRISAFE S 5 14 PHOENIX CONTACT 103503_en_03...
Страница 90: ...PSR TRISAFE S 6 2 PHOENIX CONTACT 103503_en_03...
Страница 96: ...PSR TRISAFE S 7 6 PHOENIX CONTACT 103503_en_03...


