background image

88

EN

Digital TV Settings

You can make settings of the digital tuner from the 
“Digital TV Settings”.

You can set “Adult Lock” to “ON” or “OFF” and also 
change Pincode.

1

In stop mode, press [HOME]. Select 
“General Settings” using [

U

\

D

], 

then press [OK].

2

Select “Digital TV Settings” using 
[

U

\

D

], then press [OK].

3

Select “Adult Lock” using [

U

\

D

], 

then press [OK].

4

Select “ON” or “OFF” using [

U

\

D

], 

then press [OK].

5

To set “Adult Lock” to “ON”:

1) Enter your desired Pincode using 

[Alphanumeric keypad]

, then press 

[OK]

.

2) For confirmation, enter the Pincode again 

using 

[Alphanumeric keypad]

 then press 

[OK]

.

To set “Adult Lock” to “OFF”:

Enter the Pincode using 

[Alphanumeric keypad]

.

• While entering the Pincode, use 

[

L

]

 or 

[CLEAR]


to clear the numbers erroneously entered.

• If you forget the Pincode, press 

[4]

[7]

[3]

[7]


to cancel the Pincode.

6

Press [HOME] to exit.

Note

• Once “Adult Lock” has been set to “ON”, Pincode 

will be required in order to view the locked channels 
or make the timer recording of them, and when you 
try to execute the “Auto Tuning” for digital TV or
“Edit Channels”.

• “Adult Lock” settings will only take effect after the 

unit goes to and wake up from standby.

1

Follow steps 

1

 to 

2

 in“Pincode 

Setting for Adult Lock” on this page.

2

Select “Language” using [

U

\

D

], 

then press [OK].

3

Select the item by which you want to 
change the language using [

U

\

D

], 

then press [OK].

4

Select a language using [

U

\

D

], 

then press [OK].

5

Press [HOME] to exit.

Note

• The “Audio” and “Subtitle” setting may not be 

available for some broadcasts.

• To change the audio language, refer to “Multiaudio” 

on page 24.

• To display the subtitle or choose the subtitle 

language, refer to “Subtitle” on page 24.

You can check the current digital system software 
version of this unit.

1

Follow steps 

1

 to 

2

 in “Pincode 

Setting for Adult Lock” on this page.

2

Select “Tuner Version Info” using 
[

U

\

D

].

3

Press [HOME] to exit.

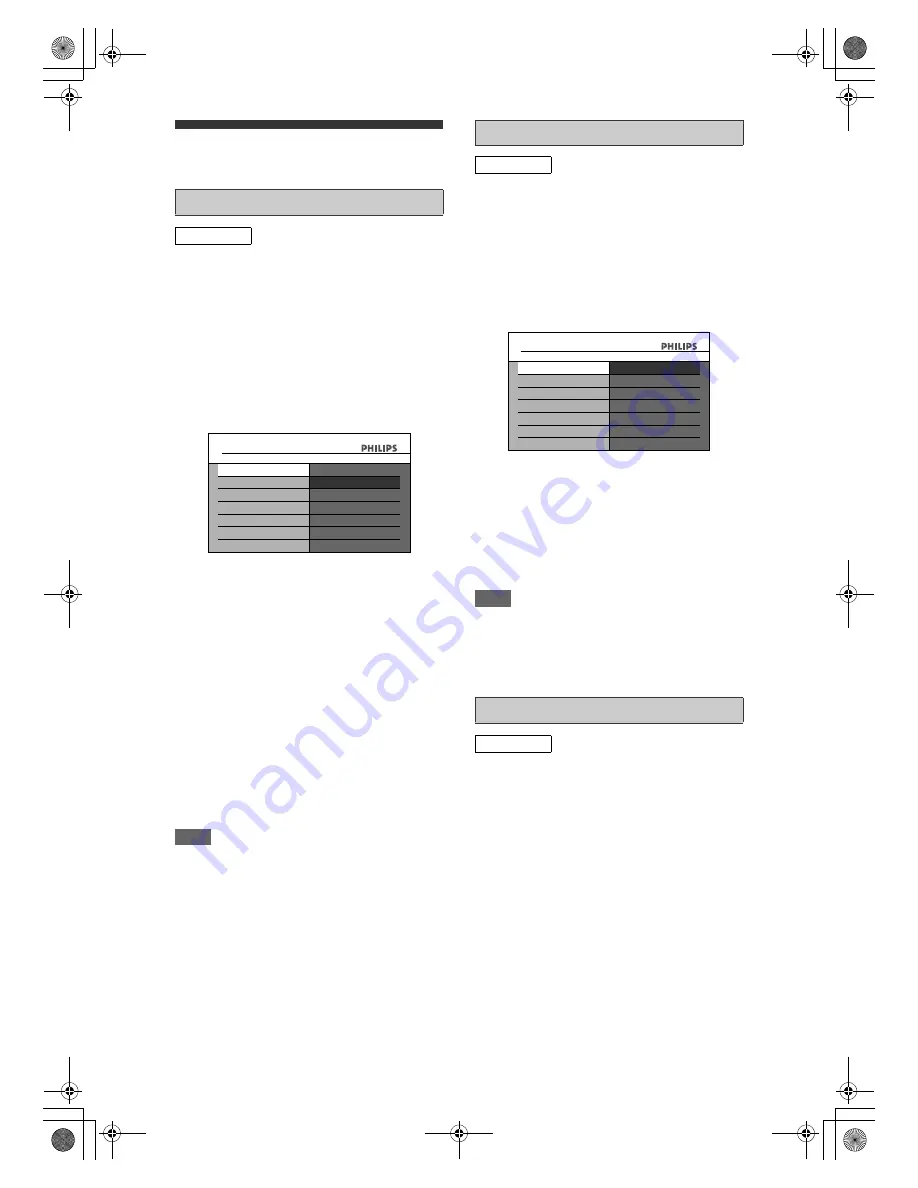
Pincode Setting for Adult Lock

DIGITAL

General Settings

Digital TV Settings

Adult Lock

Language

Tuner Version Info

ON

OFF

Language Setting

DIGITAL

Audio

: Set the Audio language

Subtitle

: Set the Subtitle language

Digital Text Service : Set the Digital Teletext language

Tuner Version Info

DIGITAL

General Settings

Digital TV Settings

Audio

Subtitle

English

Gaelic

Welsh

Digital Text Service

E2N41BN_EN.book  Page 88  Wednesday, July 2, 2008  4:36 PM

Содержание HDR3700

Страница 1: ...om welcome EN Hard Disk DVD Recorder VIDEO Plus and PlusCode are registered trademarks of Gemstar Development Corporation The VIDEO Plus system is manufactured under license from Gemstar Development Corporation E2N41BN_EN book Page 1 Wednesday July 2 2008 4 36 PM ...

Страница 2: ...RPRODUCT KLASSE1LASERPRODUKT KLASS 1 LASER APPARAT CLASSE1PRODUITLASER Caution 1 Do not attempt to open the cabinet There are no parts inside you can service Refer all servicing to qualified service personnel 2 Slots and openings in the cabinet at the sides and underneath are provided for ventilation To ensure reliable operation and to protect the unit from overheating these openings must not be b...

Страница 3: ...us help to prevent potential negative consequences for the environment and human health For more detailed information about the collection and recycling programmes available in your country please contact your local city office or the shop where you purchased the product Important Notes for Users in U K Mains plug This apparatus is fitted with an approved 13 Amp plug To change a fuse in this type ...

Страница 4: ...å redusere faren for brann eller elektrisk støt skal apparatet ikke utsettes for regn eller fuktighet Italia DICHIARAZIONE DI CONFORMITA Si dichiara che l apparecchio HDR3700 Philips risponde alle prescrizioni dell art 2 comma 1 del D M 28 Agosto 1995 n 548 Fatto a Eindhoven Philips Consumer Electronics Philips Glaslaan 25616 JB Eindhoven The Netherlands For Customer Use Enter below the Serial No ...

Страница 5: ...r failure occurs the content of the recording replaying programme may be lost HDD rotates at high speed when in operation Be sure that rotation has stopped and then move the unit without subjecting it to strong impact or vibration SERVICING If the unit becomes inoperative do not try to correct the problem by yourself There are no user serviceable parts inside Turn the unit off unplug the mains cab...

Страница 6: ...the VIDEO Plus System 35 Satellite Recording 37 Settings for External Equipment 38 Information on Digital Video Dubbing 39 Digital Video Camera to HDD DVD Dubbing 40 Information on Dubbing 41 Protecting a Disc 44 Finalising Discs 44 Playback 46 Information on Playback 46 Basic Playback 47 Additional Playback Functions 54 Search 57 Repeat Random Programme Playback Slide Show 59 Selecting the Format...

Страница 7: ...ith all HDMI CEC compliant devices over HDMI It enables the connected devices to control each other with a single remote control Satellite recording E Pages 37 38 This function enables you to record a programme from your Satellite Receiver or any other device Make sure that the device is connected to the AV2 AUX socket of this unit and the timer setting has been done on the connected device i LINK...

Страница 8: ...Digital Video output of external device with a DV cable 10 AUDIO input jacks AV3 Use to connect external device with an RCA audio cable 11 VIDEO input jack AV3 Use to connect external device with an RCA video cable 12 S VIDEO input jack AV3 Use to connect the S video output of external device with an S video cable 13 Infrared sensor window Receive signals from your remote control so that you can c...

Страница 9: ...VCR camcorder or other Audio Video equipment Cable Box Satellite Receiver etc Use a commercially available Scart cable 7 HDMI OUT jack Connect to a display with an HDMI compatible port Use a commercially available HDMI cable 8 AV1 TO TV socket Connect to the Scart socket on your TV Use the supplied Scart cable 9 Mains cable Connect to a standard AC outlet Note Do not touch the inner pins of the ja...

Страница 10: ... to pause playback or recording 14 REPLAY button Press to replay by the amount of time set in advance 15 SAT REC button HDD Press to activate the Satellite Timer Recording 16 HDMI button Press to set the HDMI connector s video signal output mode 17 TIMER button Press to display the timer programme setting menu 18 VIDEO plus button Press to program a timer recording with the VIDEO Plus system 19 LI...

Страница 11: ...h the polarity indicated inside the battery compartment Caution Incorrect use of batteries can result in hazards such as leakage and bursting Do not mix new and old batteries together Do not use different kinds of batteries together Make sure that the plus and minus ends of each battery match the indications inside the battery compartment Remove batteries if the equipment will not be used for a mo...

Страница 12: ... analogue channel only or selected external input mode 3 Indicates a media recording mode and possible recording time left 4 Indicates the current title number total number of titles the current chapter number total number of chapters and time lapse of the current title playback total duration of the title 5 Each icon means 6 Indicates an operation status 7 Indicates the component in use HDD DVD N...

Страница 13: ...atically close after 3 seconds or press INFO to exit Title File Name Information Title name information only when DVD or HDD is in playback File name information only when DVD or CD with MP3 Windows Media Audio JPEG DivX Kodak Picture CD files is in playback MP3 Windows Media Audio Tag Information only when DVD or CD with MP3 Windows Media Audio files is in playback Title name information Artist n...

Страница 14: ... need 6 Channel To adjust the channel installation of the unit as you prefer 7 DivX To set up the DivX playback setting 8 HDMI To set up the HDMI connection setting You cannot select if the HDMI cable is not connected 9 Digital TV Settings To set up the digital TV setting 10 Reset All To reset all the settings to the factory default 1 Adult Lock To set the Pincode for Adult Lock 2 Language To set ...

Страница 15: ...ng the protected titles in the HDD title list 11 Del Unprotected Titles Allows you to delete all unprotected titles in the HDD title list 12 HDDADVD Allows you to dub from HDD to DVD 13 DVDAHDD Allows you to dub from DVD to HDD Note Items in the Dubbing menu may be greyed out depending upon what media is loaded into the unit and copy protection that may be present Disc Editing Disc Playback Mode H...

Страница 16: ...llite Recording standby mode Flashes when timer programming was not executed because of some error I Appears when recording or dubbing Flashes when recording being paused Appears when a disc is in this unit Appears during dubbing Appears when the channel is in digital mode DB DTV Display Messages The disc tray is opening Appears when HDMI output mode 480p is selected The PBC function of the Video ...

Страница 17: ...o connect the AUDIO OUT ANALOG L R jacks The progressive scan video quality is only available when using Component connection and a progressive scan TV It provides superior picture quality when watching DVD movies 1 Connect the component video cables red blue green not supplied from the COMPONENT VIDEO OUTPUT jacks of this unit to the corresponding component video input jacks usually labelled as Y...

Страница 18: ...and authentication of the connected AV device This unit supports HDCP Please read the operating instructions of your display device or AV amplifier for more information HDMI High Definition Multimedia Interface Note Switch the input selector on your TV to an appropriate external input channel Some HDMI TVs monitors from different manufacturers may adhere to different standards resulting in unrelia...

Страница 19: ...hange the setup when using S VIDEO input jack Refer to Active Video Input on this page 3 When connecting a DV camcorder use DV input jack of AV4 Front instead of S VIDEO IN or VIDEO IN jack For AV3 jacks you have to select S VIDEO input or VIDEO input jacks depending on the connected devices Active Video Input 1 In stop mode press HOME Select General Settings using U D then press OK 2 Select Video...

Страница 20: ...i channel surround format cannot be recorded using an MD or DAT deck as a digital sound If not connected to a Dolby Digital decoder set Dolby Digital to PCM in Disc Audio menu Playing back a DVD using incorrect settings may generate noise distortion and damage speakers Set Dolby Digital and MPEG to PCM in Disc Audio menu for connecting to an MD or DAT deck You can use AUDIO OUT ANALOG L R jacks fo...

Страница 21: ...search is finished Clock Setting will appear Press OK if you want to adjust the current date and time then follow steps below or press BACK U or HOME to exit The current date and time will appear automatically The message Wait for a moment will appear while the clock data is being updated 5 Enter the date day month year using U D Press P to move the cursor to the next field If you want to go back ...

Страница 22: ...e contents of Time Shift Buffer refer to Recording the Contents of the Time Shift Buffer on pages 29 30 To play back of Time Shift Buffer refer to Playback of Time Shift Buffer on page 57 Watching digital TV broadcast This unit is able to receive free to air DVB T Digital Video Broadcast Terrestrial television and radio channels As new services are added over time make sure to regularly update and...

Страница 23: ...pages Use U D L P and OK to change the Teletext pages Electronic programme guide On screen TV guide gives you a list of the digital TV programmes and detailed information about the programmes 1 In stop mode press GUIDE Select the TV programme using U D L P then press HOME or GUIDE to exit From the EPG screen you can also set the timer recording Select the TV programme using U D L P then press OK o...

Страница 24: ...or Left using L P 3 Select your desired audio language using U D The available audio language varies depending on the digital TV broadcasts 4 Press OK to activate the settings Note If the programme is changed the audio language will be switched back to the default language you set in the Digital TV Settings Refer to Language Setting on page 88 Digital channels also contain subtitles You can select...

Страница 25: ... may not be played back if the disc is damaged or dirty or if there is condensation on the recorder s lens If you record a disc using a personal computer even if it is recorded in a compatible format it may not be played back because of the settings of the application software used to create the disc Check with the software publisher for more detailed information Since recording is performed using...

Страница 26: ...lect Recording using U D then press OK 3 Select Make Rec Compatible using U D then press OK 4 Select ON or OFF using U D then press OK 5 Press HOME to exit The unit inserts a chapter marker periodically every 5 minutes by default during recording Using the Auto Chapter menu you can turn this function off or change the time period 1 In stop mode press HOME Select General Settings using U D then pre...

Страница 27: ...ing is only for recording analogue channel 1 In stop mode press HOME Select General Settings using U D then press OK 2 Select Recording using U D then press OK 3 Select Recording Language using U D then press OK 4 Select Main or Sub using U D then press OK 5 Press HOME to exit Setting External Input Audio HDD HDD D DVD R VD RW W DVD RW D DVD R VD R DVD R D DVD VD R RW W DVD RW D DVD R VD R DVD R G...

Страница 28: ...01 08 and 00 00 You cannot change the recording mode in the pause mode Even if the analogue channel you are recording is in SECAM TV system this unit automatically converts it to PAL TV system during recording If the external equipment e g cable box Canal decoder is connected to AV2 the picture of the external equipment will be output except during the DVD playback of this unit Turn off the extern...

Страница 29: ...minate the recording Time Shift Buffer Every time you turn on this unit this unit automatically records the channel currently viewed and temporarily stores the recorded content to the HDD Time Shift Buffer By using this function you can pause or view earlier parts of the current TV programme You may also start to record from the beginning of the TV programme Time shift buffer can store programmes ...

Страница 30: ...y programme recordings are also available Be sure to set the clock before entering a timer programming Insert a recordable disc 1 In stop mode press TIMER Timer Programming list will appear 2 Select New Programme using U D then press OK If there are 7 programmes or more use S PREV T NEXT to turn the page 3 Enter the date using U D then press P Each time you press D at the current date the timer re...

Страница 31: ...nput on your TV to the recorder source Alternate recording DVD only If there is no disc or not enough space on DVD or copy once source recording will be done to HDD even when DVD is selected during timer programming If the available space on the HDD is less than that of DVD the unit will not perform the alternate recording This feature is available only for timer recording and not available for on...

Страница 32: ...d to change channel from 15 seconds before the programmed starting time I RECORD does not work from 2 minutes before the programmed starting time If it comes to 2 minutes before the starting time during regular or one touch timer recording the recording in progress will be stopped Playback of DVD CD is prohibited from 2 minutes before the programmed starting time when the recording media is DVD If...

Страница 33: ...he remote control PROG 2 recording will start after PROG 1 recording is completed Actual recording The first 2 minutes at the longest will be cut off PROG 2 PROG 1 PROG 1 PROG 2 The first 2 minutes at the longest will be cut off PROG 2 PROG 1 PROG 3 PROG 1 PROG 3 PROG 2 Actual recording The first 2 minutes at the longest will be cut off Actual recording PROG 2 PROG 1 PROG 2 PROG 1 Actual recording...

Страница 34: ...recording programmes all related programmes will be deleted or corrected GREEN is available only when the selected programme has the series link tag Series Link Timer Recording always starts from the first available date If you want to record on specific dates only of the series please use normal Timer Recording Recording split programmes With EPG system when you set the first part for timer recor...

Страница 35: ...ng channel using U D then press P If the channel linking to the VIDEO Plus code is installed in the unit its preset number will be indicated in the menu If your local channel information is not programmed in the unit s memory may appear If you select the channel number using U D it is stored in the unit s memory only analogue channels If not may appear If necessary correct the information as you w...

Страница 36: ...ritten title Title name will not be overwritten When you overwrite a Title take note of following scenarios mentioned Do note the scenarios is for overwriting without recording mode discrepancy To avoid accidental deletion please check that there is no important title after selected point before overwriting When overwriting title is shorter than the existing title overwriting from the beginning of...

Страница 37: ...n how to set the timer Make sure to turn off the Cable Box Satellite Receiver when you finish setting Preparation of this unit Make sure to select the desired Recording mode beforehand 1 In stop mode press HDD then select the recording mode for HDD using REC MODE 2 Press SAT REC Sat will appear on the front panel display and the unit goes into the Satellite Recording standby mode 3 When the Cable ...

Страница 38: ...D then press OK 4 Select Auto PAL or SECAM using U D then press OK 5 Press HOME to exit Note During recording when a signal other than PAL or SECAM is detected an error message appears on the screen and recording will be paused Recording will be resumed when a PAL or SECAM signal is detected Before recording from external equipment see page 19 for connection instructions 1 Turn on the TV and the u...

Страница 39: ...ut the picture of this unit Information on Digital Video Dubbing This function helps you to dub the contents in the DVC digital video camera to HDD or DVD easily You can control basic operations of the DVC from the remote control of this unit if the DVC is in video mode 1 Connect your DVC to the DV IN jack on the front panel using a DV cable Use the DV cable that has 4 pin input jack and is compli...

Страница 40: ... 25 3 Press DISPLAY 4 With Control highlighted press OK to display the available devices to control with the remote control of this unit Select DVC using U D then press OK e g DVC to DVD dubbing Now you can operate your DVC with the remote control of this unit 5 Press B PLAY to start playing back the DVC and find where you want to start dubbing Press C STOP when it comes to the desired start point...

Страница 41: ...u dub a title recorded in SLP mode to DVD R R dubbing speed will be 24 times at the maximum To perform the high speed dubbing set the recording mode to High Duration of high speed dubbing will vary depending on the recording mode and the title amount High speed dubbing is not available when recording mode is set to other than High dubbing from a DVD to the HDD there is not enough space in the DVD ...

Страница 42: ... HOME 2 Select Dubbing using U D then press OK 3 Select HDDADVD using U D then press OK Select DVDAHDD using U D then press OK e g HDDADVD 4 Select Add Title using U D then press OK If you have registered any dubbing before they will be listed in the dubbing title list Before Starting Dubbing One Title Dubbing HDD HDD D DVD R VD RW W DVD RW D DVD R VD R DVD R D DVD VD R RW W DVD RW D DVD R VD R DV...

Страница 43: ...pending on the dubbing direction the available recording mode varies When dubbing from HDD to DVD you can select High to perform the high speed dubbing 9 Select Yes using U D then press OK Dubbing will start It may take awhile to prepare for the dubbing During normal dubbing except for High speed dubbing time taken to do the dub may be equal to record duration for example 1 hour title means waitin...

Страница 44: ...s cable during finalisation Insert a recordable disc before finalising 1 In stop mode press HOME 2 Select Disc Editing using U D then press OK 3 Select Finalise using U D then press OK 4 Select Yes using U D then press OK e g DVD RW disc Finalising will start To cancel finalising DVD RW disc only At step 4 press C STOP Select Yes using U D then press OK Finalising is cancelled and the unit switche...

Страница 45: ...ns out if you set this in Recording menu 1 In stop mode press HOME Select General Settings using U D then press OK 2 Select Recording using U D then press OK 3 Select Auto Finalise using U D then press OK 4 Select ON using U D then press OK 5 Press HOME to exit Auto Finalise DVD R DVD R D DVD VD R RW W DVD RW D DVD R VD R DVD R General Settings Auto Chapter Auto Finalise Make Rec Compatible Record...

Страница 46: ...ou cannot play back the DVD in this unit The number inside the globe refers to region of the world A DVD labelled for a specific region can only play back on a unit with the same region code This unit conforms to ver 1 1 and ver 2 0 of the Video CD standard playback control PBC function This enables you to play back interactive software using menu screens Refer to the information accompanying the ...

Страница 47: ...N CLOSE to open the disc tray 3 Place the disc on the disc tray with its label facing up Be sure to align the disc with the disc tray guide 4 Press A OPEN CLOSE to close the disc tray 5 Press P PLAY to start playback If you are playing back a DVD video or video CD with PBC function a menu may appear See on pages 46 47 and 53 6 Press C STOP to stop playback temporarily Refer to Resume Playback on p...

Страница 48: ... W DVD RW D DVD R VD R DVD R D DVD VD R RW W DVD RW D DVD R VD R DVD R VCD VCD VCD 12 00 1 00 00 01 01 08 1 SP 01 01 08 12 00 1 00 00 1 4 5 6 2 3 Title List 1 DVB 123 SP 0 10 00 2 01 01 08 12 00 DVB 123 SP 10 01 08 0 10 00 01 01 08 17 00 DVB 123 SP 10 01 08 0 10 00 3 SP 2Hr Note for DVD Title List If you want to see disc information press L when the first page of the title list is displayed or pre...

Страница 49: ...gh resolution or large size JPEG files take a few moments to be displayed It is not possible to play back progressive JPEGs JPEG files saved in progressive format on this unit It is not possible to play back JPEG files of 12 MB or more It is recommended that files to be played back in this unit are recorded under the following specifications MP3 Windows Media Audio JPEG Size of picture Note MP3 fi...

Страница 50: ...ACK U to move back to the folder above Kodak Picture CD The Picture CD is a service to convert photographs taken by a conventional film camera into digital data and write the data on a CD You can enjoy picture images on the TV set by playing back the Picture CDs For details of Kodak Picture CD contact a shop that provides developing service of Kodak Inc Press DVD first 1 Press TITLE To exit the Pi...

Страница 51: ...tle file does not come with any extension SMI SRT SUB ASS SSA TXT 1 DivX File1 Subtitle List OFF DivX VOD This unit allows you to play back the files purchased or rented from DivX Video On Demand VOD services The files are available on the internet When you purchase or rent DivX VOD files on the internet you will be asked to enter a registration code This menu item provides you with the registrati...

Страница 52: ...f 255 folders or 999 files may be recognised in one disc Up to 8 hierarchies can be recognised in one folder Files in the 9th or deeper hierarchies cannot be played back If the track extends beyond the scope of screen a down arrow appears indicating that the user can view another part on the next page The current page number and the number of total pages are shown on the right of the down arrow Le...

Страница 53: ... TITLE The Title Menu will appear For some discs the Title Menu appears automatically If the feature is not available may appear on the TV screen 2 Select a desired item using U D L P then press OK The disc will start playing back at the title you selected The following operations are available TITLE button Displays the DVD Title Menu which will vary between discs U D L P buttons Move the cursor f...

Страница 54: ...ds are 2x 20x and 40x and approximate reverse speeds are 5x 20x and 40x To return to playback at normal speed press B PLAY Picture quality of DivX files in fast reverse is lower than that in fast forward For some DivX files Fast forward Fast reverse may not function Hint Forward reverse speeds are indicated with icons as follows Forward Approx Speed 2x 20x 40x Reverse Approx Speed 5x 20x 40x Durin...

Страница 55: ...x 1 5 and x 2 0 These are displayed excluding the current zoom rate 3 Select the desired zoom factor to zoom using U D then press OK The zoom area is displayed 4 Select the desired zoom position using U D L P then press OK Zoom playback will start Hint To cancel the zoom function select x 1 0 using U D then press OK Note If selecting a smaller factor than that currently selected the zoom area is n...

Страница 56: ...displayed on the front panel display 2 To stop the playback press C STOP once The front panel display will switch back to show the elapsed recording time If you press C STOP twice it will stop the recording Note You can also use the special playback functions such as D FFW E REV etc during chasing playback mode I RECORD is invalid during FlexTime function You can no longer fast forward the playbac...

Страница 57: ...mer recordings the Time Shift Buffering will not be performed When this unit turns on for the timer recordings the Time Shift Buffering will not be performed For the contents of the Time Shift Buffer you cannot change the TV audio Once it has exceeded 6 hours the beginning of Time Shift Buffer will be deleted accordingly and the elapsed time displayed will be unchanged Search Using S PREV T NEXT b...

Страница 58: ... the display menu is not displayed press Alphanumeric keypad to enter the desired track number Note During Random playback or Programme playback you cannot search the desired track directly 1 During playback press DISPLAY 2 Select the icon using L P then press OK for the title or track number is highlighted 3 Press L P to highlight 4 Enter the desired time to search for using U D or Alphanumeric k...

Страница 59: ... function repeat playback does not work while the PBC function is on Disc for which the number of recording titles comes up to the maximum When the DivX media file changes to DivX video file while repeat setting is done the repeat setting will be cleared You can use this function to play back a disc randomly instead of in the recorded order 1 In stop mode press HOME 2 Select Disc Playback Mode usi...

Страница 60: ...or more languages The available languages are usually printed on the disc case You can switch subtitle languages at any time during playback 1 During playback press DISPLAY Or press SUBTITLE during playback and follow from step 3 2 Select the icon using L P then press OK within 1 second or wait for 1 second to display the selection menu 3 Select the desired subtitle language using U D then press O...

Страница 61: ...nt of the movie actors Note For some discs it is only possible to change the soundtrack from the disc menu Press TITLE or DISC MENU to display the disc menu If a 4 digit language code appears in the menu at step 3 refer to the Language Code on page 95 You can enjoy stereophonic virtual space through your existing 2 channel stereo system 1 During playback press DISPLAY Display menu will appear 2 Se...

Страница 62: ...can select the angle if the currently played back title has at least two multi angle scenes 1 During playback press DISPLAY 2 Select the icon using L P then press OK within 1 second or wait for 1 second to display the selection menu Noise Reduction menu will appear 3 Select the desired option using U D then press OK This function reduces noise in the playback picture When playing back discs record...

Страница 63: ... of each title in the disc The portion for the selected title is highlighted It may not indicate the precise capacity of the disc If the duration of a title is too short it may not be reflected in the capacity indicator 10 Index pictures A cut from the recorded content is displayed here 11 Submenu Submenus for the selected menu are displayed here 12 Title name editable If you do not name the title...

Страница 64: ...dding deleting chapter marks Hiding chapters Protecting a title Dividing a title 1 Setting an index picture Finalising a disc 2 Making edits compatible 3 Editing name on disc Setting or Releasing disc protect How to Access the Edit Menu HDD HDD 1 4 5 6 2 3 01 01 08 1 SP 01 01 08 12 00 1SP 12 00 1 00 00 Title List 1 4 5 6 2 3 01 01 08 1 SP 01 01 08 12 00 1SP 12 00 1 00 00 Title List Play From Start...

Страница 65: ...8 17 00 DVB 123 SP 10 01 08 0 10 00 EMPTY TITLE SP 2Hr Play Edit Overwrite 01 01 08 12 00 8 SP 0 00 59 1 Edit Title Delete Edit Title Name Chapter Mark Hide Chapter Title Dividing Index Picture HDD HDD D DVD R VD RW W DVD RW D DVD R VD R DVD R D DVD VD R RW W DVD RW D DVD R VD R DVD R 1 4 5 6 2 3 01 01 08 1 SP 12 00 1 00 00 Title List Title1 1 2 3 01 01 08 12 00 8 SP 01 01 08 1 55 00 0 05 00 SP 2H...

Страница 66: ...OK 4 Use U D L P to select the title you want to delete then press OK Trash mark will appear indicating the title is marked for deletion 5 Repeat step 4 until you select all the titles you want to delete 6 Press CLEAR Confirmation message will appear 7 Use U D to select Yes then press OK Final confirmation message will appear Select Yes then press OK Titles are now deleted To remove the trash mark...

Страница 67: ...er up to 30 letters Unrecognisable characters will be replaced with asterisks If you delete them adjoining characters may change to asterisks or other Editing Title Name HDD HDD D DVD R VD RW W DVD RW D DVD R VD R DVD R D DVD VD R RW W DVD RW D DVD R VD R DVD R 01 01 08 12 00 1 SP 1 05 00 1 Edit Title Delete Edit Title Name Chapter Mark Hide Chapter Title Dividing Index Picture 1 05 00 1 ABC Edit ...

Страница 68: ... for a point at step 3 you can also use the special playback functions such as T NEXT D FFW etc To delete a chapter mark 1 Follow steps in How to Access the Edit Menu on pages 64 65 to display Edit menu 2 Use U D to select Chapter Mark then press OK Submenu will appear 3 Use S PREV T NEXT to go to the chapter with the chapter mark number you want to delete then press F PAUSE Chapter mark number is...

Страница 69: ... list automatically Title name of the divided titles are identical and index pictures are reset to the first scene at this point Note If an internal HDD or a DVD contains the maximum number of titles HDD 600 DVD RW RW 49 you cannot divide any titles With DVD RW RW you cannot divide the titles if the total number of chapters has already reached 254 When you search for a point at step 2 you can also...

Страница 70: ...functions such as T NEXT D FFW etc You can hide chapters from the title list Hidden chapters are skipped during playback 1 Follow steps in How to Access the Edit Menu on pages 64 65 to display Edit menu 2 Use U D to select Hide Chapter then press OK 3 Use S PREV T NEXT to go to the chapter you want to hide then press F PAUSE 4 Use U D to select Hidden then press OK The chapter is now hidden 5 Pres...

Страница 71: ...s OK 5 Use U D to select Yes then press OK Data will be written onto the disc momentarily You can erase all titles on a disc Press C STOP if you are playing back a disc or if you are displaying the Title Menu 1 Press HOME 2 Use U D to select Disc Editing then press OK 3 Use U D to select Erase Disc then press OK 4 Use U D to select Yes then press OK e g DVD RW Data will be written onto the disc mo...

Страница 72: ... all titles including the ones protected Select Del Unprotected Titles if you want to delete only the unprotected titles 4 Use U D to select Yes then press OK Are you sure will appear Select Yes using U D and then press OK Titles are deleted Making Edits Compatible DVD RW DVD RW ALL 8 7 6 5 4 3 Change Password Yes No Disc Editing Edit Disc Name Erase Disc Make Edits Compatible Disc Editing Disc Pr...

Страница 73: ...s REPLAY TV System E Page 78 Auto Set the TV system Display Screen Saver E Page 78 OFF 5 minutes 15 minutes 30 minutes Set the idling time before the screen saver starts Front panel brightness E Page 79 Bright Dim OFF Set the brightness of the Front Panel Display Video TV Shape E Page 79 4 3 Letter Box 4 3 Pan scan Set a picture size according to aspect ratio of your TV Active Video Input E Page 1...

Страница 74: ...itle E Page 80 English French Spanish German Italian Swedish Dutch Russian1 Russian2 Hungarian Polish Czech Set the language for DivX Subtitle HDMI Format E Page 81 YCbCr Set the colour space for the HDMI output HDMI Audio E Page 81 OFF Set whether to output the HDMI audio signal or not Black Level E Page 81 Enhanced Set this function to adjust the noise reduction EasyLink E Page 81 OFF Set whethe...

Страница 75: ...te Press CLEAR to erase numbers entered incorrectly If you forget your password or you want to clear all settings in Parental Lock enter 4 7 3 7 using Alphanumeric keypad at the option window Your password is cleared and parental levels are set to All 1 Parental Lock Default All DVD only All All parental locks are cancelled 8 DVD software of any grade adult general children can be played back 7 to...

Страница 76: ... decoder is compatible with 96 kHz PCM select 96kHz Sound is sampled at 96 kHz A B C D Dynamic Range Control PCM Disc Audio Dolby Digital MPEG General Settings Dynamic Range Control PCM Disc Audio Dolby Digital MPEG ON OFF Dynamic Range Control General Settings Dynamic Range Control PCM Disc Audio Dolby Digital MPEG 48kHz 96kHz PCM C Dolby Digital conversion Default Stream PCM Converts the Dolby D...

Страница 77: ...ngs Parental Lock Disc Audio Disc Playback English Original Disc Menu Language Audio Language Audio Language Subtitle Language Angle Icon Still Mode Other General Settings Parental Lock Disc Audio Disc Playback Disc Menu Language Audio Language Subtitle Language Angle Icon Still Mode OFF English Other Subtitle Language ALL 8 7 6 5 4 3 Code Input 6 Angle Icon Default ON DVD only 7 Still Mode Defaul...

Страница 78: ...U D then press OK 4 Refer to pages 78 79 and set the selected item 5 When you finish with the setting press HOME to exit Set the screen saver time delay Select a setting using U D then press OK Your setting is activated 9 TV System Default PAL DVD only PAL Outputs a modified PAL signal for viewing discs recorded with the NTSC system on a PAL system TV Auto Changes the video system PAL NTSC automat...

Страница 79: ...standard TV Select 4 3 Letter Box so that black bars appear on the top and bottom of the TV screen when playing back a wide screen picture Select 4 3 Pan scan for a full height picture with both sides trimmed when playing back wide screen picture If you have a widescreen TV Select 16 9 Widescreen This unit is compatible with the Progressive Scan System This feature provides better quality video ou...

Страница 80: ... example to SCART RGB while the COMPONENT VIDEO OUTPUT jacks are used to connect to the TV a distorted video signal may result DivX 1 In stop mode press HOME Select General Settings using U D then press OK 2 Select DivX using U D then press OK 3 Select the desired item using U D then press OK For refer to page 51 for details Select the desired setting using U D then press OK 4 When you finish with...

Страница 81: ...can adjust the black level to make the dark areas of the HDMI images brighter Select a setting using U D then press OK Select Enhanced if the black white contrast is not clear This setting is effective only for HDMI RGB output Your setting is activated This feature is only applicable if this unit is connected to HDMI CEC compliant TV device It enables all the linked devices response or react to ce...

Страница 82: ...both analogue and digital channels available in your area 1 In stop mode press HOME After pressing HOME the message Time Shift Buffer will be cleared depending on your selection Do you want to continue will appear Select Yes 2 Select General Settings using U D then press OK General Settings menu will appear 3 Select Channel using U D then press OK 4 Select Digital Analog Tuning using U D then pres...

Страница 83: ...U D then press OK 2 Select Channel using U D then press OK 3 Select Analog Channel Setup using U D then press OK 4 Select Manual Tuning using U D then press OK 5 Select Position using U D then press P 6 Select the position number you want to use using Alphanumeric keypad or U D then press L You can select position number 01 99 7 Select Channel using U D then press P 8 Press U D to start scanning T...

Страница 84: ...channel to another position number using U D then press OK To move another channel repeat steps 5 to 6 7 Press HOME to exit You can programme the tuner to scan only the digital channels that you can receive in your area 1 In stop mode press HOME Select General Settings using U D then press OK 2 Select Channel using U D then press OK 3 Select Digital Channel Setup using U D then press OK 4 Select A...

Страница 85: ...he digital channel you want to watch using U D then press OK 4 Press BACK U to exit With Edit Channels menu you can see all the stored digital channels and sort them into the group lists Quick select or set the viewer limitation Adult Lock etc 1 Follow steps 1 to 3 in Auto Tuning DIGITAL on page 84 2 Select Edit Channels using U D then press OK Edit Channels menu will appear 1 Channel numbers 2 Ch...

Страница 86: ... to exit Once you turn off the unit Pincode will be required to view the locked channels To set the Pincode refer to Pincode Setting for Adult Lock on page 88 4 Switch the unit to standby in order for the settings to take effect You can delete the digital channels from the stored digital channels 1 Follow steps 1 to 2 in Edit Channels DIGITAL on page 85 2 Select the digital channel you want to del...

Страница 87: ...4 After completion press OK 5 Press HOME to exit Note You can enter up to 19 letters You can check the detailed information of the current digital channel 1 Follow steps 1 to 3 in Auto Tuning DIGITAL on page 84 2 Select Signal Information using U D then press OK Signal Information display will appear 3 Press HOME to exit Signal Information is not available for analogue channel and external input A...

Страница 88: ... Lock settings will only take effect after the unit goes to and wake up from standby 1 Follow steps 1 to 2 in Pincode Setting for Adult Lock on this page 2 Select Language using U D then press OK 3 Select the item by which you want to change the language using U D then press OK 4 Select a language using U D then press OK 5 Press HOME to exit Note The Audio and Subtitle setting may not be available...

Страница 89: ... off The clock cannot be set automatically if you are not receiving a channel in your area that carries a time signal In this case set the clock manually The unit will also correct the current time automatically at 8 00 if the unit is in standby mode or if you are watching digital channel The time will be downloaded from the currently viewed digital channel Auto Clock will be activated by a digita...

Страница 90: ...When you finish with the setting press HOME to exit Note The settings listed below will remain unchanged even after resetting to the factory default Clock setting Channel installation Parental lock setting DivX VOD code Timer Programmes Digital TV Settings General Settings HDMI Digital TV Settings General Settings Reset All ALL 8 7 6 5 4 3 Reset to factory Reset All Yes No default E2N41BN_EN book ...

Страница 91: ... not connect any device other than the DVC Even if a recorder or PC with another DV terminal is connected the DV function will not operate If the DVC is not recognised after connection turn off the power supply for the unit and re connect the DVC The DVC cannot be operated with this unit Signal input or DVC operation from this unit may be disabled depending on the type of DVC If a DVC signal canno...

Страница 92: ...yed and it cannot be disappeared In the Time Shift Buffer when you display the digital TV programme information the information will be recorded as the part of the picture DVD Recording is impossible Copy once programmes can only be copied onto an Internal HDD Check if the disc is protected or finalised Undo the protection or the finalisation Check if the connections are made securely and correctl...

Страница 93: ...o PCM in Disc Playback menu available only for DVD See page 76 Audio language or the subtitle language of the DVD cannot be changed Multilingual subtitles are not supported by the disc Some audio languages or the subtitle languages can be changed only from the disc menu Please refer to the disc s manual Angles cannot be changed Even though the multi angle feature is supported by the disc that does...

Страница 94: ...iting menu See page 44 Recording Error You cannot record more than 49 titles on one disc The maximum is 49 You are trying to record onto the disc for which the number of recording titles comes up to the maximum 49 Delete unnecessary titles See pages 65 66 Recording Error You cannot record more than 254 chapters on one disc The maximum is 254 You are trying to record onto the DVD RW or DVD RW disc ...

Страница 95: ...5847 Latvian Lettish 5868 Lingala 5860 Language Code Lithuanian 5866 Macedonian 5957 Malagasy 5953 Malay 5965 Malayalam 5958 Maltese 5966 Maori 5955 Marathi 5964 Moldavian 5961 Mongolian 5960 Nauru 6047 Nepali 6051 Norwegian 6061 Occitan 6149 Oriya 6164 Oromo Afan 6159 Panjabi 6247 Pashto Pushto 6265 Persian 5247 Polish 6258 Portuguese 6266 Quechua 6367 Rhaeto Romance 6459 Romanian 6461 Russian 64...

Страница 96: ...s on this unit MP3 MPEG Audio Layer 3 MP3 is a method of compressing files You can copy MP3 files on CD RW R discs from a computer and play back the files on this unit PBC Video CD only Playback Control This function enables you to play back interactive software using a menu screen See also Title Video CD PCM Pulse Code Modulation PCM is a format that converts audio into digital data It is mainly ...

Страница 97: ...For analogue channels E21 E69 For DVB T channels Input Output Front Panel AV3 AV4 Video input Input level One RCA connector 1 Vp p 75 Ω S Video input Input level One Mini DIN 4 pin jack Y luminance 1 Vp p 75 Ω C colour 300 mVp p 75 Ω Audio input Input level Two RCA connectors 2 Vrms input impedance more than 10 kΩ Digital Video input Digital Video 4 pin jack IEEE 1394 Rear Panel VHF UHF antenna in...

Страница 98: ...98 EN E2N41BN_EN book Page 98 Wednesday July 2 2008 4 36 PM ...

Страница 99: ...99 EN Introduction Connections Initial Setup Playback Editing Others General Settings Recording E2N41BN_EN book Page 99 Wednesday July 2 2008 4 36 PM ...

Страница 100: ... 2008 Philips Consumer Lifestyle All right reserved jpkm_0838 05 1 1VMN25834 E2N41BN Printed in EU ڎڎڎڎڎ E2N41BN_EN book Page 92 Wednesday July 2 2008 4 36 PM ...

Отзывы: