4
5
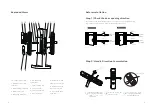
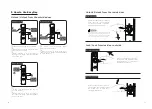
Exploded Views
1. Front Escutcheon
(
X1)
2. M6 Mounting screw
tube
(
X2
)
3. Mortise fixed screw
(
X4
)
4. 524 Mortise
(
X1
)
5. Mounting Plate
(
X1
)
Before installation
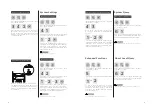
Step 1 | Check the door opening direction
This product can be installed on doors of 4 types of opening directions:
left-out pull, right-in push, right-out pull and left-in push.
Step 2
|
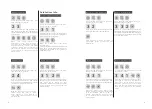
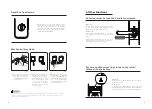
Handle Direction Commutation
Remove the two cross
recessed countersunk
screws on the
escutcheon
1
Directly rotate the
handle to 180°
2
Lock the two cross
recessed countersunk
head screws back
3
1
2
6
7
3
4
5
6
7
8
9
10
11
12
13
Indoor
Indoor
Indoor
Indoor
Outdoor
Outdoor
Outdoor
Outdoor
Left-in
push
Left-
Out Pull
Right-
In Pull
Right-
out pull
Lock the Screw
6. M6 Mounting
screw
(
X2
)
7. Square shaft
(
X2
)
8. Square Shaft
Pressure Spring
(
X2
)
9. Inner Body
(
X1
)
10. AA batteriy
(
X8
)
11. Battery Cover
(
X1
)
12. Rear Escutcheon
Bottom cover
(
X1
)
13. Inner Body fixed
screw(X4)
Left Open
Right Open
Содержание EasyKey 7100DS
Страница 1: ......

