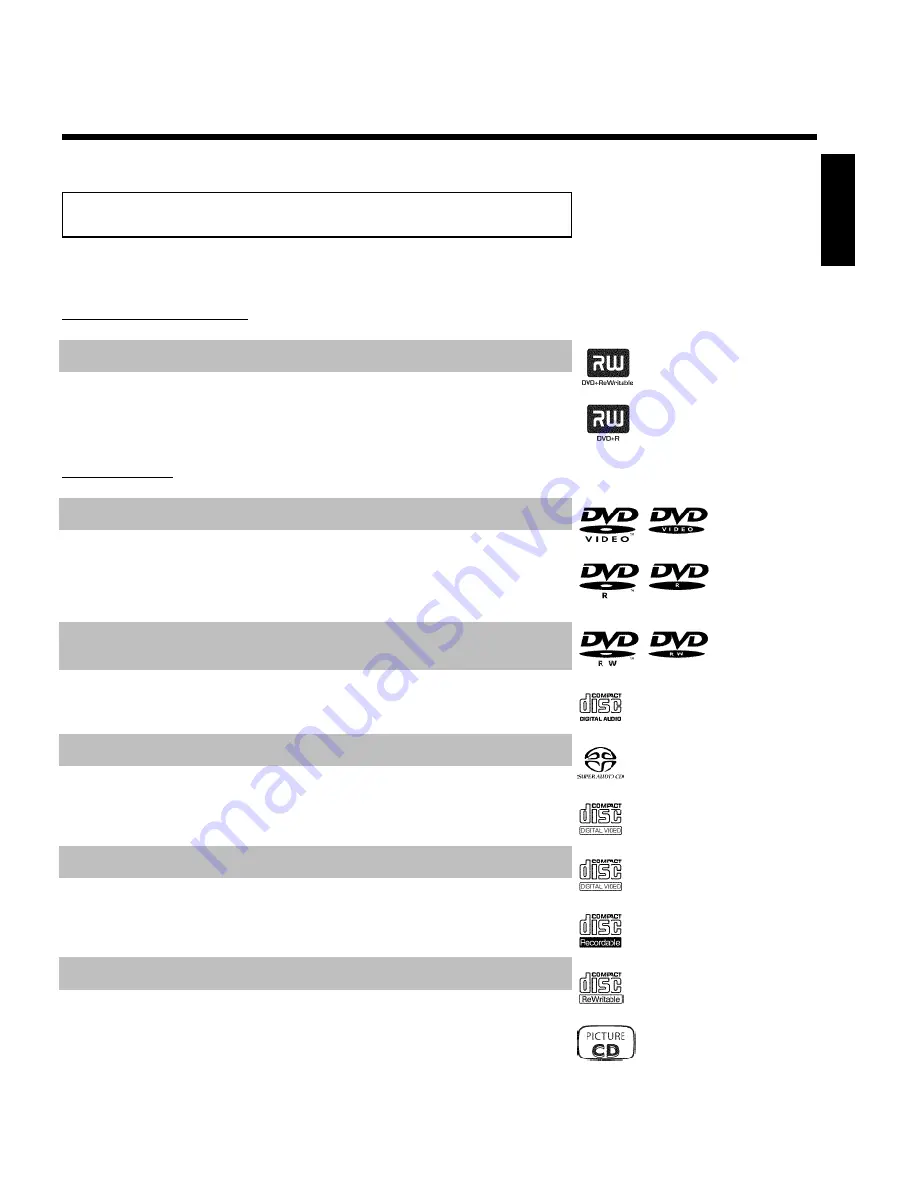
background image

5

Compatible discs

Using this DVD Recorder, you can play and record on the following discs:

Recording and Playback

DVD+RW (Digital Versatile Disc + Rewritable); can be recorded on over and over.

DVD+R (Digital Versatile Disc + recordable); can be recorded on once.

Playback only:

DVD Video (Digital Versatile Disc)

DVD-R (DVD-Recordable) Can only be played back when the recording was made in 'video mode'
and the recording was finalized.

DVD-RW (DVD-Rewritable) Can only be played back when the recording was made in 'video
mode' and the recording was finalized.

Audio CD (Compact Disc Digital Audio)

Super Audio CD (only plays the CD layer of a hybrid SACD disc)

Video CD (Formats 1.0, 1.1, 2.0)

Super Video CD

CD-R (CD-Recordable) Audio/MP3 contents

CD-RW (CD-Rewritable) Audio/MP3 contents

Picture CD, CD-R/RW with JPEG content

ENGLISH

Introduction

Содержание DVD RECORDER DVDR77 - Firmware Upgrade Readme File

Страница 1: ......

Страница 2: ......

Страница 3: ...anding service networks in the industry What s more your purchase guarantees you ll receive all the information and special offers for which you qualify plus easy access to accessories from our convenient home shopping network Most importantly you can count on our uncompromising commitment to your total satisfaction All of this is our way of saying welcome and thanks for investing in a PHILIPS pro...

Страница 4: ... guarantee that interference will not occur in a particular installation If this equipment does cause harmful interference to radio or television reception which can be determined by turning the equipment off and on the user is encouraged to try to correct the interference by one or more of the following measures 1 Reorient or relocate the receiving antenna 2 Increase the separation between the eq...

Страница 5: ...gs convenience receptacles and the point where they exit from the apparatus 11 Only use attachments accessories specified by the manufacturer 12 Use only with a cart stand tripod bracket or table specified by the manufacturer or sold with the apparatus When a cart is used use caution when moving the cart apparatus combination to avoid injury from tip over 13 Unplug this apparatus during lightning ...

Страница 6: ...T DIMMED OFF RETURN Back To return to the previous menu step on a video CD VCD This also functions with some DVDs T C Title Chapter To directly select a B title C chapter in the menu bar using B A If INFO appears in the display the index menu of the loaded disc will appear or an introduction will play In this case this function will not be available SUBTITLE Subtitle Select the subtitle language A...

Страница 7: ...g playback it will search forward If button is held down during a still picture function it will search forward in slow motion 0 9 Number Letter buttons To enter numbers or letters in appropriate entry fields A CH Last channel Switch back to the last selected channel Additional TV functions With the enclosed multicode remote control you can control the main functions of your TV set To do this you ...

Страница 8: ...cording Behind the door at the lower right front corner Switching between jack S VIDEO and VIDEO is done automatically In case both jacks are occupied the signal at jack S VIDEO is given priority S VIDEO S Video jack Input for SVHS Hi8 camcorders or SVHS Hi8 video recorders channel number CAM1 Yellow jack VIDEO Video input jack Input for camcorders or video recorders channel number CAM1 White Red ...

Страница 9: ...r jack Video in Connection for an additional device channel number EXT2 Input jacks IN EXT1 AUDIO L R IN Analog audio input red white jack next to jack COMPONENT VIDEO IN Connection for an additional device Audio input for component video channel number EXT1 COMPONENT VIDEO IN Component video input red blue green jack Connection for an additional device with component video output channel number E...

Страница 10: ...Clock Disc Title play time OTR time Title name Display of the TV channel number playing time function Display of information warnings IIIIIIIIIIIIIII Disc bar Displays the current position on the disc disc pointer Play Record single flashing segment at the current position Pause flashing segment on both sides of the current position Stop flashing segment at the current position TIMER A recording T...

Страница 11: ...s message disappears The DVD Recorder is busy processing another operation NO DISC No disc has been inserted If a disc has been inserted then it is possible that the disc cannot be read INFO Information on the inserted DVD is displayed on the screen BUSY The DVD Recorder is busy making changes DVD compatible ERASING Entire disc is being erased EMPTYDISC Inserted disc is new or has been completely ...

Страница 12: ...riting the title The recording will continue but the error will be skipped SETUP After the automatic channel search the menu for setting the time date appears on the screen WAIT 01 During automatic channel search the detected TV channels are counted BLOCKED It is not possible to close open the disc tray SAFE REC The new recording will be added to the end of all recordings SAFE RECORD POST FORMAT A...

Страница 13: ...sages 31 Status box 32 Disc type icons 32 Disc status icons 32 Tuner info box 33 Live picture in the Tuner information box 33 Timer info box 33 FPlayback 34 General information regarding playback 34 Inserting a disc 35 Playing a DVD video disc 36 Playing a DVD RW or DVD R 36 Playing audio CDs 37 Playing MP3 CDs 37 Playback of a Super Video CD 38 GOther playback functions 39 Changing to a different...

Страница 14: ...eleting recordings titles 79 Disc settings 80 Changing disc name 80 Finalize editing 81 Finalizing DVD R discs 82 Erasing DVD RWs 82 KProgramming a recording TIMER 83 General 83 Programming a recording with the VCR Plus system 83 Programming a recording without the VCR Plus system 85 How to change or delete a programmed recording TIMER 87 Problem solving for programmed recordings 88 LUser preferen...

Страница 15: ...hings Tip Here I will be giving you instructions on functions that help make it easier to use your DVD Recorder Problem Here I will help you find the cause of problems and their solutions I hope you have lots of fun with your new DVD Recorder Phil P S If you have questions or if problems come up during operation please see the helpful information in the chapter Before you call technical support If...

Страница 16: ...double that of VHS and is superior to Laser Discs The quality can be compared to digital masters made in recording studios What is DVD RW DVD ReWritable DVD RW uses phase change media the same technology that formed the basis for CD ReWritable A high power laser is used to change the reflectivity of the recording layer This process means the disc can be recorded on more than a thousand times What ...

Страница 17: ...VD Recordable Can only be played back when the recording was made in video mode and the recording was finalized DVD RW DVD Rewritable Can only be played back when the recording was made in video mode and the recording was finalized Audio CD Compact Disc Digital Audio Super Audio CD only plays the CD layer of a hybrid SACD disc Video CD Formats 1 0 1 1 2 0 Super Video CD CD R CD Recordable Audio MP...

Страница 18: ...epresents U S Canada upper regions of North America Bermuda U S Virgin Islands and smaller regions near Australia Technical data Voltage 110 130V 60Hz Power consumption 31W Power consumption Standby Less than 7W clock display off Measurements in inches W H D 17 2 3 0 13 30 disc tray closed 18 58 disc tray open Weight without packaging approx 4 0kg Power failure no power supply Channel and timer da...

Страница 19: ...soon as the DVD Recorder is connected to the power supply there are some components that are in constant operation To switch off the DVD Recorder completely you must disconnect it from the power supply If you disconnect the DVD Recorder from the power supply pull out the power cord s plug from the wall outlet not only the plug from the jack 4MAINS at the rear of the set Children playing near the d...

Страница 20: ...ce candles etc Make sure children do not place any foreign objects into the openings or the disc tray Cleaning discs Some problems occur because the disc inside the Recorder is dirty frozen picture sound disruptions picture distortions To avoid these problems discs should be cleaned on a regular basis 1 When a disc is dirty clean it with a soft cloth Wipe the disc from the center to the edge in a ...

Страница 21: ...of the disc Each index picture represents a recording At the right hand side of the screen a disc pointer graphically displays the duration and position on the disc of the selected recording This function can be used to delete commercial interruptions during a film as well as other scenes The corresponding scenes are marked then skipped as desired This is saved on the DVD so any DVD player will al...

Страница 22: ...written authorization for any other use Changes to the device reverse engineering or disassembly is prohibited This DVD Recorder is equipped with Directional Correlational Deinterlacing known as DCDi DCDi was developed by Faroudja Laboratories for ultra high end home theater equipment to eliminate the jagged edges that appear when standard interlaced video is viewed on Progressive Scan displays Th...

Страница 23: ...r not the TV Tip Connecting your DVD Recorder to the TV The necessary cable connections must be made before you can record or playback TV programs using your DVD recorder Connect the DVD Recorder directly to the TV Connecting a video cassette Recorder between the DVD Recorder and the TV could result in poor picture quality When you install your DVD Recorder for the first time select one of the fol...

Страница 24: ...ystem as a complete picture i e the even and odd lines are formed together Disruptive picture flickering is avoided as is the case with 100 Hz TV devices Have the following cables ready an antenna cable 1 supplied a power cable 2 supplied a Component Video Y PB PR cable 3 red green blue jack or a corresponding video compatible cinch cable an audio cable 4 red white jack 1 Remove the antenna cable ...

Страница 25: ...n is completed this function will be switched off How you switch on this function again read in the chapter User preferences in the section Standby 8 Press STANDBY ON m on the recorder IS TV ON will appear on the display Switching TV and DVD Recorder to Progressive scan The factory settings of the DVD Recorder are set to Interlaced If you selected the Progressive scan connection during installatio...

Страница 26: ...DVD Recorder and the other end into the antenna input jack at the back of the TV 3 Use a S Video SVHS cable and plug one end into the S VIDEO OUT jack at the back of the DVD Recorder and the other end into the S Video SVHS In jack of the TV usually called S Video in or SVHS in See your TV s instruction manual 4 Use an audio cinch cable and plug one end into the red white cinch jack AUDIO L R OUT a...

Страница 27: ...ith the picture such as Moiré patterns Have the following cables ready an antenna cable 1 supplied a power cable 2 supplied a video CVBS cable 3 with yellow ends and an audio cable 4 with red white ends 1 Remove the antenna or cable TV signal from your TV Connect it to the ANTENNA IN jack at the back of the DVD recorder 2 Insert one end of the supplied antenna cable into the TV OUT jack at the bac...

Страница 28: ...R TV ONLY HAS A SINGLE ANTENNA IN JACK AND DOES NOT HAVE ANY AUDIO VIDEO JACKS Please observe that you must adjust the TV to the DVD Recorder channel 3 or 4 Have the following cables ready an antenna cable 1 supplied and a power cable 2 supplied 1 Switch off your TV 2 Remove the antenna or Cable TV signal from the antenna input jack of the TV Insert it into the ANTENNA IN jack at the back of the D...

Страница 29: ... C03 channel 3 will appear on the display 7 Switch your TV to the selected channel channel 3 or 4 Use therefor your TV remote control The menu for language selection will appear on the screen Initial Setup Menu Language English Español Français Press OK to continue aI don t see a menu for language selection b Check the cable connections b Is DVDR DVD Recorder operation lit up in the display If not...

Страница 30: ...itional video recorder DVD player You can also connect a video recorder or a DVD player to the input jacks Please use the S VIDEO IN jack and the IN AUDIO L R jacks for SVHS video recorders Please be aware Most pre recorded video cassettes and DVDs are copy protected When you attempt to copy them the COPY PROT message will appear in the DVD Recorder display aWhen copying video cassettes NO SIGNAL ...

Страница 31: ...e observe the following The DVD Recorder must be connected directly to the TV set If there is a video recorder or an additional device in between the picture quality may be poor because of the copy protection system built into the DVD Recorder The additional device satellite receiver must be connected before the DVD recorder additional device DVD recorder TV set Only the TV set must be connected t...

Страница 32: ...der to the audio out jacks on the camcorder Choose CAM1 as a programme number for this input jack Good Picture Quality If your camcorder only uses a video output Composite Video or CVBS connect the VIDEO input of the DVD Recorder to the corresponding output jack on the camcorder You must also connect the left AUDIO right in jacks of the DVD Recorder to the audio out jacks on the camcorder Choose C...

Страница 33: ...mum sound quality You will need a multi channel A V receiver or amplifier that supports at least one of the audio formats of the DVD Recorder MPEG2 Dolby Digital and DTS Consult the instruction manual of your receiver to find out which audio formats it supports aA loud distorted sound is coming from my speakers b The receiver does not support the digital audio format of the DVD recorder The audio ...

Страница 34: ...ge for the on screen menu by pressing B or A What is an on screen menu The multi language on screen menu takes the mystery out of using your new DVD recorder All settings and or functions are displayed on your TV screen in one of the available languages English French or Spanish 2 Confirm with OK Initial Setup Audio Language English Español Français Português Italiano Press OK to continue 3 Select...

Страница 35: ...d any TV channels b Select another channel on the TV Do you see that channel on the TV screen If not check the cable connection of the antenna antenna jack between the DVD Recorder and TV b Please have patience The DVD Recorder searches the entire frequency range in order to find and save the largest possible number of TV channels b If no antenna is connected complete the basic settings and then i...

Страница 36: ...TV channels 000 Channels found Please wait 8 When the channel search is completed Auto ch search complete will appear on the TV screen 9 Press SYSTEM MENU repeatedly to remove all the menus from the screen aVery few TV channels were found b During Automatic channel search the DVD Recorder detects whether an antenna or a cable TV signal is connected If you have connected a cable TV signal but found...

Страница 37: ...reen 3 Select A using D or C 4 Press B repeatedly to select Installation and then press C 5 Select line Add Delete Channels using B or A the press C Installation Add Delete Channels Channel 001 Add Channel 002 Add Channel 003 Delete Channel 004 Delete Channel 005 Delete Channel 006 Delete To exit press SYSTEM MENU 6 Using B or A select the TV channel that you want to delete or add 7 Press C or D t...

Страница 38: ...ss of this setting 1 Turn on your TV If required select the channel number for the DVD Recorder channel 3 or 4 2 Turn on the DVD Recorder by pressing STANDBY ON m 3 Press SYSTEM MENU on the remote control The menu bar will appear 4 Select A using D or C 5 Select the line Language using B or A and confirm with C Language Playback audio English Recording audio Stereo Subtitle English Menu English 6 ...

Страница 39: ...g you selected for recording a recording in SAP can be played back only in SAP 1 Switch on the TV If required select the channel number for the DVD Recorder channel 3 or 4 2 Turn on the DVD Recorder by pressing STANDBY ON m 3 Press SYSTEM MENU on the remote control The menu bar will appear 4 Select A using D or C Language Playback audio English Recording audio Stereo Subtitle English Menu English ...

Страница 40: ...he line VCR Plus Ch using B or A and confirm with C Installation VCR Plus Ch VCR Plus Ch Channel 001 002 003 004 005 To exit press SYSTEM MENU 5 Use B or A to select the Guide channel number you want to assign to a TV channel 6 Use D or C or use the number buttons 0 9 to select the TV channel corresponding to this Guide channel number An overview of guide numbers TV channels can be found in your d...

Страница 41: ...t the channel which sends the time date information in the line PBS Channel and confirm with OK The DVD Recorder will check whether or not the information transfer is possible a Clock not set check channel will appear on the TV screen b No time date data can be received from this TV channel Select a different channel or Auto in line PBS Channel Problem 8 Select one of the following settings in lin...

Страница 42: ...nth 01 Date 01 Daylight Saving Off To exit press SYSTEM MENU 7 Change the time in line Time using the number buttons 0 9 on your remote control 8 Check AM PM Year Month and Date in the same way To select between the fields use B or A Change the information with D C or the number buttons 0 9 9 Select one of the following settings in line Daylight Saving On The time set corresponds to the summer tim...

Страница 43: ...ot be available Menu bar 1 A User preferences B Current Title Track C Current Chapter Index D Audio Language E Subtitle Language F Camera Angle G Zoom Menu bar 2 While menu bar 1 is being displayed you can press C repeatedly to display menu bar 2 H Sound I Picture by Picture J Slow motion K Fast motion L Search with time entry Field for temporary messages There is a field in the top left corner of...

Страница 44: ... box The status box displays the current status of the DVD Recorder and the type of disc inserted This display can be turned off Disc type icons M DVD RW M DVD R N DVD Video O Video CD P No disc Q Disc error Disc status icons R Recording S Stop T Playing U Pause play V Pause record X Fast forward x8 Y Fast reverse x8 Z Slow motion Information on the TV screen ...

Страница 45: ...menu button SYSTEM MENU select the symbol and confirm with C 2 In the line Live source view select On to view this picture or Off to switch this picture off 3 End with OK and then SYSTEM MENU Timer info box This box is located above the tuner info box When a recording is programmed timer it shows the time symbol and the start time or the date of the first programmed recording When no timer is prog...

Страница 46: ... X in the menu bar on the screen b DVDs can be manufactured in such a way that certain operations are required or only specific functions are possible during playback When the X symbol appears on the screen the selected function is not available aI see region code information on the screen b Because DVD films are usually not released at the same time in all regions of the world all DVD players are...

Страница 47: ...n also use the remote control to open and close the disc tray To do this hold down the STOP h button on the remote control until OPENING opens or CLOSING closes appears in the display Tip 3 Playback starts automatically A menu may appear during playback of a DVD If the titles and chapters are numbered press a number button on the remote control You can also select a menu item with D C A B or with ...

Страница 48: ...e control or h on the DVD recorder 3 To eject the disc press OPEN CLOSE J on the front of the DVD recorder Playing a DVD RW or DVD R 1 If the inserted disc has been write protected or it is a finalized DVD R playback starts automatically C01 ANNA P01 2 If playback does not start automatically select the title you want to play from the index screen using B or A You can also use the N or O buttons o...

Страница 49: ... Track number and total play time are displayed Playing MP3 CDs MP3 MPEG1 Audio Layer 3 files are highly compressed pieces of music Using this technology the data volume can be compressed by a factor of 10 This enables you to fit up to 10 hours of CD quality music on a single CD ROM When creating MP3 CDs keep the following in mind Data system supported ISO9660 Directory structure maximum of 8 leve...

Страница 50: ...C for track with C or D 2 Select the number of the album track with B A or the number buttons 0 9 on the remote control You can also use repeat functions PLAY MODE Tip Playback of a Super Video CD Super Video CDs may feature PBC Play Back Control This allows the direct selection of special playback functions menus The Video CD must be PBC compatible see CD packaging PBC is turned on by default 1 I...

Страница 51: ...ton 1 Press the T C title chapter button and select the corresponding title with A or B Make sure that the T title icon is selected in the menu bar 2 You can also select a chapter within a title using the T C button Press T C and select C chapter using C Then select the corresponding chapter with A or B Tip Disc search You can fast forward a disc at four or thirty two times normal playback speed Y...

Страница 52: ...ck press PAUSE 9 to stop playback and display a still picture Still picture features via the menu bar 1 While playback is paused press the SYSTEM MENU button on the remote control The menu bar will appear at the top of the screen 2 Select I in the second menu bar with C or D then press B 3 You can now move the still picture forward or backward using D or C 4 If necessary turn off the menu line wit...

Страница 53: ...u can select where playback should start elapsed time 1 During playback press the SYSTEM MENU button on the remote control The menu bar will appear at the top of the screen 2 Select L with C or D and confirm with B The playback is stopped and the screen displays how much play time has already elapsed 3 Enter the desired start time for the playback using the number buttons 0 9 4 Confirm with OK aTh...

Страница 54: ...OP h You can also keep pressing PLAY MODE until the displays disappear Repeat a specific segment A B You can repeat a specific segment within a title chapter track To do this you must mark the start and end of the desired segment 1 During playback press the PAUSE 9 at the desired starting position You will see a still picture 2 Keep pressing PLAY MODE until the symbol appears on the TV screen This...

Страница 55: ...gles you can select different angles for playback 1 During playback press PAUSE 9 You will see a still picture 2 Press the SYSTEM MENU button and select F using C aThe F icon cannot be selected b The selected scene was only recorded with one camera angle This function is therefore not available For more information please read the label of your DVD disc Problem 3 Select the desired angle with B or...

Страница 56: ...e in different languages The language used for playback is the one that you selected during the initial installation of the Recorder or the default language of the DVD However you can change the audio language of a disc at any time Please note that the audio language can be changed via the menu DISC MENU button of the inserted disc as well as with the AUDIO button The audio languages for DVD playb...

Страница 57: ...nguage can be changed via the menu DISC MENU button of the inserted disc as well as with the SUBTITLE button It is possible for the subtitle languages of the two menus to be different 1 Press SUBTITLE during playback Use B or A to select the desired subtitle language You can also directly enter the number with the number buttons 0 9 You can shut the subtitles off with number buttons 0 or by select...

Страница 58: ...card to install or remove the memory card Showing JPEG pictures from a roll in order to view and modify the pictures and create slide shows from the roll Advanced editing of JPEG pictures for advanced editing options such as color sharpness Creating an album to arrange pictures from different rolls in a definite order and to create a slideshow from the album Making a DVD compatible slide show Make...

Страница 59: ...lot in the front of the recorder until the EJECT button sticks out of the device front completely Press this button only if you want to remove the PC Card Removing the PC Card 1 Press the EJECT button next to the PC Card 2 This will push the card out of its slot If the card remains in the slot insert the PC Card once again and press the EJECT button again Warning Insert Remove the PC Card only whe...

Страница 60: ...ou want to use CD DVD RW R memory card 2 Press PHOTO on the remote control The Media menu will appear 3 Use B or A to select the medium you want to process disc or memory card If you did not insert the corresponding medium disc or memory card a warning sign will appear above the symbol on the left hand side of the screen 4 Confirm with C 5 Select Roll using B or A and confirm with C 6 You will see...

Страница 61: ...lide show Erase Erases the selected pictures Rotate Rotates the selected pictures by 90 Copy Copies the selected pictures on the other loaded media from memory card to DVD RW R or vice versa Select all Selects all pictures Cancel Cancels the changes Using the buttons on the remote Play Button PLAY G Erase Button CLEAR and then OK Rotate Button ANGLE Tip Slide show You can display JPEG pictures in ...

Страница 62: ...s on the remote Repeat playback Button PLAY MODE Enlarge pictures Button ZOOM Edit pictures Button EDIT Tip Advanced editing of the JPEG pictures You can edit the pictures in the DVD recorder and then store them back on the memory card or a DVD RW R The original picture remains unchanged and the modified one is additionally stored on the medium Please make sure the memory card or DVD RW R is not w...

Страница 63: ...sing this function you can modify the picture properties 1 Press B and select one of the displayed functions using B or A Confirm with C Which options are available Sepia Displays the entire picture in brown colors It gives the picture an antique appearance Negative Converts the picture into a black and white negative Color negative Converts the picture into a color negative Comparable to a color ...

Страница 64: ...ange the color using D or C 4 Keep pressing A until the menu bar is selected Reset This setting will appear only if changes have already been made to the picture If you want to discard the changes confirm with OK Save This setting will appear only if changes have already been made to the picture If you want to save the changes confirm with OK The Digital Photo Manager ...

Страница 65: ... from different rolls you have to create an album first Then you can store the album as a video title on the DVD RW R 1 Select in the Media menu screen the memory card symbol in the middle and confirm with C 2 Select the line Rolls and confirm with C 3 Select with B A the roll from which you want to make a video title 4 Press C the Roll Settings menu will appear 5 Select the line Make video title ...

Страница 66: ...esponds to your personal preferences 4 Select Make video title in the menu Album Settings using B A 5 Confirm with OK SAVING will appear in the display and the screen will show the time left until completion The new album will be stored on the DVD RW R as a video title movie It will appear in the index picture overview as a separate title This video will be recorded automatically after the last re...

Страница 67: ... new album 3 Press C The menu Album Settings will appear In a new album the line Add photos is already highlighted 4 Confirm with OK 5 The roll overview will appear 6 Use B or A to select the roll from which you want to add pictures to the album 7 Confirm with C The picture overview will appear 8 Use D C B A to select the pictures you want to add to the album 9 Confirm each selected picture with S...

Страница 68: ...ins unchanged 1 Select Albums in the Media menu using B or A and confirm with C An overview of the albums you already created will appear 2 Press C to select the desired album The Album Settings menu will appear 3 Select Overview by pressing B The Overview option can be found on the second menu page 4 Confirm with OK 5 Use B A D C to select the picture you want to move to a different position 6 Pr...

Страница 69: ... displayed functions with the D or C button What do the individual functions mean Menu Closes the current menu Play Starts the slide show of the album Move Changes the order of pictures within an album Erase Erases the pictures from an album The picture on the media remains unchanged Rotate Rotates pictures by 90 Hide Hides pictures for the slide show Select all Selects all pictures Cancel Discard...

Страница 70: ...anging the album name You can re enter or change the name of an existing album 1 Select the Album name in the Album Settings using B A and confirm with C 2 Type the new album name using the 0 9 buttons like you would do on a cellular phone You can also move to the position where you want to enter or change a character using D C Change the characters with B A How can I enter the characters with the...

Страница 71: ... This will take you directly into the album overview where you can make changes Copying an album Using this function you can Copy albums created on a memory card to a DVD RW R Copy albums created on a DVD or a CD ROM to a memory card This will also store the pictures used for the album 1 Select Copy album second page in the Album Settings using B A and confirm with OK aIt is not possible to select...

Страница 72: ... be stored additionally 1 Select Roll name in the menu Roll Settings using B A and confirm with C 2 Type the new roll name using the 0 9 buttons like you would do on a cellular phone You can also move to the position where you want to enter or change a character using D C 3 Enter the new name with the buttons B A Enter the characters with the buttons 0 9 Press a number button as often as the requi...

Страница 73: ...ctly into the roll overview where you can make changes Deleting a roll WARNING This procedure cannot be reversed since the rolls will also be erased from the corresponding media Deleting a roll will also affect any album that uses pictures contained in this roll Therefore apply this function with particular care 1 Select Erase roll in the menu Roll Settings using B A and confirm with OK 2 If you r...

Страница 74: ...an only be prepared for Photo only What is the difference Photo only The DVD RW R will be prepared so that only pictures can be stored on the entire disc 4 4 GB Video photo On the DVD RW R a space 650 MB will be reserved for storing pictures additionally to movies So you can store the appropriate photos after the movie A DVD R can not be prepared for Video photo How long does this process last To ...

Страница 75: ...ress PHOTO on the remote control The Media menu will appear 2 Use B or A to select the disc with the memory card last symbol If you did not insert a disc a warning sign will appear above the symbol on the left hand side of the screen 3 Press C 4 Use B or A to select whether you want to copy the complete memory card into a roll or to create additionally to the roll an album that contains the same p...

Страница 76: ... the digital camera Media protected The write protection of the media can be switched on or off You can use this function only if the write protection can be switched off by a software You can not select this line if your memory card was equipped with a mechanically switch Prepare media The DVD RW R will be prepared for the data transfer Read further information in the section Preparing a DVD RW R...

Страница 77: ...mputer can not read the DVD RW R bCheck that your DVD drive on the computer can read DVD RW R discs bCheck that your operating system of your computer support the file system UDF Universal Disc Format Install if necessary the required driver The DVD RW Rs were recorded in the format UDF 1 02 Video photo and UDF 1 50 Photo only The disc CD ROM DVD can not be read by the DVD Recorder no pictures ava...

Страница 78: ... with the B A buttons If the recording is to be inserted between existing recordings please note the length of the old and new recording If the new recording is too long the recording title chapter following it will be overwritten Adding new recordings after the end of all recordings Safe Record To add a new recording after the last recording on a disc press and hold the REC OTR n button until SAF...

Страница 79: ...mpted b A disc can only contain a max of 48 titles including the empty titles Erase the titles or change the disc Problem 3 If necessary switch to TV programming by pressing the MONITOR button on the remote 4 Use CHANNEL q or CHANNEL r to select the channel you want to record The following will appear on the display 1 FREETITLE P01 Channel number of the external inputs EXT2 SVHS jack Y C S VIDEO I...

Страница 80: ... more information about title chapter please read the section Changing to a different chapter track title in the chapter Other playback functions Tip 6 You can stop recording by pressing STOP h on the remote or h on the recorder MENU UPDT will appear on the display The DVD Recorder is preparing the list of contents Wait until this message disappears in the display then the recording is completed a...

Страница 81: ...tch to TV programming by pressing the MONITOR button on the remote 3 Use CHANNEL q or CHANNEL r to select the channel you want to record 4 Press REC OTR n on the remote control 5 Each time you press REC OTR n you will add 30 minutes to the recording time How can I delete the recording time I just entered To delete an entry press CLEAR while the display shows the recording time How can I check the ...

Страница 82: ... into the recorder 2 While the Index Picture Screen is displayed press STOP h on the remote control The first title is selected 3 Press A The disc information screen is displayed 4 Press the C button Select the Protection line Confirm with C 5 Select Protected using B and confirm with OK 6 Press D then press DISC MENU to play the disc The entire disc is now protected If you attempt a recording DIS...

Страница 83: ...nformation read section Changing to a different chapter track title in chapter Other playback functions What happens with DVD Rs New recordings on DVD R can only be made on existing space You cannot overwrite existing recordings on DVD R discs 1 In the index display find the title to which the new recording is to be added 2 Look at the last minute of the old recording 3 Press PAUSE 9 on the remote...

Страница 84: ...igh Quality offers the best picture quality with a total recording time of 1 hour M2 Standard Play pre recorded DVD quality offers excellent picture quality with a total recording time of 2 hours M2x Standard Play plus better than S VHS picture quality offers excellent picture quality with a total recording time of 2 5 hours M3 Long Play S VHS picture quality Total recording time of 3 hours M4 Ext...

Страница 85: ...g is complete Can markings also be made on DVD Rs Markings can be made on these discs as long as they have not been finalized It is also possible to create additional chapter markings This allows you to hide or skip things you don t want to see e g commercials During playback you would then see your recording without the hidden chapter as a complete sequence Select from the following chapters Read...

Страница 86: ...e all chapter markers Current chapter visible Press EDIT to exit 2 Press A or B to select Inserting chapter marker then press OK Inserting marker appears on the TV screen X appears on the TV screen This DVD is protected or a finalized DVD R was inserted You cannot make any changes to it Tip 3 To remove the menu press EDIT Hiding chapters Initially all chapters are visible You can hide chapters for...

Страница 87: ... displayed to change the chapter number 2 Select the chapter between the new markers using B or A Press PAUSE 9 3 Select Delete chapter marker with B to delete the current chapter marker Confirm with OK The current chapter number decreases by one Problem 7 Press T C twice to change the chapter number C 8 Select the previous chapter with B since you are already in the next chapter end of the chapte...

Страница 88: ... all chapters of the selected title 3 Confirm with OK You will be prompted to press OK again to make sure you really want to delete all markers If you do not want to press the D button 4 To remove the menu press EDIT Changing the index picture Normally a frame from the begin of a recording is shown as the title s index picture You can however use any picture as an index picture 1 During playback f...

Страница 89: ...fully completed the DVD Recorder automatically brings you back to the index picture screen Splitting titles A title can be split into several parts titles no matter how large Each of these parts titles is characterized by its own index picture Warning Once a title is split it cannot be reversed Can I also divide titles on DVD Rs Because recordings on DVD Rs cannot be overwritten it is not possible...

Страница 90: ...5 Change the desired character using A or B You can switch between uppercase and lowercase letters with the SELECT button You can re delete a character with the CLEAR button Playing the entire title If you have hidden certain chapters of a title with this setting you can view the entire title including the hidden chapters Proceed as follows 1 Press the STOP h button or during playback press DISC M...

Страница 91: ... title confirm with OK Otherwise end by pressing D 5 Erasing title will appear on the screen 6 An Empty title box will now appear at this location in the index picture screen New recordings can now be added at this location If the deleted title was too short less than one minute no Empty title will appear at this point Can titles also be deleted on DVD Rs Titles on DVD R are only marked as deleted...

Страница 92: ...l appear Changing disc name 1 Press C in the Disc info display The Settings for menu will appear on the screen Settings for Philips1 Disc name Philips1 Protection Unprotected Erase disc 2 Select the Disc name line using A or B and confirm with C 3 Using C or D select the position where the letter number symbol is to be changed re entered 4 Change the desired character using A or B You can switch b...

Страница 93: ...h OK Storing name appears on the TV screen for confirmation 10 To end press D Finalize editing If one or more titles have been edited it is possible that another DVD Player will display the original titles You can prepare your disc so that a DVD player can play the edited version 1 Press C in the Disc info display The Settings for menu will appear on the screen 2 Select the line Make edits compati...

Страница 94: ... the A menu submenu Features Problem 3 This will take will appear on the screen to show how long this process will last 4 To confirm press OK Working will appear on the screen A bar moving from left to right will show the progress of the editing process Erasing DVD RWs 1 Press C in the Disc info display The Settings for menu will appear on the screen Settings for Philips1 Disc name Philips1 Protec...

Страница 95: ...pace is too small the recording will be stopped to prevent the following titles from being overwritten Tip This information is saved in a TIMER block Before you begin make sure the clock is set If the clock is not set the Time Date menu will appear when you press the TIMER s button Programming a recording with the VCR Plus system Thanks to this programming system you no longer need to tediously en...

Страница 96: ...annel number name of the TV channel and confirm with OK aThe following message appears on the screen PlusCode number wrong b The entered PlusCode number is incorrect Repeat your entry or cancel using the SYSTEM MENU button b Check the time date see Setting the time date in Installing your DVD recorder aThe following message appears on the screen Date does not match Mon Fri b A daily recording was ...

Страница 97: ...e recording Press STOP h 11 Switch the Recorder off with STANDBY m The programmed recording will only function properly when the DVD Recorder has been switched off using the STANDBY m button If any of the TIMER blocks are in use TIMER will light up on the display Programming a recording without the VCR Plus system 1 Switch on the TV Select the channel number for the DVD Recorder channel 3 or 4 or ...

Страница 98: ...M in the input fields Start and End Changing the recording quality Select the RecMode input field using C Use B A to select the recording mode Tip 6 If all information is correct press the OK button The information is stored in a TIMER block 7 To end press TIMER s The disc you have inserted will be checked 8 Search the position on the disc where the recording should begin 9 Switch off with STANDBY...

Страница 99: ...e 01 40 To change Press To exit Press TIMER 4 Select the programmed recording TIMER you want to check change or delete with B or A Delete programmed recording 1 Press the CLEAR button 2 Confirm with OK Timer Cleared will briefly appear on the TV screen appears rather than the displayed values 3 To end press TIMER s Tip 5 Press C Select the entry field with D or C If required change the information...

Страница 100: ...m The error message Disc locked appears briefly on the screen bA protected disc was inserted Undo the erase protection chapter Manual recording section Preventing accidental erasing of discs or insert a different disc Error message Memory full bIf this error message appears after pressing TIMER s then all TIMER blocks are already programmed No more recordings can be programmed Press the C button S...

Страница 101: ...o Video In channel 2 Press SYSTEM MENU on the remote control The menu bar will appear at the top of the TV screen 3 Select A with D or C and confirm with B 4 Select the corresponding function with B or A and confirm with C 5 Select the corresponding line with B or A and confirm with the C button Choose an item you want to adjust using the instructions provided on the following pages 6 Select the c...

Страница 102: ...using the D C buttons in order to adjust the picture to your TV screen EXT1 video attenuation With the buttons D C you can attenuate or boost the component video signal on the input socket COMPONENT VIDEO IN These setting concerns only the input signal The component video output signal leaves unchanged Video output This allows you to switch the Component Video signal between Interlaced and Progres...

Страница 103: ...eo Night mode Off Digital output You can select one of the following settings for devices that are connected to the COAX OUT or OPTICAL AUDIO OUT jacks All Dolby Digital and DTS signals are going out unchanged to the digital output MPEG 2 multi channel signals are converted to PCM Pulse Code Modulation Use receivers amplifiers with a digital multi channel sound decoder PCM only Dolby Digital and M...

Страница 104: ...uage Additional settings You can select the following functions in this menu Features Status box On Live source view On Auto standby On Standby Normal Display Bright Status box Along with the on screen menu the OSD On Screen Display also displays the current operating status on the TV screen counter playback recording TV channel You can switch off the information about the operating status so as t...

Страница 105: ...rgy you can switch off the clock display on the DVD recorder Programmed TIMER recordings will still take place Moreover you can present the most important features of the DVD Recorder in scrolling text in the display demo Low power If the DVD Recorder is switched off using STANDBY m the clock display is not visible Normal If the DVD Recorder is switched off using STANDBY m the clock display is vis...

Страница 106: ...ll be restarted at the exact location when the disc is reinserted This function does not only apply to the current disc but also to the last 20 discs you played If desired this function can be turned off PBC This line only appears when a VCD has been inserted This function is used to activate or deactivate the PBC menu playback control of Video CDs For more information please see the chapter on Pl...

Страница 107: ...or TV VOLUME q buttons aMy TV set will not react b Also try to enter the other code numbers or that of other manufacturers b In some cases it is possible that your TV set will not react to the selected code numbers If this is the case you unfortunately cannot use this function aHow can I reset the remote code b Enter the code number 000 Problem 3 By using the TV buttons on the panel in the middle ...

Страница 108: ...ust be reentered the next time you try to play the disc Activating Deactivating the child lock 1 Switch on the TV If required select the channel number for the DVD Recorder channel 3 or 4 or the Audio Video In channel 2 Turn on the DVD Recorder by pressing STANDBY ON m 3 Press SYSTEM MENU The menu bar will appear at the top of the screen 4 Select A using D or C 5 Select line 1 Disc features using ...

Страница 109: ...ur PIN Double sided DVDs can have a unique ID number for each side To completely authorize these discs you must authorize each side separately Multi volume VCDs can also have a unique ID number for each volume To authorize the complete set each volume must be authorized separately Locking authorized discs Proceed as follows to lock an authorized disc 1 Insert the disc Playback starts automatically...

Страница 110: ...udio Video In channel 2 Turn on the DVD Recorder by pressing STANDBY ON m 3 Press SYSTEM MENU The menu bar will appear on the top of the TV screen 4 Select A using D or C 5 Select line 1 Disc features using B or A and confirm with C Access control Enter code Auto resume On 6 Confirm the line Access control by pressing C 7 Enter a four digit code of your choice If you are entering the code for the ...

Страница 111: ...by pressing STANDBY ON m 3 Press SYSTEM MENU The menu bar will appear 4 Select A using D or C 5 Select line 1 Disc features using B or A and confirm with C Access control Enter code Auto resume On 6 Confirm the line Access control by pressing C 7 Press the number buttons to enter a four digit code of your choice If this is you first time entering your code you must enter this code a second time to...

Страница 112: ...line Access control by pressing C 7 Press the number buttons to enter your four digit code If this is you first time entering your code you must enter this code a second time to confirm it 8 Select the line Change code using A or B and confirm with C 9 Enter the new code with the number buttons 0 9 Re enter the code for confirmation 10 To end press D and SYSTEM MENU I forgot my code When it asks f...

Страница 113: ... time or appears in the display 6 10 seconds release h and OPEN CLOSE J Your DVD Recorder does not respond to any button being pressed bThere is no power Check the power supply bA programmed recording TIMER is currently being made If desired cancel the programmed recording Timer with STANDBY m bThere is a technical problem Disconnect from the power outlet for 30 seconds then connect again If this ...

Страница 114: ... record is not stored or you selected the wrong program number Check TV channels stored bDisc is write protected cannot be recorded on Remove write protection or change the disc For more information please see Preventing accidental erasing of discs on the Manual Recording bA finalized DVD R has been inserted Change disc Programmed recording does not work bYou have set the wrong time or date Check ...

Страница 115: ...this problem by using a special function 1 Open the disc tray with OPEN CLOSE J Insert the disc but do not close the tray 2 Hold down the number button 2 on the remote control until the tray closes The disc is modified 3 If this fails to produce the desired result repeat the procedure using the number button 3 on the remote control 4 You can restore the disc to its original condition by pressing a...

Страница 116: ...repair process This may take up to four times as much time as the recording in which the error occurred 4 If the disc is recovered the index screen will appear Please observe the following Error during recording The title may be missing Error while changing the title index picture The original title index picture may be visible Error while finalizing The disc appears not to have been finalized The...

Страница 117: ...but not limited to rental purposes WHERE IS SERVICE AVAILABLE Warranty service is available in all countries where the product is officially distributed by Philips In countries where Philips does not distribute the product the local Philips service organization will attempt to provide service although there may be a delay if the appropriate spare parts and technical manual s are not readily availa...

Страница 118: ...me 003 004 006 015 113 114 131 146 Elin 211 246 250 258 312 332 Elite 217 250 266 Elman 257 Elta 201 246 332 Emerson 004 006 009 016 017 018 019 020 021 022 023 024 025 026 027 028 029 030 031 032 068 091 094 095 100 110 112 113 114 115 116 128 131 136 137 141 146 151 157 209 250 254 261 262 272 306 Envision 004 006 114 120 Erres 203 247 250 Europhon 250 257 272 Expert 312 Fenner 246 332 Ferguson ...

Страница 119: ...ion 250 283 Pathe Cinema 275 338 Pathe Marconi 319 Perdio 250 255 Philco 003 004 005 006 008 009 015 037 041 042 046 071 113 114 120 128 131 134 136 137 144 154 158 209 250 256 262 272 306 338 Philips000 003 004 006 008 009 015 037 041 042 048 049 050 121 134 203 205 209 233 242 243 247 250 251 301 306 312 320 Phoenix 209 250 255 Phonola 203 209 247 250 306 320 Pioneer 004 006 095 109 112 118 119 ...

Страница 120: ...91 303 310 319 341 Thorn204 211 213 237 240 241 250 263 278 298 303 305 313 324 Toshiba 033 043 044 058 061 065 066 087 088 129 141 148 149 150 204 208 238 241 248 249 254 257 271 314 318 Totevision 91 Towada 257 Tristar 266 Triumph 250 261 271 279 Uher 250 256 306 312 Ultra 154 Ultravox 250 257 272 306 Uniden 138 Universal 49 Universum 211 212 222 231 240 249 250 254 256 258 260 261 264 272 276 2...

Страница 121: ...e en una de nuestras zonas para sucursales Philips de servicio al de fábrica ver directorio más abajo Ud puede comunicarse con la sucursal de servicio más cercana para obtener una reparación oportuna y eficaz de su producto Si su producto está todavía bajo garantía Ud debe presentar comprobante de compra para no ocasionar ningunos cargos por servicio Para servicio después del vencimiento de la gar...

Страница 122: ...0 SITIOS POR TODO EL PAIS PARA LA RECEPCION DE PRODUCTOS NECESITADOS DE REPARACIONES COMUNICARSE CON EL CENTRO DE SERVICIO DE FABRICA MAS CERCANO PARA ESTOS LUGARES DENTRO DE UN RADIO DE 80 A 120 KM 50 A 75 MILLAS DEL CENTRO DE SERVICIO LOCAL ATLANTA Philips Factory Service 550 Franklin Road Suite F Marietta GA 30067 800 273 1501 CLEVELAND Philips Factory Service 950 Keynote Circle Brooklyn Height...

Отзывы: