background image

until 

2008/5/19

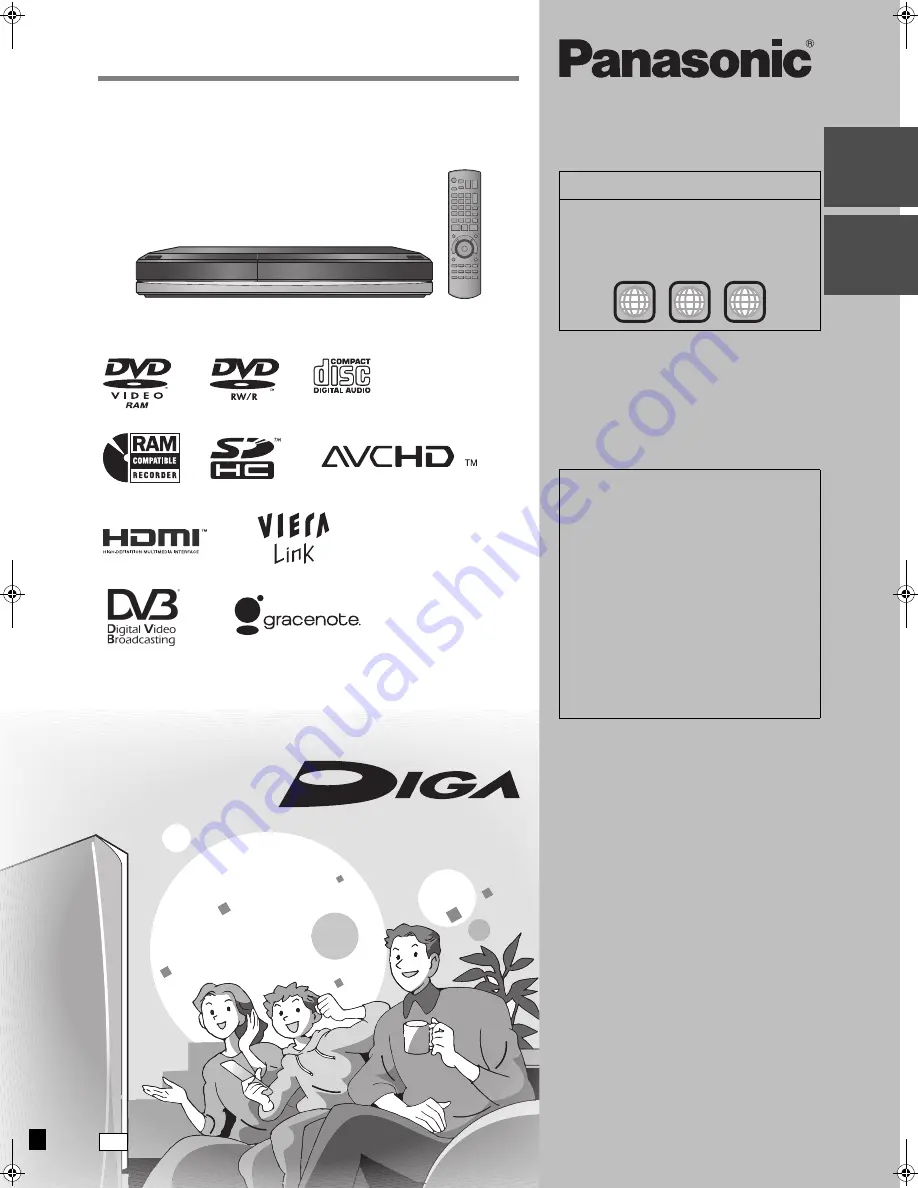
Operating Instructions

DVD Recorder

Model No.

DMR-XW300

Dear customer

Thank you for purchasing this product. For optimum 
performance and safety, please read these 
instructions carefully.

Before connecting, operating or adjusting this 
product, please read the instructions completely. 
Please keep this manual for future reference.

Region management information

DVD-Video

This unit plays DVD-Video marked with labels 
containing the region number “

4

” or “ALL”.

Example:

This DVD Recorder is for viewing and 
recording free to view channels only, not pay 
TV or encrypted channels.

Trademark of the DVB Digital Video 
Broadcasting Project (1991 to 1996) 
Declaration of Conformity No. 5368, 25th 
January 2008

Notice for DVB functions

Any function related to DVB (Digital Video 
Broadcasting) will work in areas where 
DVB-T (MPEG2) digital terrestrial 
broadcasting is received. Consult your local 
Panasonic dealer with coverage areas.

This unit has the capability for DVB 
specifications. But future DVB services 
cannot be guaranteed.

This unit does not support MHP (Multimedia 
Home Platform).

4

ALL

3

4

2


GN

RQT9135-L

Q

u

ic

k Star

Gu

id

e

B

asi

op

e

ra

ti

ons

DMRXW300GN-RQT9135-L_eng.book  1 ページ  2008年4月30日 水曜日 午後6時11分

Summary of Contents for Diga DMR-XW300

Page 1: ...is DVD Recorder is for viewing and recording free to view channels only not pay TV or encrypted channels Trademark of the DVB Digital Video Broadcasting Project 1991 to 1996 Declaration of Conformity No 5368 25th January 2008 Notice for DVB functions Any function related to DVB Digital Video Broadcasting will work in areas where DVB T MPEG2 digital terrestrial broadcasting is received Consult your...

Page 2: ...ACE SOURCES OF NAKED FLAMES SUCH AS LIGHTED CANDLES ON THE UNIT DISPOSE OF BATTERIES IN AN ENVIRONMENTALLY FRIENDLY MANNER CAUTION Danger of explosion if battery is incorrectly replaced Replace only with the same or equivalent type recommended by the manufacturer Dispose of used batteries according to the manufacturer s instructions THIS UNIT IS INTENDED FOR USE IN MODERATE CLIMATES This product m...

Page 3: ...UN 10 01 08 19 10 All DVB Services All Types Select Service OK RETURN Select Programme OPTION Portrait Landscape Page Page 24 Hr 24 Hr Prog type Favourites Time Info ABC 1 ABC 2 In today s show we will Emmerdale SUN 10 01 News News News GUIDE CH 2 programmes Simultaneous Recording It is possible to record 2 programmes being broadcasted at the same time 31 VIERA Link HDAVI ControlTM Operation of th...

Page 4: ...cording 31 Flexible Recording 32 Playing while you are recording 32 Operation during Recording 33 Advanced timer recording 34 Manually programming timer recordings 34 To release the unit from recording standby 35 Relief Recording 35 Auto Renewal Recording 35 To cancel recording when recording has already begun 35 Check change or delete a programme 36 Notes on timer recording 36 Operations in the T...

Page 5: ...7 Deleting all titles Delete all titles 78 Enabling the unit s recording function Format 78 Selecting the background style Top Menu 79 Selecting whether to show the Top Menu first Auto Play Select 79 Enabling discs to be played on other equipment Finalise 79 Creating Top Menu Create Top Menu 79 Changing the unit s settings 80 Common procedures 80 Tuning 80 HDD Disc 82 Picture 83 Sound 83 Display 8...

Page 6: ...D RAM DVD RAM DVD R DVD R DVD R DVD R DL DVD R DL DVD R DL DVD RW DVD RW DVD RW Internal REC HDD Cannot do Can do Discs Landscape TV Guide SUN 10 01 08 19 10 All DVB Services All Types Select Service OK RETURN OPTION Portrait Landscape Page Page 24 Hr 24 Hr Prog type Favourites Time Info ABC 1 ABC 2 In today s show we will Emmerdale SUN 10 01 News News News GUIDE CH Select Programme DVD RAM HDD Ca...

Page 7: ...ding on the recording mode When copying DR mode titles to disc It is copied in standard definition SD It is copied in Normal Speed mode Regarding DR Direct Recording mode The following can be recorded in DR mode HDD HDD HDD DR XP SP LP EP FR Record as high definition HD quality Record as standard definition SD quality Programmes in high definition HD quality DR XP SP LP EP FR All subtitles and mul...

Page 8: ...pe Hard disk drive HDD Standard symbol HDD Data that can be recorded and played Video Still picture Music Quality that can be recorded High definition HD quality Standard definition SD quality Recording mode that can be recorded All recording mode DR XP SP LP EP FR Rewritable Timer recording Copy once recording ...

Page 9: ...back on Panasonic DVD recorders and DVD RAM compatible DVD players Finalisation needed for playback on other equipment R DL can be played back only on equipment compatible with this disc Note Discs recorded on equipment other than this unit may not be able to be recorded to Disc type R R DL RW Standard symbol R before finalisation DVD V after finalisation R DL before finalisation DVD V after final...

Page 10: ...CD CVD SVCD SACD MV Disc PD Video CD DivX discs etc Play only discs Disc type Logo Standard symbol Uses DVD Video DVD V Movie and music discs DVD RW DVD Video Recording format RW VR DVD RW video recorded on another DVD recorder You can play programmes that allow One time only recording if they have been recorded onto a CPRM compatible disc By formatting 78 the disc you can record onto it in DVD Vi...

Page 11: ...rted Digital Cameras which require additional programme installation when connected to a PC are not supported MTP Media Transport Protocol device is not supported A multi port USB card reader is not supported PTP protocol is not supported Format FAT16 and FAT32 file systems are supported UDF NTFS exFAT file system is not supported Depending on the sector size some files may not work Only the first...

Page 12: ...ccess the main functions Playback Recording etc quickly and easily GReturn to previous screen HCreate chapter 44 IShow Timer Recording screen 34 JSkip the specified time 39 KSkip approx 1 minute forward 39 LStart Flexible Recording 32 The remote control information Batteries Insert so the poles i and j match those in the remote control Do not use rechargeable type batteries Do not mix old and new ...

Page 13: ... close disc tray 15 9SD card slot 15 USB port 15 Channel select 23 Start recording 23 Specify a time to stop recording 23 Stop 23 38 Start play Rear panel terminals 16 17 91 94 1Copying indicator 2SD card slot indicator 3USB port indicator 4Disc indicator 5Timer recording indicator 6Drive HDD DVD or SD indicator 7Main display section indicator 8Playback indicator Indicators for functions that this...

Page 14: ...where the rear cooling fan and the cooling vents on the side are covered up Place the unit on a surface that is flat and not subject to vibration or impact Do not place on anything that generates heat like a video cassette recorder etc Do not place in an area often subject to temperature changes Place in an area where condensation does not occur Condensation is a phenomenon where moisture forms on...

Page 15: ...ions Do not attach labels or stickers to discs This may cause disc warping and un balanced rotation rendering it unusable Write on the label side of the disc only with a soft oil based felt pen Do not use ballpoint pens or other hard writing implements Do not use record cleaning sprays benzine thinner static electricity prevention liquids or any other solvent Do not use scratch proof protectors or...

Page 16: ...the 21 pin Scart cable If your television is equipped with RGB input capability by connecting with a fully wired 21 pin Scart cable you can see video using RGB output on this unit Required setting AV1 Output in the Setup menu 85 RF RF IN IN RF RF OUT OUT AV2 EXT AV1 TV OPTICAL COAXIAL COMPONENT COMPONENT VIDEO OUT VIDEO OUT OUT OUT AV4 IN AV4 IN S VIDEO VIDEO R AUDIO L PR PB Y AC IN 10BASE T 100BA...

Page 17: ... unit to DVI devices that are incompatible with HDCP For units compatible with HDCP High Bandwidth Digital Content Protection copyright protection that are equipped with a digital DVI input terminal PC monitors etc Depending on the unit images may not display properly or at all when connecting with a DVI HDMI switching cable Audio cannot be output Connecting to a TV with an HDMI High Definition Mu...

Page 18: ...inutes Auto Tuning is complete when Quick Start setting screen appears The time information for your region can be obtained MANUAL SKIP DISPLAY STATUS AUDIO PROG CHECK TIME SLIP REC MODE REC CREATE CHAPTER F U N C T I O N M E N U D I R E C T N A V I G A T O R GUIDE RETURN PLAY x1 3 PAUSE STOP SLOW SEARCH SKIP TEXT CH PAGE SELECT INPUT 0 9 8 7 6 5 4 3 2 1 CH AV TV DRIVE SELECT DVD VOL DELETE STTL E...

Page 19: ...ned on for the first time Please proceed to the following steps After Download from TV is complete Quick Start setting screen appears Press 3 4 to select On or Off and press OK When television picture appears set up is complete To stop partway Press RETURN Note Acquisition of the setting information is not supported by all Panasonic TVs VIERA The acquisition may take some time depending on the VIE...

Page 20: ... View and press OK To exit the screen Press EXIT Press AUDIO Audio will switch according to the contents of the programme every time it is pressed When STTL appears in digital channel information 21 Press STTL Press again to hide the subtitle Important This unit does not have an analogue broadcast tuner Select the channel e g 5 0 0 5 15 0 1 5 115 1 1 5 MANUAL SKIP DISPLAY STATUS AUDIO PROG CHECK T...

Page 21: ...olour button of the colour to change 2 Enter the new page number with the numbered buttons 3 Press and hold OK To exit the teletext screen Press TEXT Note The teletext function depends on respective stations While stopped Press STATUS 1 Channel and Station Name 2 Programme name and Broadcast time 3 Current favourite list 4 Change the favourite list 5 Software update 90 6 The parental ratings level...

Page 22: ...SELECT to select the HDD or DVD drive The HDD or DVD indicator lights up on the unit s display 2 Press DIRECT NAVIGATOR HDD RAM When VIDEO is not selected press the Red button to select VIDEO 3 Press 3 4 to select the title and press OK To show other pages Press 9 Regarding DIRECT NAVIGATOR 40 To exit the screen Press DIRECT NAVIGATOR Playing DVD Video STATUS PROG CHECK TIME SLIP REC MODE REC CREA...

Page 23: ...n recording in XP SP LP or EP modes Subtitles cannot be recorded Multiple audio will be recorded with the contents selected when the recording starts and the switching cannot be done after the recording Select the audio to be recorded with Audio Mode for Digital Broadcast in the Setup menu prior to the recording 83 During recording Press REC on the main unit to select the recording time You can sp...

Page 24: ...programme currently broadcasting is selected Press 3 4 to select Timer Rec Set and press OK Confirm the programme start and end time by using a TV magazine etc and make corrections if necessary using 3 4 2 1 34 step 3 3 Press OK The timer programme is stored and the timer icon is displayed F lights on the unit s display to indicate timer recording standby has been activated Press Í DVD to turn the...

Page 25: ...ndicate timer recording standby has been activated Press Í DVD to turn the unit off To return to the previous screen Press RETURN To exit the screen Press EXIT To cancel a timer recording on the TV Guide screen 1 Press 3 4 2 1 to select the programme in the TV Guide and press OK 2 Press 2 1 to select Yes and press OK F in the TV Guide disappears To modify the timer recording on the TV Guide screen...

Page 26: ...space after deleting HDD RAM The space deleted becomes available for recording RW V RW Available recording space increases only when the last recorded title is deleted This space become available for recording after all the later recorded titles are deleted R R DL R R DL Available space does not increase even after the contents are deleted STATUS PROG CHECK TIME SLIP REC MODE REC CREATE CHAPTER F ...

Page 27: ...ode When the copy destination disc does not have enough space When the title aspect for the copying source and Aspect for Recording do not match When the title aspect for the copying source is 16 9 R R DL RW R R DL RW V copying source was recorded in EP or FR recordings 5 hours or longer mode Note Titles in the grouped titles and other titles cannot be registered simultaneously If you register mul...

Page 28: ...re receiving a programme with the subtitles STTL appears at the bottom of digital channel information display 21 When recording in DR mode HDD Subtitles will be recorded as is It is possible to switch the subtitles after it is recorded When recording in XP SP LP EP or FR modes Subtitles cannot be recorded Recording of 16 9 image such as wide broadcasting When the Rec for High Speed Copy of the Set...

Page 29: ...e deleted from the HDD They cannot be copied Even when copying to videotape the title may not be copied correctly because of the copy guard Playing the disc on other players R R DL RW V R R DL The disc must be finalised 79 It is necessary to finalise DVD R etc on this unit after recording or copying titles to them You can then play them as a commercially sold DVD Video However the discs become pla...

Page 30: ...ode Record by automatically adjusting the quality between XP SP LP and EP depending on the remaining area on the disc Broadcasting input that can be recorded Digital broadcasting Digital broadcasting External input DV input Quality that can be recorded Quality same as broadcasted HD quality and SD quality SD quality only The audio of the surround programme Surround audio as the broadcast Stereo au...

Page 31: ...lly selects a recording rate between XP and EP 8 hours that will enable the recordings to fit in the remaining disc space with the best possible recording quality For example with a 90 minute recording to an unused DVD RAM the picture quality is adjusted to between XP and SP When recording to the HDD picture quality is automatically adjusted to precisely fit a copied title on a 4 7 GB disc It is p...

Page 32: ...the HDD or timer recording onto the disc However disc cannot be played back while timer recording onto the disc 1 Press DRIVE SELECT to select the HDD or DVD drive 2 Press DIRECT NAVIGATOR during recording is displayed on the recording programme 3 Press 3 4 to select a title and press OK To stop play Press To exit the Direct Navigator screen Press DIRECT NAVIGATOR Note Chasing playback and Simulta...

Page 33: ...e on the TV screen above Press Press again to restart recording You can also press REC to restart Title is not split into separate titles When the recording in DR mode is paused that part will show up as still picture instantaneously while playback Switch the input Press INPUT SELECT Switch to other channel Press W X CH Perform 2 programmes simultaneous recording Record other programme with steps ...

Page 34: ...is DVD and there is not enough remaining space recording automatically switches to the HDD 35 Relief Recording Mode Recording modes 30 Renew Auto Renewal Recording 35 Programme Name Press OK 71 Entering text 4 Press OK The timer programme is stored and the timer icon is displayed F lights on the unit s display to indicate timer recording standby has been activated Press Í DVD to turn the unit off ...

Page 35: ...d only when weekly recording or daily recording is selected 1 Press PROG CHECK 2 Press 3 4 to select the programme and press OK 3 Press 3 4 to select Renew column 4 Press 2 1 to select ON and press OK Note If a programme set for Auto Renewal Recording is protected or while playback is taking place from the HDD or while copying the programme will not be overwritten Instead the programme set for rec...

Page 36: ...s simultaneous recording First 1 minute of the following programme is not recorded either if the following programme set to be recorded is also DVD If the start of 2 timer recordings overlap with each other when 2 programme simultaneous recording is not possible the programme with the earlier start time will be recorded Starting of the timer recording while executing other operation 95 Check chang...

Page 37: ...ump back 24 hours Press the Red button You can only jump back to the current date Past information cannot be viewed When jumping the selected time period may deviate To browse through the TV Guide list Press W X CH To see programme information Programmes with the symbol Press STATUS Additional information programme name programme duration broadcast time description is available for these programme...

Page 38: ... restart play Search Press 6 or 5 The speed increases up to 5 steps R R DL RW up to 3 steps Press 1 PLAY to restart play Audio is heard during first level search forward Skip During play or while paused press or 9 Skip to the title or chapter you want to play It will skip to the beginning of chapters 44 if the title contains chapters HDD It will not skip the title But the title in the grouped titl...

Page 39: ...the aspect ratio of the screen 75 Create Chapter Chapters are divided at the point pressed 44 5 min This automatically disappears after approximately 5 seconds To show the screen again press TIME SLIP again Changing audio during play PLAY eng Audio LR HDD Soundtrack 1 ENG Digital 3 2 1ch e g English is selected Display the subtitle during play When playing DVD R DL Dual Layer single sided and R DL...

Page 40: ... used as the group name To change the group name 1 Press 3 4 to select the group and press OPTION 2 Press 3 4 to select Edit and press OK 3 Press 3 4 to select Enter Name and press OK 4 Enter the name 71 Entering text Even if the group name is changed the title names in the group will not be changed Direct Navigator screen icons Currently recording Title protected Title that was not recorded due t...

Page 41: ...ation Insert a disc Press DRIVE SELECT to select the DVD drive 1 While stopped Press FUNCTION MENU 2 Press 3 4 to select To Others and press OK 3 Press 3 4 to select Playlists and press OK 4 Press 3 4 2 1 to select the playlist and press OK Operation during play 38 To return to the previous screen Press RETURN To exit the screen Press EXIT DVD RAM AVCHD OK RETURN This disc is play only and cannot ...

Page 42: ...he protection 1 Press DIRECT NAVIGATOR HDD RAM When VIDEO is not selected press the Red button to select VIDEO 2 Press 3 4 to select the title To show other pages Press 9 Multiple editing Select with 3 4 and press Repeat A check mark appears Press again to cancel 3 Press OPTION 4 Press 3 4 to select the operation and press OK If you select Edit press 3 4 to select the operation and press OK To ret...

Page 43: ...ays 10 seconds before and after the division point To change the division point Restart play and press 3 4 to select Divide then press OK at the point where you want to divide the title Note The divided titles retain the title name and CPRM property 110 of the original title Video and audio just before and after the dividing point may momentarily cut out HDD Divided titles form a group of titles C...

Page 44: ...s the maximum chapter numbers R R DL RW V RW VR R R DL RW Only playback is possible During the playback or pause Press CREATE CHAPTER Chapters are divided at the point pressed To delete the Chapter Mark 1 While paused Press 9 and skip to the location you want to delete 2 Press CREATE CHAPTER 3 Press 2 1 to select Yes and press OK Regarding Chapters Programmes are recorded as a single title consist...

Page 45: ...ted chapter Selected chapter can be edited via OPTION Press RETURN to go back to previous menu Chapter View Select OPTION Page 001 001 0 00 00 001 0 00 00 Play Time Remaining Chapter View screen Combine Chapters Delete Chapter Refer to Chapter operations Chapter operations Create Chapter Select the point where you want to start a new chapter while viewing the title 1Press CREATE CHAPTER at the poi...

Page 46: ...Copy Copy Title Playing Advanced Copy The high speed copy may not be possible depending on the destination disc or the title to copy 48 When is the time high speed copy is not possible RAM RW VR HDD Advanced Copy High speed RW HDD Advanced Copy Normal speed Before finalise R R DL RW V R R DL Cannot copy DVD V After finalise R R DL RW V R R DL HDD Advanced Copy Normal speed SD Video MPEG2 format Fr...

Page 47: ...me speed as with a 4X Speed DVD RW disc 4 In this unit copying with a 16X Speed R disc will be performed at the same speed as with a 8X Speed R disc Note When recording or playing while copying the unit may not use the maximum recording speed Depending on the condition of the disc the unit may not copy using the maximum speed High speed mode Normal speed mode Features Copy with shorter time than t...

Page 48: ...ed to the disc The titles that were temporarily copied to the HDD are then deleted You cannot copy to the disc in the following cases When there is not enough free space on the HDD When copying to a new blank disc if you intend to fill a new disc when copying to it the equivalent of up to 4 hours of free space in SP mode is needed on the HDD When the number of titles recorded to the HDD and the nu...

Page 49: ...STATUS Note Timer recordings executed while copying are recorded to the HDD regardless of the recording drive settings Only when high speed copying Speed and recording mode when copying For titles in DR mode Normal speed FR mode For titles in XP SP LP EP or FR modes RAM High speed recording mode as is When the copy destination disc does not have enough space copy will perform at normal speed R R D...

Page 50: ...2 to confirm 7 Set to make it possible to play on other equipment Finalise or Create Top Menu HDD R R DL RW V R R DL RW only Press 4 if it is not to be set step 8 1 Press 3 4 to select Other setting and press 1 2 Press OK 3 Press 3 4 to select On or Off and press OK If On is selected R R DL RW V R R DL After finalising the discs become play only and you can also play them on other DVD equipment Ho...

Page 51: ...rming steps 1 3 50 1 Press 3 4 2 1 to select Cancel All and press OK 2 Press 2 1 to select Yes and press OK The settings and lists may be cancelled in the following situations When a title still picture etc has been recorded or deleted at the copy source When steps have been taken for instance to turn off the unit open the tray change the copy direction etc COPY Navigator Copying list icons and fu...

Page 52: ...opying The disc top menu is displayed Disc play automatically begins from title 1 when Title 1 is selected from the Auto Play Select menu when finalising the disc 79 4 When the top menu is displayed Press 3 4 2 1 to select the title you want to start copying and press OK While playing in order all the titles after the selected title are recorded until the set time After the last title on the disc ...

Page 53: ...LECT to select the input channel for the equipment you have connected e g If you have connected to AV3 input terminals select AV3 2 Press REC MODE to select the recording mode DR FR mode cannot be selected 3 Select the channel on the other equipment 4 Press REC Recording starts To skip unwanted parts Press to pause recording Press again to restart recording To stop recording Press See also Importa...

Page 54: ... via AV3 input Copy will stop when timer recording starts Chasing playback simultaneous rec and play switching of the broadcast or input cannot be performed HDD Preparation Press DRIVE SELECT to select the HDD drive When recording bilingual programmes 28 Important notes for recording When the output signal from the external equipment is NTSC change the TV System to NTSC in the Setup menu 84 1 Whil...

Page 55: ... connected to the AV3 input terminals Preparation Press DRIVE SELECT to select the DVD drive When the output signal from the external equipment is NTSC change the TV System to NTSC in the Setup menu 84 1 While stopped Press FUNCTION MENU 2 Press 3 4 to select To Others and press OK 3 Press 3 4 to select Recording via AV3 input and press OK It may take a while for the next screen to display while p...

Page 56: ...2 1 to select Start and press OK To stop copying Press and hold RETURN for 3 seconds Note Record playback or timer recording cannot be executed while copying Title with more than 256 scenes cannot be copied Copied video will be displayed as AVCHD in the Name column of the Direct Navigator screen Depending on the recording condition with the high definition camera scenes recorded on same day might ...

Page 57: ...Advanced Copy 50 Please set the items in step 4 and 5 as shown below Copy Direction Source USB Copy Mode Format VIDEO SD Video on the camera are automatically registered on the copy list Copying SD Video MPEG 2 format SD HDD RAM All the recordings on the same date become a title You cannot playback SD Video on an SD card with this unit You must copy the files to the HDD or a DVD RAM You cannot pla...

Page 58: ...creen Press RETURN To exit the screen Press DIRECT NAVIGATOR The display below automatically appears when you insert a SD card USB memory or the CD while stopped Press 3 4 to select Play Pictures JPEG or JPEG and press OK Then go to step 3 right CD It will go to step 3 right automatically if it is only still pictures that is recorded Display contents differs depending on what is recorded in each m...

Page 59: ... pictures When changing date If you remove the SD card while the DIRECT NAVIGATOR screen is displayed picture rotation information may not be properly stored Remove the SD card after you exit the DIRECT NAVIGATOR screen Zoom in Zoom out While playing 1 Press OPTION 2 Press 3 4 to select Zoom out and press OK Press 3 4 to select Zoom in in step 2 and press OK to resume the display size of the still...

Page 60: ...ill pictures JPEG ᧂ Date 04 02 2007 Total 9 Date 08 09 2006 Total 19 RETURN OK 20 08 DR PICTURE VIDEO MUSIC VIDEO PICTURE MUSIC Slide Show Select OPTION Press OK to display pictures DIRECT NAVIGATOR Pictures by Date Page 01 01 001 002 Time Remaining Pictures by Date screen 20 08 DR 04 02 2007 PICTURE VIDEO MUSIC RETURN OK DIRECT NAVIGATOR Picture JPEG View Page 001 001 OPTION Select Time Remaining...

Page 61: ...D RAM HDD Copy to HDD RAM Press 2 1 to select Start and press OK Change Date HDD RAM Pictures by Date only 1Press 2 1 to select the item and press 3 4 to change 2Press OK Date of the original is maintained Delete if unrequired If the changed date already exists pictures will be moved to that date Enter Album Name HDD RAM Album View only You can give names to albums 71 Entering text Album names inp...

Page 62: ...3 seconds Note This unit saves the information on up to 12 000 still pictures and 30 SD cards If additional still pictures are imported then the older information will be deleted HDD RAM SD 1 While stopped Press FUNCTION MENU 2 Press 3 4 to select To Others and press OK 3 Press 3 4 to select Advanced Copy and press OK If you are not going to change the registered list press 4 several times step 7 ...

Page 63: ...in which the still pictures are registered on the copy list may not be the same at the copy destination If still pictures are already contained inside the copy destination folder the new still pictures are recorded following the existing still pictures To edit the copying list Select the item in step 6 3 left 1 Press OPTION 2 Press 3 4 to select the operation and press OK Delete All Delete all ite...

Page 64: ... track will stop Playing MP3 files Using the tree screen to find a group CD OK RETURN Select file type JPEG MP3 USB device OK RETURN USB device is inserted Copy AVCHD Copy Video MPEG2 Play Pictures JPEG Copy Pictures JPEG Play Copy Music MP3 DIRECT NAVIGATOR CD MP3 0 09 March Moon OK RETURN No Track Name Folder Mexican pops Artist 0001 March Moon Do this flower open Go to there from here If easter...

Page 65: ... OK To return to the previous screen Press RETURN To exit the screen Press DIRECT NAVIGATOR Playback of track will stop Note You cannot play music tracks on HDD while copying When this unit is not operated for approximately 10 minutes during music playback the screen saver is displayed only when the Screen Saver in the Setup menu is set to On 84 To return to the previous screen press RETURN Playin...

Page 66: ... OUT terminal only when Digital Audio Output is set to PCM However in this case audio is output as 2ch Display Still Pictures Slide show Sample pictures in this unit or pictures stored on the Album View of the HDD can be played back as slide show during playback of the music While playing the music Press the Red button Change the pictures to display 1 Press OPTION 2 Press 3 4 to select Select Pict...

Page 67: ...bum and track operation right 68 Enter Artist Name Delete AllTracks Album and track operation right Add to Playlist EditTrack Name Properties Edit Artist Name Delete Album and track operation right 68 66 Album and track operation Delete All Tracks While displaying Music Menu screen Delete all tracks in the HDD 1 Press 2 1 to select Yes and press OK 2 Press 2 1 to select Delete and press OK Once de...

Page 68: ... OK 3 Edit the playlist Press 3 4 to select the playlist and press OPTION Edit the track in the playlist 1 Press 3 4 to select the playlist and press OK 2 Press 3 4 to select the track and press OPTION 4 Press 3 4 to select item and press OK e g while selecting playlist e g while selecting the track in playlist To return to the previous screen Press RETURN To exit the screen Press DIRECT NAVIGATOR...

Page 69: ...M USB CD MP3 MP3 The maximum number of tracks on HDD 40000 Depends on the remaining capacity If titles or pictures are recorded then the number of albums that can be recorded will be reduced 1 While stopped Insert a CD or USB memory CD Music CD The unit starts accessing the Gracenote Database and searches for the title information If search results indicate that multiple titles were found Press 3 ...

Page 70: ...ess OK When MUSIC is not selected press the Yellow button to select MUSIC 3 Deleting an artist album music 1Press 3 4 2 1 to select the item and press OK 2Press 3 4 2 1 to select the item and press DELETE Deleting a track 1Press 3 4 2 1 to select the item which contains the track to delete and press OK 2Press 3 4 2 1 to select the track and press OK Remove the music Only when My Favourites Playlis...

Page 71: ...rs Title 64 44 Album of still pictures 36 Album Music HDD 59 Track HDD 59 Artist HDD 39 Playlist Music HDD 59 Disc RAM 64 R R DL RW V R R DL RW Characters Title 44 Disc 40 Title timer recording Select Programme Name in step 3 on page 34 Title Select Enter Name in step 4 on page 42 Disc Select Disc Name in step 1 of Providing a name for a disc on page 77 Album of still pictures Select Enter Album N...

Page 72: ... 3 function HDAVI Control 3 is the newest standard current as of December 2007 for Panasonic s HDAVI Control compatible equipment This standard is compatible with Panasonic s conventional HDAVI equipment Please refer to individual manuals for other manufacturers equipment supporting VIERA Link function Download from the TV 1 If this unit is connected to a Panasonic TV VIERA supporting HDAVI Contro...

Page 73: ...you want to pause the TV programme Turn on the Pause Live TV function using the TV remote control This unit turns on automatically 2 When you want to resume Display the Control Panel below and press OK The TV programme resumes To stop Pause Live TV 1 Press 4 while the Control Panel is displayed 2 Press 2 1 to select Yes and press OK Refer to Note on page 76 To pause the TV programme you are watchi...

Page 74: ...tiple audio Angle DVD V Change the number to select an angle Audio channel HDD RAM RW VR 39 Changing audio during play Disc Play Picture Sound Soundtrack Subtitle 1 Audio channel Off L R Digital 2 0 ch Menu Item Setting LPCM ÎDigital DTS MPEG k kHz b bit ch channel Signal type Sampling frequency Number of bits Number of channels ENG FRA DEU ITA ESP NLD SVE NOR English French German Italian Spanish...

Page 75: ...r bilingual recordings This function is effective for audio from the HDMI terminal or the DIGITAL AUDIO OUT terminal only when Digital Audio Output is set to PCM However in this case audio is output as 2ch Dialogue Enhancer HDD RAM R R DL RW V R R DL RW DVD V RW VR AVCHD 3 channel or over only including a centre channel The volume of the centre channel is raised to make dialogue easier to hear Sta...

Page 76: ...p menu is set to On 84 To return to the previous screen press RETURN FUNCTION MENU window Playback You can select and play recorded programmes 22 change the Play Mode JPEG MP3 etc Recording You can easily find programmes you want to watch and set them for timer recording 24 Delete You can delete items using DELETE Navigator 26 70 Copy You can copy recorded titles using COPY Navigator 27 Timer Reco...

Page 77: ... 3 4 to select Disc Name and press OK 71 Entering text The disc name is displayed in the DVD Management window R R DL RW V R R DL With a finalised disc the name is displayed on the Top Menu RW The disc name is displayed only if you play the disc on other equipment after creating top menu To return to the previous screen Press RETURN To exit the screen Press EXIT Common procedures Playback Recordin...

Page 78: ...ormat Disc or Format Card and press OK 2 Press 2 1 to select Yes and press OK 3 Press 2 1 to select Start and press OK A message appears when formatting is finished Note Formatting normally takes a few minutes however it may take up to a maximum of 70 minutes RAM Do not disconnect the AC mains lead while formatting This can render the disc or the card unusable 4 Press OK Note When a disc or card h...

Page 79: ...nt other than this unit the background selected as Top Menu may not be displayed Discs finalised on this unit may not be playable on other players due to the condition of the recording RW RW discs contain no Top Menu data Top Menu is a convenient function We recommend you create the menu before playing a RW disc on other equipment You cannot use the Top Menu for playing on this unit Make selection...

Page 80: ...to move other channels 4 Press OK to save the group To delete channels on a group 1 Press 1 2 Press 3 4 to select the channel in the Fav List column and press the Yellow button Repeat this step to delete other channels Press the Blue button to delete all the channels from the group 3 Press OK to save the group Deleting a channel from a group does not affect the channel itself You can still select ...

Page 81: ...X CH to select the channel Signal Quality Below 2 display red The signal quality is so poor that there may be interference in the pictures and sound 2 5 display orange The signal quality is basically adequate but brief interference in the pictures and sound is possible in isolated case Over 5 display green Optimum picture and sound quality Signal Strength The display for signal strength is grey 0 ...

Page 82: ...o when recording It is valid when recording in following When recording to DVD R DVD R DL or DVD RW DVD Video format When the Rec for High Speed Copy is enabled below Automatic The programme will be recorded in the original aspect used when recording started including when recording started at a commercial etc 16 9 4 3 When recording to the HDD or DVD RAM with Rec for High Speed Copy set to Off pr...

Page 83: ...nverted to 48 kHz Choose when the connected equipment cannot process signals with a sampling frequency of 96 kHz Off Signals are output as 96 kHz Choose when the connected equipment can process signals with a sampling frequency of 96 kHz Dolby Digital Select to output Dolby Digital as bitstream or PCM Bitstream Select Bitstream when the connected equipment can decode the respective audio format PC...

Page 84: ...played the display on the screen is not displayed When Music is played the display returns to the screen saver mode Playback continues When still pictures are shown except for slideshows the display returns to the Direct Navigator screen The display returns to the screen saver mode when it is paused by the Pause Live TV Pause status will continue Off Teletext Select the Teletext display mode 21 TO...

Page 85: ...solution when using the component video terminal 576i 480i 576p 480p 720p 1080i If it is set to 720p images other than 720p will be output as 1080i Press the and 1 PLAY for more than 5 seconds when the image is disturbed by changing the setting It will be set to 576i 480i AV1 Output Set according to the terminal of the connected TV Select Video or S Video for component output progressive output If...

Page 86: ...m you want to change The items change as follows Hour Minute Second Day Month Year J 2 Press 3 4 to change the setting 3 Press OK when you have finished the settings The clock starts Clock Time Date Please set clock manually OK store RETURN leave 15 45 39 1 8 2008 Power Save On Power consumption is minimized when the unit is turned to standby 109 Off If Quick Start is set to On Power Save is autom...

Page 87: ...t making any changes When setting an assigned DNS server from your internet service provider perform the following settings After performing steps 1 5 left 6 Press 3 4 to select IP Address Auto assignment and press 2 1 to select Off 7 Press 3 4 to select Primary DNS or Secondary DNS and press OK 8 Enter numbers with the numbered buttons and press OK Follow the instructions given by your internet s...

Page 88: ...y Server Settings and press OK 6 Press 3 4 to select Proxy Address and press OK 71 Entering text After the input of Proxy Address is completed 7 Press 3 4 to select Proxy Port Number and press OK 8 Enter numbers with the numbered buttons and press OK 9 Press 2 1 to select Yes and press OK To set back to default setting After performing steps 1 5 above 1 Press 3 4 to select Initialize and press OK ...

Page 89: ...ble To cancel the Child Lock Press and hold OK and RETURN simultaneously until X HOLD disappears Television operation e g 01 0 1 10 1 0 Brand Code Brand Code Panasonic 01 02 03 04 METZ 05 28 AIWA 35 MITSUBISHI 05 19 20 47 AKAI 27 30 MIVAR 24 BEJING 33 NEC 36 BEKO 05 71 72 73 74 NOBLEX 33 BENQ 58 59 NOKIA 25 26 27 60 61 BP 09 NORDMENDE 10 BRANDT 10 15 OLEVIA 45 BUSH 05 ONWA 30 39 70 CENTREX 66 ORIO...

Page 90: ...For Internet Update of the software will start when the power is turned off The unit s display during the update SW DL Software is downloading Download will stop when the power is turned on or the timer recording starts START Update of the software will start once the download is completed UPD Software is updating FINISH Updated of the software has completed You cannot operate the unit until the u...

Page 91: ... RF IN IN AV1 TV COMPONENT COMPONENT VIDEO OUT VIDEO OUT OUT OUT AV4 IN PR PB Y S VIDEO IN AUDIO IN R L VIDEO IN Television s rear panel Red White S Video cable Red White This unit s rear panel Audio Video cable included RF RF IN IN RF RF OUT OUT AV2 EXT AV1 TV OPTICAL COAXIAL COMPONENT COMPONENT VIDEO OUT VIDEO OUT OUT OUT AV4 IN AV4 IN S VIDEO VIDEO R AUDIO L PR PB Y AV OUT N LAN E T E TX DIGITA...

Page 92: ... Digital Content Protection copyright protection that are equipped with a digital DVI input terminal PC monitors etc Depending on the unit images may not display properly or at all when connecting with a DVI HDMI switching cable Audio cannot be output Connecting with an HDMI compatible television and receiver Regarding VIERA Link HDAVI ControlTM function When connecting with a Panasonic TV VIERA o...

Page 93: ...e if there are both television and VCR input terminals Connecting to a television with 21 pin Scart terminal You can also connect with the AV1 terminal on this unit using the 21 pin Scart cable If your television is equipped with RGB input capability by connecting with a fully wired 21 pin Scart cable you can see video using RGB output on this unit Required setting AV1 Output in the Setup menu 85 ...

Page 94: ... acquire the title of the CD or the information about the artist 69 Update the software of this unit Automatically update the software of this unit 90 Update of the software can be done from the broadcast too Make the necessary settings in Network Settings after connecting 87 RF RF IN IN RF RF OUT OUT AV2 EXT AV1 TV OPTICAL COAXIAL COMPONENT COMPONENT VIDEO OUT VIDEO OUT OUT OUT AV4 IN AV4 IN S VI...

Page 95: ...other operation Starting of timer recording possible during the following operations Starting of timer recording not possible during the following operations Recording the title 1 Playing the title 2 Editing the title Copying a title in high speed mode without finalising Only 1 programme can be recorded Executing DV Auto Rec 3 Executing Recording via AV3 input 3 Executing Pause Live TV 1 1 Executi...

Page 96: ...to start up when this unit is connected with the HDMI IN terminal Can I play DVD Video bought in another country Playback of the following discs is not possible DVD Video discs that do not include region 4 or ALL Refer to the disc s jacket for more information Cover Can DVD Video that does not have a region number be played The region management information for DVD Video indicates that the disc co...

Page 97: ...album Can I transfer the music tracks from HDD to the disc or USB memory No you cannot Abkhazian 6566 Afar 6565 Afrikaans 6570 Albanian 8381 Amharic 6577 Arabic 6582 Armenian 7289 Assamese 6583 Aymara 6589 Azerbaijani 6590 Bashkir 6665 Basque 6985 Bengali Bangla 6678 Bhutani 6890 Bihari 6672 Breton 6682 Bulgarian 6671 Burmese 7789 Byelorussian 6669 Cambodian 7577 Catalan 6765 Chinese 9072 Corsican...

Page 98: ...ete recorded content from the DVD R DVD R DL R or R DL there is no increase in disc space Available space on DVD RW DVD Video format and RW increases only when the last recorded title is deleted Use a new disc 26 43 78 Cannot record Exceeds maximum number limit of titles allowed No Disc The disc may be upside down No folders There is no compatible folder in this unit 111 No SD CARD No valid SD car...

Page 99: ...tible USB memory 8 10 11 UPD The software is being updated You cannot operate the unit until the update is complete 90 U59 The unit is hot The unit switches to standby for safety reasons Wait for about 30 minutes until the message disappears Select a position with good ventilation when installing the unit Do not block the cooling fan on the rear of the unit U61 When a disc is not inserted Displays...

Page 100: ...e time recorded on the disc and the available time shown do not add up The displayed time of this unit is different from the actual recording time Times shown may disagree with actual times Available recording space on DVD RW DVD Video format or RW increases only when the last recorded title is deleted It does not increase if other titles are deleted Even if you delete recorded content from the DV...

Page 101: ...d vertically Adjust by the aspect ratio setting on the TV If you cannot make the adjustment set the Component Resolution in the Setup menu to 576p 480p and HDMI Video Format to 576p 480p 84 85 There is a lot of after image when playing video Set HD optimizer in the Picture menu to Off 74 When playing DVD Video using progressive output one part of the picture momentarily appears to be doubled up Se...

Page 102: ... new ones You are not pointing the remote control at the main unit s remote control signal sensor during operation Coloured glass may obstruct the signal reception transmission Don t place the signal sensor in direct sunlight or in areas that may be subject to sunlight exposure Software is updating when UPD is displaying on the unit s display Wait until the update is completed It may be necessary ...

Page 103: ...ording standby The timer icon F in the timer recording is grey Set the clock The programme information in the TV Guide system may not be correct It is recommended to modify the start and end times to allow a margin of a few minutes 36 35 86 34 Cannot timer record to the disc It cannot timer record in following conditions Unformatted disc R R DL RW V R R DL RW Timer record to DVD RAM in DR mode Dis...

Page 104: ...orded You have forgotten your ratings password You want to cancel the ratings level The ratings level returns to the factory preset While the disc tray is open press DRIVE SELECT to select the DVD drive then press and hold REC and 1 PLAY on the main unit at the same time for 5 or more seconds INIT will appear on the unit s display Image for the Quick View is not smooth Image may not be played back...

Page 105: ...rom CDs that do not conform to CD DA specifications copy control CDs etc cannot be guaranteed Bonus tracks may not be copied Title of the newly released CD cannot be acquired Title cannot be acquired if the title is not registered in the built in GracenoteR database Connection to the network is necessary to acquire title for the newly released CD 94 ID3 tag of a MP3 file is not completely displaye...

Page 106: ...andard AS1417 1 If you live within 5 10 km of DVB transmission towers a combined VHF UHF aerial should be adequate Outside this area separate VHF and UHF aerials provide superior reception performance If you live in a unit or apartment check to ensure the Master Antenna TV MATV system is designed for DVB T reception Please consult your body corporate Picture regularly breaks up on some channels No...

Page 107: ...ttings ratings level ratings password remote control code network settings return to the factory presets Press and hold X CH and CH W on the main unit until the Region Selection screen appears All the settings except for the ratings level ratings password and clock settings return to the factory preset The timer recording programmes are also cancelled 86 86 To reset the ratings level settings Whil...

Page 108: ...Laser power No hazardous radiation is emitted with the safety protection Audio Recording system Dolby Digital 2ch XP SP LP EP mode Linear PCM XP mode Dolby Digital 2ch Max 5 1ch DVB T DR mode Audio in AV1 AV2 21 pin AV3 AV4 pin jack Input level Standard 0 5 Vrms Full scale 2 0 Vrms at 1 kHz Input impedance More than 10 k Audio out AV1 AV2 21 pin Audio Out pin jack Output level Standard 0 5 Vrms Fu...

Page 109: ...le formats ISO9660 level 1 or 2 except for extended formats and Joliet This unit is compatible with multi session but reading or play of the disc may take time if there are a lot of sessions Operation may take time to complete when there are many files tracks and or folders and some files tracks may not display or be playable English alphabet and Arabic numerals are displayed correctly Other chara...

Page 110: ...r A field still shows less picture information so it may be rougher but there is no blurring Gateway IP address of the electronic device providing Internet access Usually called a router IP address e g 192 168 0 1 HDD Hard disk drive This is a mass data storage device used in computers etc A disk with a surface that has been treated with magnetic fluid is spun and a magnetic head is brought in clo...

Page 111: ...etail is much clearer and creates a more realistic and rich image 1080p In one high definition image 1080 1125 scan lines pass at the same time every 1 50th of a second to create a progressive image Since progressive video does not alternate scan lines like interlace there is a minimal amount of screen flicker 720p In one high definition image 720 750 scan lines pass at the same time every 1 50th ...

Page 112: ...unit is repaired disassembled or reconstructed by unqualified persons Extend operating life by disconnecting the unit from the power source if it is not to be used for a long time Placement Voltage AC mains lead protection Foreign matter Service Manufactured under license from Dolby Laboratories Dolby and the double D symbol are trademarks of Dolby Laboratories DTS is a registered trademark of DTS...

Page 113: ...s you agree to cease any and all use of the Gracenote Data the Gracenote Software and Gracenote Servers Gracenote reserves all rights in Gracenote Data the Gracenote Software and the Gracenote Servers including all ownership rights Under no circumstances will Gracenote become liable for any payment to you for any information that you provide You agree that Gracenote Inc may enforce its rights unde...

Page 114: ...gator Music 65 Still picture 58 Title 22 Discs Discs you can use for recording and play 8 Play only discs 10 Discs that cannot be played 10 Disc name 77 Format 78 Protection 77 Display Digital channel information 21 Status messages 75 Divide Title 43 DR Direct Recording mode 7 30 DV automatic recording 55 DVB Signal Display 81 Edit Chapter 45 Music on HDD 67 Still picture 60 Title 42 Enabling disc...

Page 115: ...ure 58 Supported formats 11 SD Video Copy 57 Select channel 20 Setup menu 80 Simultaneous rec and play 32 Slide show 59 Software Update 90 Soundtrack 74 Specifications 108 Still picture Copy 62 Edit 60 Play 58 Subtitle Digital broadcast 20 Disc 74 Playback 39 Switch the audio subtitles on the disc Disc menu 74 Teletext 21 Time Slip 39 Timer recording Check change or delete a programme 36 Manual Re...

Page 116: ...Matsushita Electric Industrial Co Ltd Web Site http panasonic net p RQT9135 L F0408EY0 4100 A ...

Reviews: