background image

VQT4C72

Operating Instructions

Thank you for purchasing this product.
For optimum performance and safety, please read these instructions carefully.
Please keep this manual for future reference.

• This DVD Recorder is for viewing and recording free to air DVB channels only. It does not 

receive pay TV or encrypted channels.
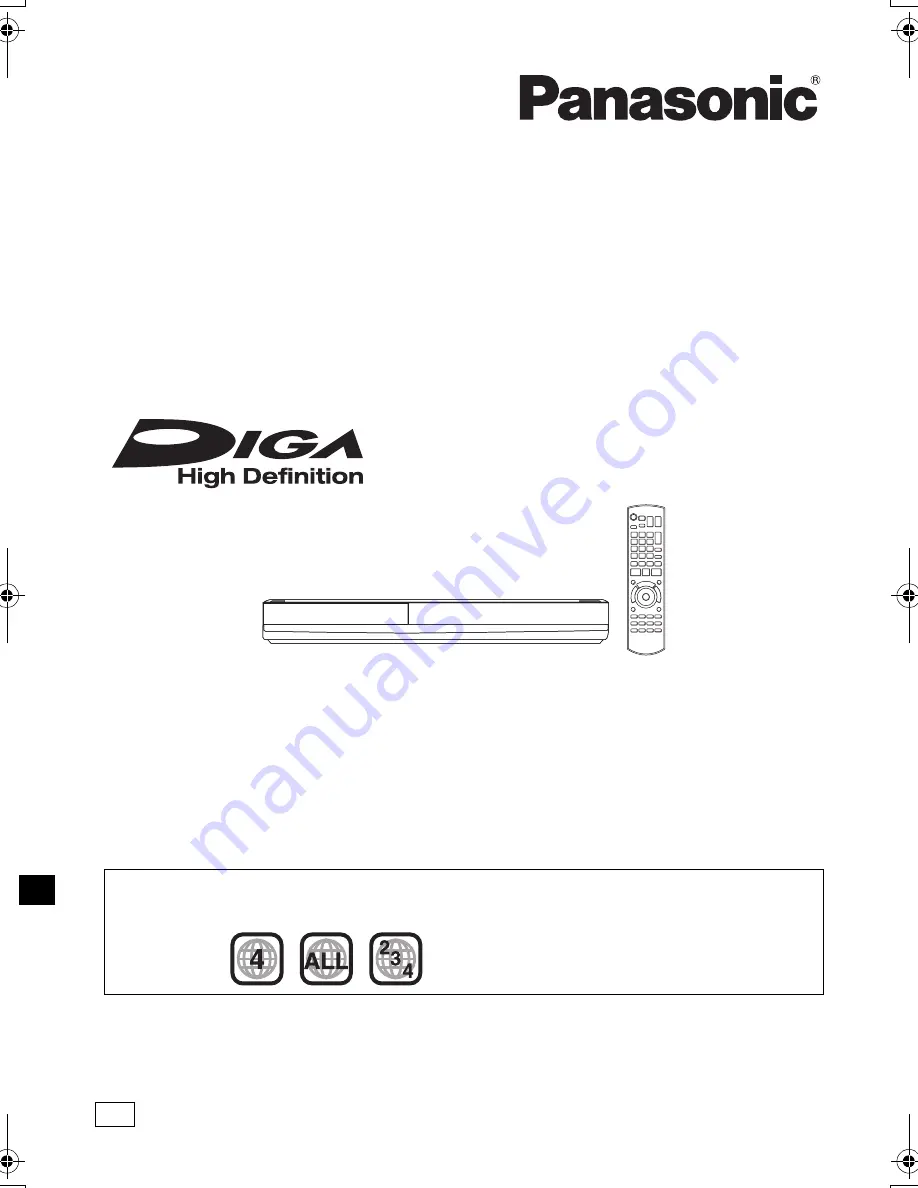
DVD Recorder

Model No. 

DMR-XW390

Region management information
DVD-Video:

This unit can play DVD-Video discs supporting the region number 

“4”

 or 

“ALL”

.

e.g.,

GZ

until 
2012/03/13

DMRXW390GZ-VQT4C72_eng.book  1 ページ  2012年2月28日 火曜日 午前9時8分

Summary of Contents for Diga DMR-XW390

Page 1: ...s carefully Please keep this manual for future reference This DVD Recorder is for viewing and recording free to air DVB channels only It does not receive pay TV or encrypted channels DVD Recorder Model No DMR XW390 Region management information DVD Video This unit can play DVD Video discs supporting the region number 4 or ALL e g GZ ...

Page 2: ... unplugged from the socket outlet immediately if any problem occurs SD card Keep the Memory Card out of reach of children to prevent swallowing Unit This unit utilizes a laser Use of controls or adjustments or performance of procedures other than those specified herein may result in hazardous radiation exposure Do not place sources of naked flames such as lighted candles on this unit This unit may...

Page 3: ...lace When disposing the batteries please contact your local authorities or dealer and ask for the correct method of disposal Please check and identify the supplied accessories Product numbers correct as of February 2012 These may be subject to change Do not use AC mains lead with other equipment Inside of product Supplied accessories Remote control N2QAYB000480 1 pc Batteries for remote control 2 ...

Page 4: ... recording 27 To confirm and edit the timer programme 28 Playing back video Playing titles on the HDD 29 DIRECT NAVIGATOR VIDEO screen 29 Playing titles on the media 31 Operation during play 33 Editing video Deleting recorded titles 35 Editing recorded titles 36 Copying video Copying titles 40 Copying titles from DIRECT NAVIGATOR 42 Notes for copying 43 Copying a finalised disc 44 Copying Title Pl...

Page 5: ...etwork 75 Others 77 Language code list 79 Software Firmware Update 80 Other Operations 81 Entering text 81 Switching the aspect ratio of the screen 81 HOLD function 81 Troubleshooting Troubleshooting guide 82 General operation 82 Displays 83 TV screen and video 83 Sound 84 Recording timer recording and copying 84 Play 85 Edit 86 Picture 86 Music 86 USB 86 TV Guide 86 Broadcast 87 VIERA Link 87 Net...

Page 6: ... HDD 1 HDD Video AVCHD JPEG Music copied from music CD MP3 DVD Video 3 DVD V Video DVD RAM 1 RAM Video JPEG AVCHD 2 DVD R DVD R DL DVD R Video AVCHD 2 DivX JPEG MP3 DVD RW 1 DVD RW Video AVCHD 2 R R DL R Video AVCHD 2 RW 1 RW Video AVCHD 2 Audio CD CD DA CD Music CD including CD R RW DivX JPEG MP3 SD Cards 1 SD JPEG AVCHD MPEG2 4 5 JPEG USB memories USB AVCHD 2 4 MPEG2 4 5 DivX JPEG MP3 ...

Page 7: ...ly With certain recording states and folder structures the play order may differ or playback may not be possible 1 The SD quality programme can not be converted to HD quality 2 You cannot select during play whether it appears or disappears Approximate recording times Refer to Recording modes and approximate recording times 96 FR Flexible Recording Mode The unit automatically selects the best possi...

Page 8: ... formatting discs with this unit Recording may not be possible to discs which were used for recording on other equipment Play on other players DVD R DVD RW R RW Finalisation is needed 61 RW If the disc failed to play on other equipment we recommend you create a Top Menu 61 Regarding 8 cm Disc This unit cannot record or edit the 8 cm disc Only playback or copy to the HDD is possible Discs that cann...

Page 9: ...so be used in equipment compatible with SDXC Memory Cards Do not touch the recorded surface of the discs or the terminal surface of the SD cards If there is dirt or condensation on the disc wipe with a damp cloth and then wipe dry Do not attach labels or stickers to discs Do not use disc cleaning sprays benzine thinner static electricity prevention liquids or any other solvent Do not use ballpoint...

Page 10: ...ns where condensation may occur When there is an extreme change in temperature e g when subjected to an air conditioner or when cooled air directly impacts the unit When there is high humidity or a lot of steam in the room In the above situation without turning the unit on let the unit adjust to the room temperature and wait 2 3 hours until condensation is gone Do not block the cooling fan on the ...

Page 11: ...ding 23 56 Select a recording mode 56 Show Teletext 22 Show subtitles 22 34 TV operation buttons 16 A Channel select 20 Change pages in the DIRECT NAVIGATOR screen etc B Show the VIERA CAST screen 63 C Input select 20 56 D Show the Timer Recording screen 26 E Exit the menu screen F Show the TV Guide screen 20 G Show the FUNCTION MENU screen 19 H Return to previous screen I Skip the specified time ...

Page 12: ...7 USB port 8 Channel select 9 Start recording 23 Stop Start play Display 1 SD card slot indicator 2 Copying indicator 3 Disc indicator 4 Drive HDD DVD or SD indicator 5 Remote control signal indicator 6 Main display section indicator Current time Playback counter Various messages 88 7 Playback indicator 8 USB port indicator 9 Timer recording indicator This indicator lights up when the timer record...

Page 13: ...may not display properly or at all when connecting with a DVI HDMI switching cable Audio cannot be output If you are connecting to a TV that is only compatible with 2 channel audio output audio with 3 channels or more will be down mixed and output as 2 channels even if connecting with an HDMI cable Some discs cannot be down mixed Basic connections When the unit is not to be used for a long time To...

Page 14: ...be displayed properly VIERA Link function is possible by connecting to a TV or amplifier receiver compatible with VIERA Link Connect the Set Top Box or video equipment Other TV connection AUDIO OUT VIDEO OUT R L Audio Video cable supplied Set Top Box or VCR AUDIO IN VIDEO IN L R Audio Video cable supplied TV Amplifier receiver connections HDMI terminal HDMI IN HDMI IN HDMI OUT HDMI cable TV HDMI c...

Page 15: ...e software firmware of this unit from internet 80 For details about connection method refer to the instructions supplied with the connected equipment Use category 5 or above straight LAN cables STP when connecting to peripheral devices Inserting any cable other than a LAN cable in the LAN terminal can damage the unit DIGITAL AUDIO OUT terminal AUDIO OUT terminal OPTICAL IN Optical digital audio ca...

Page 16: ...ight Select and enter buttons To return to the previous screen To exit the screen FUNCTION MENU 19 TV operation buttons Brand Code Brand Code AIWA 35 BENQ 58 59 BRANDT 10 15 CENTREX 66 CURTIS 05 DESMET 05 ELEMIS 05 FINLUX 61 Panasonic 01 02 03 04 AKAI 27 30 BEKO 05 71 72 73 74 BUSH 05 DAEWOO 64 65 DUAL 05 FERGUSON 10 34 FISHER 21 MITSUBISHI 05 19 20 47 METZ 05 28 MIVAR 24 NEC 36 NOKIA 25 26 27 60 ...

Page 17: ...t the set time period Off It is possible to start quickly from the standby mode Quick Start mode When Easy Setting has been completed appears Easy setting is complete To stop partway Press RETURN To restart set up 1 Press FUNCTION MENU 16 2 Select Setup in Others then press OK 3 Select Auto Setup in Digital TV Tuning then press OK 4 Select Yes then press OK If the TV aspect setting screen appears ...

Page 18: ...ems with Network Easy Setting 91 To restart Network Easy Settings 1 Press FUNCTION MENU 16 2 Select Setup in Others then press OK 3 Select Network Easy Settings in Network then press OK To redo settings individually If Network Easy Settings did not work properly or when you change the settings individually perform the following steps 1 Press FUNCTION MENU 16 2 Select Setup in Others then press OK ...

Page 19: ...deleted Timer Recording Copy Others Disc SD Card USB Network Playback Contents TV Guide HDD High Definition FUNCTION MENU list FUNCTION MENU Playback Contents Video 29 Picture 46 Music 52 TV Guide 20 Timer Recording 25 Copy 40 Copy VIDEO PICTURE 40 50 Copy Video AVCHD to Disc 45 Network 63 Others Playlists 31 Flexible Recording via AV input 56 Copy Video AVCHD 57 Copy Video MPEG2 58 Copy New Pictu...

Page 20: ...played follow the on screen instructions Press GUIDE loading appears on the television screen before TV Guide is displayed Press GUIDE again to switch between Listings screen and Now Next screen Press OK to watch the current programme To return to TV Press EXIT To set a timer Recording using the TV Guide System Refer to Timer recording 25 It may take several tens of seconds to display the TV Guide...

Page 21: ...s STATUS again To hide the information screen Press EXIT To change Favourites Press the blue button Register your favourite channels Selection of channel is made easy by creating a Favourites of the channels you watch often 68 Favourites Edit To switch between the current programme and the next programme Press 2 1 To switch information of the other channel and select the programme Press 3 4 then p...

Page 22: ...ure currently displayed on the television was broadcasted 3 The amount of time temporarily saved on HDD To stop PAUSE LIVE TV 1 Press STOP 2 Select Yes then press OK To hide the display information Press EXIT Temporary save is stopped in following cases When save time exceeds 8 hours This may vary depending on the HDD free space When save time exceeds 1 hour with no HDD free space When two program...

Page 23: ...he HDD copying of music to the HDD copying of AVCHD video to the HDD When Automatic Standby after OTR is set to On 77 this unit is turned to standby mode if this unit is not operated for approximately 5 minutes after completing Automatic Stop or Recording Time This operation will only record to HDD Recording mode is DR only Performing DR File Conversion after recording makes it possible to change ...

Page 24: ...y be switched between the recording programmes You can play the recording title from the beginning or the titles previously recorded to the HDD 1 Press DIRECT NAVIGATOR is displayed on the recording programme 2 Select the title then press OK Operation during Recording To check the recording programme To stop recording REC2 HDD REC1 OTR AUTO Recording programme displayed on the TV Recording program...

Page 25: ...gs to be controlled by the signal sent from the broadcaster Guide Link The recording s start and stop times can be controlled by the broadcaster e g delayed start The Guide Link function may not work if you manually change the start time or the stop time over 10 minutes Series Timer Recording You can record all the episodes of a series by setting just one timer recording Split Programme You can re...

Page 26: ...lter in 15 minute increments Mode Refer to page 7 Renew Only daily weekly timer recording The unit will record the new programme over the old one 1 Select Renew 2 Select ON Input Name 1 Select Input Name then press OK 2 Refer to Entering text 81 Manually programming timer recording DEL Channel Name Schedule Drive Mode Space OK RETURN CH Page Up Page Down Turn Timer Off Resolve overlap Total 0 32 T...

Page 27: ...imer recording starts 2 Only one programme can be recorded 3 Executing operation will be terminated Timer recording from channel information Notes on timer recording 1 All Digital Channels 10 30 NEWS 09 00 11 00 Now HE AAC Rating G Set timer Select favourites e g Conditions when timer recording will not start Executing operation Starting of the timer recording Recording the title 1 Playing the tit...

Page 28: ...0 23 30 DR DR DR DR HDD HDD HDD HDD OK OK 31 01 Icons right e g Screen icons F Red Timer recording standby is activated Grey Timer recording standby is deactivated Currently recording programme A part or all of the programme will not be recorded since the programme is overlapping Programme overlapping can be resolved with repeat programme if available 1 Select the programme then press the green bu...

Page 29: ...s Football Dogs and Cats 1 3 1 1 04 10 04 10 29 10 29 10 Start Time 22 46 Prog Type Rec time 0 01 DR PLAY RETURN PICTURE MUSIC Social Economic Sport Video AVCHD Movies Not Viewed DIRECT NAVIGATOR Channel Date Title Name Titles All Delete Page Up Page Down DEL Playback Last Stopped Beginning Where do you want to start playback from OK RETURN DIRECT NAVIGATOR VIDEO screen Screen icons Currently reco...

Page 30: ...cted titles are removed from the group Select Remove then press OK 1 Select the group then press OPTION 2 Select Edit then press OK 3 Select Enter Title Name then press OK 4 Refer to Entering text 81 1 Select the title then press OPTION 2 Select the Chapter View then press OK e g HDD 3 Select the chapter then press OK To edit the chapter in Chapter View Refer to Editing chapters 39 Switching to th...

Page 31: ...what is recorded in each media If the menu screen is not displayed display it by performing the following operation 1 While Stopped Press OPTION 2 Select Drive Select then press OK 3 Select the media then press OK 1 Insert the media Depending on the type of the media play starts from the specified position or the screen appears AVCHD If the menu screen is not displayed Press PLAY a1 3 1 2 When the...

Page 32: ...R screen DIRECT NAVIGATOR AVCHD screen Time Remaining 1 30 SP DVD RAM Page 003 003 Copy Select All Titles VIDEO OPTION Birds World news Football Dogs and Cats 04 10 04 10 29 10 29 10 Start Time 22 46 Rec time 0 10 XP PLAY RETURN PICTURE DIRECT NAVIGATOR Channel Date Title Name All Delete Page Up Page Down DEL DIRECT NAVIGATOR Video AVCHD RETURN Date Day Time Title Name Rec time 0 30 41 Page 03 03 ...

Page 33: ...han normal DivX This function is not effective DVD RW This function is not effective even if it is finalised This function may not work when recording in XP or FR mode Press SLOW SEARCH 6 or SLOW SEARCH 5 Press PLAY a1 3 1 to restart play The speed increases up to 5 steps R RW Up to 3 steps DivX Audio is not heard during all levels search Press PAUSE Press PLAY a1 3 1 to restart play While paused ...

Page 34: ...es during the All titles 30 will be skipped HDD RAM During the playback or pause Press CHAPTER HDD RAM 1 While paused Press SKIP or SKIP 9 and skip to the location you want to delete 2 Press CHAPTER 3 Select Yes then press OK Press AUDIO It will switch depending on the contents recorded every time it is pressed HDD Press STTL If you want to switch the subtitle language select it in the Disc menu 6...

Page 35: ...e does not increase even after the contents are deleted DVD RW RW Available recording space increases only when the last recorded title is deleted 1 On the DIRECT NAVIGATOR screen Select the title 2 Press DEL 3 Select Delete then press OK Time Remaining 45 54 DR HDD Page 003 003 Copy Select Grouped Titles VIDEO OPTION Birds World news Football Dogs and Cats 1 3 1 1 04 10 04 10 29 10 29 10 Start Ti...

Page 36: ... HDD RAM R RW Protection setting prevents the title from accidental deletion 1 Select Set up Protection or Cancel Protection in Edit then press OK 2 Select Yes then press OK appears when setting the protection Time Remaining 45 54 DR HDD Page 003 003 Copy Select Grouped Titles VIDEO OPTION Birds World news Football Dogs and Cats 1 3 1 1 04 10 04 10 29 10 29 10 Start Time 22 46 Prog Type Rec time 0...

Page 37: ... division point After performing step 2 Restart play and select Divide then press OK at the division point HDD Divided titles become a group of titles 1 Select Change Thumbnail in Edit then press OK 2 Press OK at the point to use as a thumbnail You can find the desired point by using play search etc 33 3 Select Finish then press OK To change the point After performing step 2 Restart play and selec...

Page 38: ... conversion When converting to HG HX HE HL or HM mode if the selected title is indicated with or you cannot select Convert Only 29 To cancel a Now conversion Press and hold RETURN for more than 3 seconds To confirm whether the conversion is completed Press DIRECT NAVIGATOR e g When DR Recording mode for conversion is displayed the conversion has not finished To cancel a During standby conversion A...

Page 39: ...he editing operations Edit Chapter Mark Select the point where you want to start a new chapter while viewing the title 1 Press the green button 2 Press OK at the point you want to divide Repeat this step 3 Press RETURN to go to Chapter View screen To delete the chapter 1 Select the chapter then press DEL Multiple editing Select the chapter then press the yellow button A check mark is displayed Rep...

Page 40: ...3 Select the title then press the yellow button Repeat this step to select titles e g HDD To change the appearance of the list or show information of the title 1 Press OPTION 2 Select the item then press OK The titles will be copied in the order of the copying list If you want to specify the order edit the copying list after the titles are selected 41 Editing the copying list 4 Press OK 5 Press 2 ...

Page 41: ...ed Select Yes then press OK Add Add new items to the copying list 1 Select the titles with the yellow button 2 Press OK Delete When deleting multiple titles on the copying list Select the title then press the yellow button before step 1 Repeat this step to select titles Select Yes then press OK Move Move selected items or change the order of items on the copying list Select the destination then pr...

Page 42: ...discs become play only and you can also play them on other DVD equipment Create Top Menu On RW You can play the disc on other DVD equipment 3 Press 2 to confirm You can perform Finalise or Create Top Menu later 61 HDD RAM DVD R DVD RW R RW RAM RW HDD 1 On the DIRECT NAVIGATOR screen Select the title then press the yellow button A check mark is displayed Repeat this step Press the yellow button aga...

Page 43: ...R DVD RW Titles recorded via AV input in 16 9 aspect using EP mode or FR recordings 5 hours or longer mode DVD R DVD RW R RW You cannot copy to the disc in the following cases When there is not enough free space on the HDD When the number of titles recorded to the HDD and the number of titles to be copied to the disc is greater than 999 in total If copy is cancelled during the step while temporari...

Page 44: ... the content on the disc 4 Press 2 5 Select Start Copying then press OK 6 Select Yes then press OK to start copying When the top menu is displayed Select the title you want to start copying then press OK After the last title on the disc has finished playing the Top Menu is recorded until the set time is reached To stop copying Press STOP You can also press and hold RETURN for 3 seconds If stopped ...

Page 45: ...he titles in DR HG HX HE HL or HM modes copy will be performed at normal speed in FR mode When copying the titles in XP SP LP EP or FR modes and the copy destination does not have enough space copy will be performed at normal speed in FR mode You can copy HD Video AVCHD format recorded on HDD to a DVD R in High Definition quality HDD DVD R 1 Insert an unformated DVD R or DVD R DL The menu screen a...

Page 46: ... DVD R only 1 HDD 1 Press FUNCTION MENU 2 Select Picture in Playback Contents then press OK RAM DVD R CD SD USB 1 Insert the media The menu screen appears 31 2 Select View Pictures JPEG then press OK 2 Select the date of Pictures by Date or album of Album View then press OK e g HDD Pictures by Date screen 3 Select the picture then press OK Press 2 1 to display the previous or next picture 004 005 ...

Page 47: ...c My Favourites or Playlists or USB memory To stop the slideshow Press RETURN 1 While displaying a picture Press OPTION 2 Select the item then press OK You can switch the screen mode 81 e g The information of the rotated photos will not be stored depending on the media This function is only available for small sized pictures Start Slideshow Slideshow Settings Please set the following functions RET...

Page 48: ...he first recorded picture becomes the album name automatically For the pictures without shooting date the renewed date will become the file name After copying the screen shows the Album View screen automatically 1 On the DIRECT NAVIGATOR screen Editing an album or date Select the album or date Editing a picture 1 Select the item then press OK 2 Select the pictures to edit Multiple editing Select t...

Page 49: ... picture Album View only 1 Select Enter Album Name in Edit Album then press OK 2 Refer to Entering text 81 Album names input using this unit may not be displayed on other equipment Album View and Picture JPEG View only 1 Select Set up Protection or Cancel Protection in Edit Album or Edit Pictures then press OK 2 Select Yes then press OK appears when the protection is set Even if the protection is ...

Page 50: ...e destination drive runs out or the number of files folders to be copied exceeds the maximum 95 copying will stop partway through This unit saves the information on up to 12 000 pictures and 30 SD cards If additional pictures are imported the older information will be deleted HDD RAM SD SD RAM USB HDD RAM 1 While stopped Press FUNCTION MENU 2 Select Copy VIDEO PICTURE in Copy then press OK 3 Set t...

Page 51: ...o start copying To cancel all registered copying settings and lists After performing steps 1 2 50 1 Select Cancel All then press OK 2 Select Yes then press OK To stop copying Press and hold RETURN for 3 seconds If the number of files folders to be copied exceeds the maximum 95 copying will stop partway through Select the item after step 5 7 left 1 Press OPTION 2 Select the operation then press OK ...

Page 52: ... performed Timer recordings will not proceed Music CD All tracks in the CD will be recorded MP3 All tracks in the folder will be recorded Tracks recorded to HDD in one operation will be regarded as one album DVD R only Music CD Insert the disc If connected to the network the unit starts accessing the Gracenote Database and searches for the information 15 18 If search results indicate that multiple...

Page 53: ...ct the playlist then press OK Tracks most often played recently up to 30 tracks Random playback of all tracks 4 Select the track then press OK 1 On the DIRECT NAVIGATOR Music Menu screen Press the red button 2 Select VIDEO or PICTURE then press OK On the Track List screen 1 Select the track then press OPTION 2 Select Information then press OK Playing music recorded on HDD Artists Albums My Favouri...

Page 54: ...es to display 1 While slideshow playing Press OPTION 2 Select Select Picture Album then press OK 3 Select the album then press OK e g To end the slideshow Press RETURN How to create the picture album Refer to Copy the selected item to new Album 48 To play music continuously even if the Power off link works Refer to Playing music continuously even after turning off power to the TV 62 Operations dur...

Page 55: ...deleted from the HDD Select Remove then press OK Tracks themselves are not deleted from the HDD You can register your favourite albums and tracks into 10 preset playlists Select the playlist then press OK New playlist cannot be added Up to 999 tracks can be registered to each playlist DIRECT NAVIGATOR Music Menu MUSIC OK RETURN Please select to access music Artists Frequently Played Albums Total T...

Page 56: ...SD card HDD RAM DVD R DVD RW R RW This function is not available with DVD R DL and R DL Recording mode FR 1 Press INPUT SELECT and select AV then press OK 2 Press FUNCTION MENU 3 Select Flexible Recording via AV input in Others then press OK 4 Set the recording time 5 Start play on the other equipment 6 Select Start then press OK To stop recording partway Press STOP To show the remaining time Pres...

Page 57: ...played Repeat this step Press the yellow button again to cancel All the recordings on the same date become a title 4 Press OK 5 Select Start then press OK It may take time for the copying to start To stop copying Press and hold RETURN for 3 seconds To copy the DVD R in High Definition Refer to Copying HD Video AVCHD format to the DVD R in High Definition 45 An AVCHD title with 100 or more scenes w...

Page 58: ...Make the video camera ready for data transfer The menu screen appears 31 2 Select Copy Video MPEG2 then press OK To change the copy destination and the titles to copy 40 Copying titles 3 Select Start Copying then press OK 4 Select Yes then press OK to start copying To stop copying Press and hold RETURN for 3 seconds Copying SD Video MPEG2 format ...

Page 59: ... and to register the devices make the following settings Named devices 76 Unnamed devices 76 1 Operate the playback equipment Client to display the list of titles on this unit Refer to their respective operating instructions 2 Select the item then press OK You cannot play back the titles on other DLNA compatible equipment from this unit Some video cannot be played back depending on the equipment t...

Page 60: ...en finished 3 Press OK Picture data JPEG or computer data cannot be deleted RAM DVD RW RW SD R New disc only Formatting deletes all contents including computer data and they cannot be restored Check carefully before proceeding 1 Select Yes then press OK 2 Select Start then press OK 3 Press OK RAM To stop formatting Press RETURN You can cancel formatting if it takes more than 2 minutes The disc mus...

Page 61: ...finalising Finalising takes up to 15 minutes Up to 60 minutes in case of DVD R DL and R DL Do not disconnect the AC mains lead while finalising This can render the disc unusable Depending on the disc it may take longer than displayed on the confirmation screen approximately four times longer You cannot finalise discs recorded on other manufacturer s equipment DVD R DVD RW R If you finalise discs r...

Page 62: ...to PAUSE LIVE TV 22 This function is available with the TV that supports HDAVI Control 3 or later This function allows you to immediately start recording the programme that you are viewing on the TV Refer to the TV operating instructions for operation This function is available with the TV that supports HDAVI Control 3 or later You can operate this unit using the TV remote control Refer to the ope...

Page 63: ...75 When restricting the use of VIERA CAST When the audio is distorted If using slow Internet connection the video may not be displayed correctly A high speed Internet service with a speed of at least 6 Mbps is recommended Be sure to update the software firmware when a software firmware update notice is displayed on the screen If the software firmware is not updated you will not be able to use the ...

Page 64: ...MPEG 4 AVC etc appears Soundtrack Show or change the soundtrack Subtitles Turn the subtitle on off and change the language depending on the media Audio Selection Switch in the case of multiple audio Subtitle Language Select the subtitle language in the case of multiple languages Angle Change the number to select an angle Audio Channel Change audio LR L R during playback With some discs you may onl...

Page 65: ...cted However if the video content is distorted as shown in the illustration to the right then select Auto Sound Effects This function is effective when Digital Audio Output is set to PCM 73 Re master 1 Re master 2 Sound becomes more natural by adding higher frequency signals not recorded on the track Dialogue Enhancer The volume of the centre channel is raised to make dialogue easier to hear Posit...

Page 66: ...tting item please refer to the following pages Common procedures Setup OK RETURN Digital TV Tuning HDD Disc Picture Sound Display Connection Network Others Menu list Digital TV Tuning Favourites Edit 68 Channel List 68 Auto Setup 68 Download from TV 68 Manual Tuning 69 Update Channel List 69 Child Lock Parental Rating 69 Signal Condition 69 Preferred Language 69 HDD Disc Settings for Playback 70 S...

Page 67: ...pe for Digital Broadcast 73 Audio for HG HX HE HL HM Recording 73 Display On Screen Information 74 Unit s Display 74 Screen Saver 74 Teletext 74 Connection TV Aspect 74 Aspect for 4 3 Video 74 TV System 74 HDMI Connection 74 HDMI Video Format 74 Deep Colour Output 75 HDMI Audio Output 75 Contents Type Flag 75 VIERA Link 75 Network Network Easy Settings 75 Network Settings 75 IP Address DNS Setting...

Page 68: ...ect a character then press OK Repeat this step to enter other characters Red Delete a character Blue Delete all characters 3 Press RETURN Add all Selectfavourites RETURN Add Select channel All Digital Channels Favourites 1 Digital TV Favourites Editor 1 2 3 5 7 6 4 Channel List You can edit the Channel List To hide unwanted channels 1 Select the channel 2 Press OK The check mark is removed Yellow ...

Page 69: ...ayback PIN is required to change 67 Scan CH 21 69 RF Ch Searching Quality Type Channel Name RETURN This will take about 3 minutes Digital TV Update Channel List Digital TV 0 Radio 0 Signal Condition You can check the quality and strength of signals Press W X CH to select the channel Signal Quality Red bar Bad Yellow bar Poor Green bar Good Signal Strength 0 0 10 100 The channels you can receive ar...

Page 70: ...code list DVD Video Parental Control Set a rating level to limit DVD Video play PIN is required to change 67 Settings for Recording Recording time in EP mode Select the maximum number of hours for recording in EP mode 96 Recording modes and approximate recording times Aspect for Recording Sets the aspect ratio when recording or copying except in DR mode If Automatic is selected the title will be r...

Page 71: ... audio when watching a programme via AV input DVD Speed for High Speed Copy Select the speed of high speed copying If Normal Silent is selected the time required for copying will be longer Timer Record Start Buffer This function sets the timer recording to start earlier than the TV Guide time Timer Record Stop Buffer This function sets the timer recording to stop later than the TV Guide time HDD M...

Page 72: ...gramme NTSC Video Output This works only for video output from the VIDEO OUT terminal Select how to output the NTSC image Sound Dynamic Range Compression To lower the dynamic range for playback e g at night This does not work depending on broadcasts and recorded titles Downmix Select the downmix system of multi channel to 2 channels sound Select Surround encoded when the connected equipment suppor...

Page 73: ...c between the video and audio is corrected by delaying the audio output Audio Type for XP Recording Choose the audio type when recording or copying with XP mode The picture quality of LPCM recordings may be lower than that of normal XP mode recordings The audio recording becomes Dolby Digital even if you selected LPCM when using a recording mode other than XP Audio Type for Digital Broadcast If th...

Page 74: ...the letterbox style depending on the content Letterbox Black bands appear for 16 9 picture Aspect for 4 3 Video To play a 4 3 title set how to show pictures on a 16 9 TV TV System Set in accordance with the TV System for the connected TV HDMI Connection HDMI Video Format You can only select items compatible with the connected equipment If Automatic is selected the output resolution best suited to ...

Page 75: ... the connection of the network or set the IP address and DNS Press OK to show the respective setting If you set IP Address Subnet Mask and Gateway Address individually make their settings after setting IP Address Auto assignment to Off When the router s DHCP server function is not activated check the numbers of other connected devices such as personal computers then assign a number different from ...

Page 76: ...tes Up to 4 devices can be registered If you cannot register Panasonic equipment use Unnamed devices right RETURN Named devices Registered devices list Setting device name OK Off Home Network DLNA Unnamed devices By allowing access from non Panasonic DLNA compatible equipment on the network it allows them to access this unit 59 To register non Panasonic equipment 1 Select Server DLNA function then...

Page 77: ...is unit is turned to standby mode when it is not operated for approximately 5 minutes after completing Automatic Stop or Recording Time 23 Automatic Standby after Copy On This unit is turned to standby mode when it is not operated for approximately 5 minutes after completing copy 40 Copying titles Remote Control Change the remote control code on the main unit and the remote control if you place ot...

Page 78: ... the time you have specified Software Licence Information about the software licence is displayed System Information Display software firmware version of this unit DivX Registration You need this registration code to purchase and play DivX Video on Demand VOD content After playing DivX VOD content for the first time the registration code is not displayed If you purchase DivX VOD content using a re...

Page 79: ...Javanese 7487 Kannada 7578 Kashmiri 7583 Kazakh 7575 Kirghiz 7589 Korean 7579 Kurdish 7585 Laotian 7679 Latin 7665 Latvian Lettish 7686 Lingala 7678 Lithuanian 7684 Macedonian 7775 Malagasy 7771 Malay 7783 Malayalam 7776 Maltese 7784 Maori 7773 Marathi 7782 Moldavian 7779 Mongolian 7778 Nauru 7865 Nepali 7869 Norwegian 7879 Oriya 7982 Pashto Pushto 8083 Persian 7065 Polish 8076 Portuguese 8084 Pun...

Page 80: ...re firmware has completed It may take up to a few hours until the update is completed depending on the network or broadcast environment The timer recording always takes preference over the software Firmware download if the timer recording is scheduled to start the downloading will be performed at the next opportunity You can also download the latest software firmware from the following website htt...

Page 81: ...s enlarged Zoom The black bars on the top and bottom sides of the 4 3 image disappear and the image is enlarged It may also be adjusted using the screen mode of the TV etc The screen mode is switched to Normal in the following situations when you change the channel when you start or end the playback of a title when you switch the unit on or to standby mode DVD V Side cut does not have any effect W...

Page 82: ...The unit is forcibly switched to standby Alternatively disconnect the AC mains lead wait one minute then reconnect it 2 Press Í I on the main unit to switch it on If the unit still cannot be operated consult the dealer Cannot eject disc The unit may have a problem While the unit is in standby mode press and hold STOP and CH W on the main unit at the same time for about 5 seconds The following do n...

Page 83: ...ock does not display on the unit when switched to standby The clock does not display when Power Save in Standby is activated 77 Screen size is wrong Check the TV Aspect or Aspect for 4 3 Video 74 Adjust the aspect ratio setting on TV If you connect to 4 3 TV set HDMI Video Format to 576p 480p 66 74 Check Aspect for Recording before recording or file conversion 66 70 The black screen appears on the...

Page 84: ...cenes recorded with different aspect ratios Set Deep Colour Output 66 75 or Contents Type Flag 66 75 to Off No sound Distorted sound Check the connections 13 Check the settings of the connected TV etc Press AUDIO to select the audio 34 To output audio from a device connected with an HDMI cable set HDMI Audio Output to On 66 75 Cannot change audio channel You cannot switch the audio channel if Digi...

Page 85: ...disabled Available disc space display may be different from actual Cannot playback The disc is dirty 9 The disc is scratched or marked The disc may not be able to play back if it was not finalized or a Top Menu was not created on the equipment used for recording Audio and video momentarily pause DVD R DL and R DL discs have two writable layers on one side Video and audio may momentarily cut out wh...

Page 86: ...ld not be copied to the HDD Copyright protected tracks such as SCMS restrictions will not be copied Recording from CDs that do not conform to CD DA specifications copy control CDs etc cannot be guaranteed This unit does not recognize the USB device correctly If inserted during playback the USB device may not be recognized by this unit Disconnect and reconnect the USB device If it still does not re...

Page 87: ...twork connection and the network settings 15 18 It may not be possible to connect depending on the types of the equipment or the status of the equipment You cannot play contents properly from DLNA compatible equipment on the network There may be some video that cannot be played back on DLNA compatible equipment depending on the equipment Following titles cannot be played back A title with access r...

Page 88: ...e damaged The disc is dirty 9 The unit cannot record play or edit The lens cleaner has finished cleaning Press OPEN CLOSE on the main unit to eject the disc You cannot write to this disc The disc may be damaged Use a new disc Displayed when the unit is started and is switched to standby mode There was a power failure or the AC plug was disconnected while the unit was on The unit is carrying out it...

Page 89: ...is complete 80 The unit is hot The unit switches to standby for safety reasons Wait for about 30 minutes until the message disappears Do not block the cooling fan on the rear of the unit When a disc is not inserted A malfunction has occurred The unit is trying to restore to the normal operation Once the message disappears you can use the unit again If it remains displayed consult the dealer The HD...

Page 90: ...ains displayed consult the dealer The unit fails to operate properly Press Í I on the main unit to switch the unit to standby mode Now press Í I on the main unit again to turn the unit on The HOLD function is activated 81 There is something unusual The service number displayed after H and F depends on the unit s condition Reset the unit as follows 1 Disconnect the plug from the household mains soc...

Page 91: ... IP Address DNS Settings 66 75 2 IP address setting Fail 3 Connection to gateway Fail 1 LAN cable connection Pass 2 IP address setting Pass 3 Connection to gateway Fail 1 LAN cable connection Pass 2 IP address setting Home network available 3 Connection to gateway Fail Network Easy Settings Internet Connection Test Display Check the following Cannot find the server B019 Primary DNS and Secondary D...

Page 92: ...BR MPEG 4 AVC H 264 Audio Dolby Digital XP SP LP EP mode 2ch LPCM XP mode Dolby Digital DR mode HG HX HE HL HM mode Max 5 1ch DVB T HE AAC DR mode 2ch DVB T MPEG DR mode 2ch Video Video system PAL NTSC Analog video in pin jack 1 pc Input level 1 Vp p 75 Analog video out pin jack 1 pc Output level 1 Vp p 75 Audio Analog audio L R in pin jack 1 pc Input level Full scale 2 0 Vrms at 1 kHz 10 k Analog...

Page 93: ...ing is necessary for compatible playback 2 ISO9660 level 1 or 2 except for extended formats and Joliet This unit is compatible with multi session border except for DVD R DL This unit is not compatible with packet writing Optical pick up System with 1 lens 2 integration units 662 nm wavelength for DVDs 780 nm wavelength for CDs LASER specification Class 1 LASER Product Wave length 780 nm CDs 662 nm...

Page 94: ... the root folder Maximum number of files recognizable 200 files Support version DVD R and DVD R DL must conform to UDF 1 02 without ISO9660 and UDF 1 5 with ISO9660 DivX VOD contents cannot be played back Maximum numbers of titles that can be recorded HDD 999 titles When continuously recording for long durations titles are automatically divided every 8 hours DVD RAM DVD R DVD RW 99 titles on one d...

Page 95: ...e Format JPEG conforming DCF Design rule for Camera File system Compatible pixels Between 34k34 and 8192k8192 pixels Sub sampling is 4 2 2 or 4 2 0 Thawing Time Approx 2 sec in case of SD card 8 1 M pixels JPEG Maximum number of folders recognizable CD 99 folders including the root folder HDD RAM DVD R SD USB 300 folders including the root folder Maximum number of files recognizable CD 999 files R...

Page 96: ...ours 70 Regarding recording time remaining This unit records using a VBR Variable bit rate data compression system to vary recorded data segments to match video data segments which may cause differences in the displayed amount of time and space remaining for recording Recording modes and approximate recording times Recording Mode DR HD quality DR SD quality HG HX HE HL HM HDD 500 GB 75 hours 211 h...

Page 97: ...Corporation MPEG Layer 3 audio coding technology licensed from Fraunhofer IIS and Thomson This product is licensed under the AVC patent portfolio license for the personal and non commercial use of a consumer to i encode video in compliance with the AVC Standard AVC Video and or ii decode AVC Video that was encoded by a consumer engaged in a personal and non commercial activity and or was obtained ...

Page 98: ...e Gracenote Software and Gracenote Servers will terminate if you violate these restrictions If your license terminates you agree to cease any and all use of the Gracenote Data the Gracenote Software and Gracenote Servers Gracenote reserves all rights in Gracenote Data the Gracenote Software and the Gracenote Servers including all ownership rights Under no circumstances will Gracenote become liable...

Page 99: ... licenses lgpl 2 1 html In addition the software categorized as 3 and 4 are copyrighted by several individuals Please refer to the copyright notice of those individuals at http www am linux jp dl JPRCBW98 The GPL LGPL software is distributed in the hope that it will be useful but WITHOUT ANY WARRANTY without even the implied warranty of MERCHANTABILITY or FITNESS FOR A PARTICULAR PURPOSE At least ...

Page 100: ...deo Visit divx com for more information and software tools to convert your files into DivX videos ABOUT DIVX VIDEO ON DEMAND This DivX Certified device must be registered in order to play purchased DivX Video on Demand VOD movies To obtain your registration code locate the DivX VOD section in your device setup menu Go to vod divx com for more information on how to complete your registration ...

Page 101: ...ic 52 Copy Picture 50 Copy Video 40 Copy title playing 45 Finalised disc 44 HD Video AVCHD 45 57 SD Video MPEG2 58 D Delete Music 55 Picture 49 Video 35 Delete all titles Disc 60 HDD 71 DIRECT NAVIGATOR Music 53 Picture 46 Video 29 Disc Delete all titles 60 Finalise 61 Format 60 Media information 6 Protection 60 DivX 94 Playback 31 DLNA 59 76 DR File Conversion 38 DVD Video Playback 31 DVD Video P...

Page 102: ... 15 DLNA 59 76 Setting 75 Software Firmware Update 80 VIERA CAST 63 Network Easy Settings 18 75 P PAUSE LIVE TV 22 Picture Copy 50 Delete 49 Edit 48 Playback 46 Protection 49 Slideshow 47 54 PIN 67 Playback menu 64 Playback Music Audio CD 52 MP3 52 Recorded on HDD 53 Playback Picture 46 Slideshow 47 54 Playback Video AVCHD 29 31 Changing audio 34 Chapter 30 DivX 31 DVD Video 31 DVD Video Parental ...

Page 103: ... 74 Digital TV Tuning 68 Display 74 HDD Disc 70 Network 75 Others 77 Picture 72 Sound 72 Slideshow 47 54 Software Firmware Update 80 Subtitles Broadcasts 22 Playback 34 T Teletext 22 74 Timer recording 25 Guide Link 25 Manually programming timer recording 26 Series Timer Recording 25 Split Programme 25 Top Menu Create Top Menu 61 Tuning Channel List 68 Manual Tuning 69 Parental Rating 69 Signal co...

Page 104: ...at content Panasonic has no authority to and does not grant you that permission and explicitly disclaims any right ability or intention to obtain such permission on your behalf It is your responsibility to ensure that your use of this or any other device complies with applicable copyright legislation in your country Please refer to that legislation for more information on the relevant laws and reg...

Reviews: