Alignments
EN 76
DPTV565 AA
8.
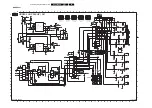
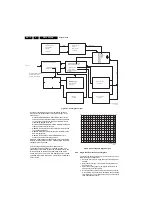
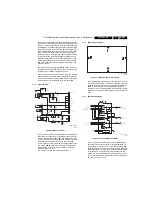
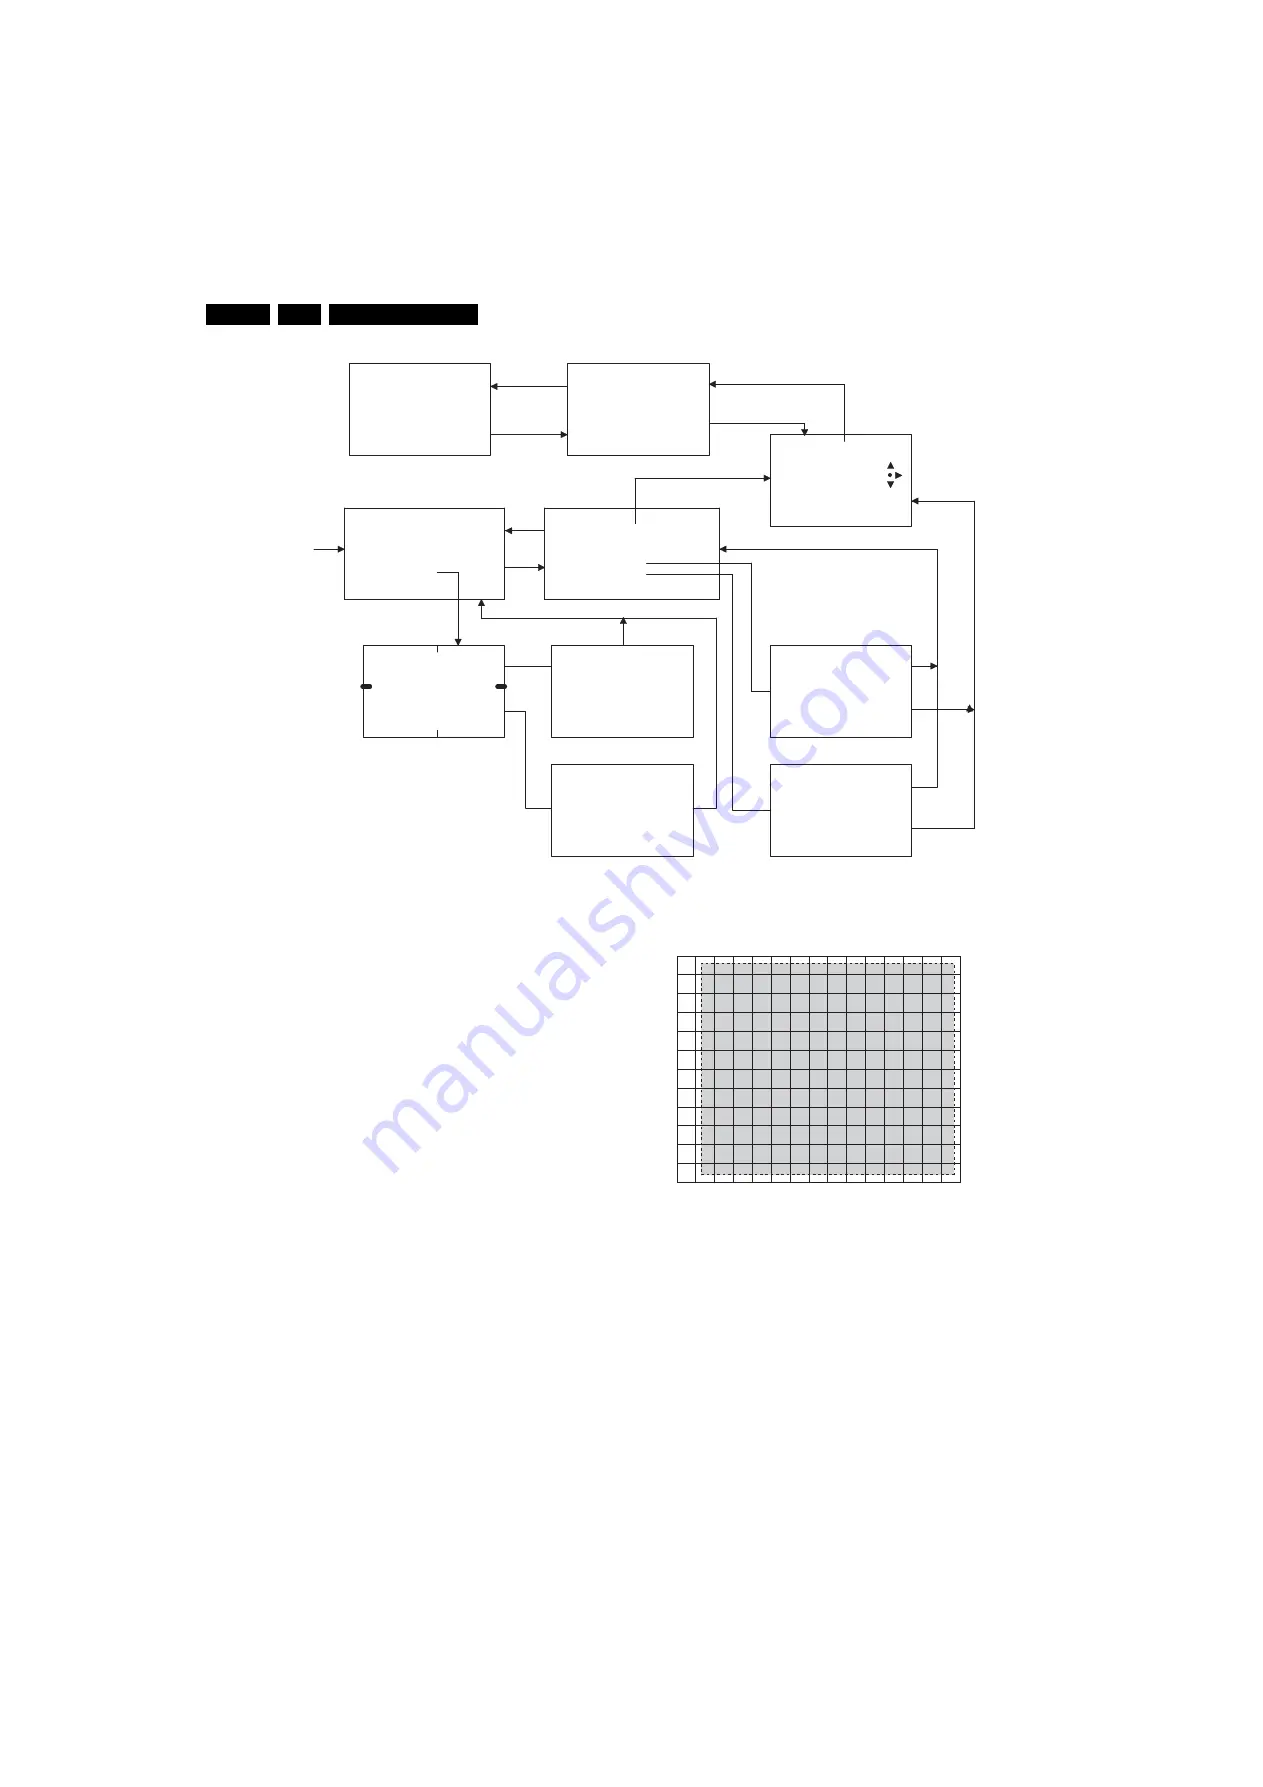
Figure 8-1 Convergence menus
Use the Cursor Up-Down button to highlight the selection.
Press the Cursor Right button to make the selection. In the
second menu:
•
MANUAL CONVERGENCE WO VIDEO means that the
screen behind the adjustment grid will be blank. This does
not mean that Convergence can be performed without a
signal being applied to the set.
•
MANUAL CONVERGENCE W VIDEO displays the applied
video behind the adjustment grid.
•
RESTORE FACTORY loads the values from the last saved
convergence alignment.
•
RESTORE DEFAULT loads values from the ROM on the
ACS Microprocessor.
•
RESTORE FACTORY or RESTORE DEFAULT will
overwrite all eight Convergence modes.
If the ACS module has been changed, there may not be data in
the NVM for RESTORE FACTORY. The RESTORE DEFAULT
settings will then be loaded.
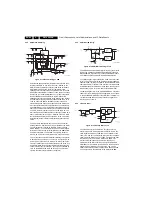
An internally generated grid will be displayed in the
Convergence mode as shown on the following page. The
shaded area is the visible screen area. Horizontal lines A and
M are displayed on the top and bottom edge of the visible
screen area. Lines 1 and 15 are also displayed on the left and
right edge of the visible screen area. Vertical line 0 is adjustable
but not visible.
Figure 8-2 Convergence alignment grid
8.4.6
Single Tube Replacement Convergence
If a single tube has been replaced, it is not necessary to do a
Major Convergence alignment.
1.
Enter the Convergence mode and select the adjustment
needed.
2.
Select "Red to Green", for example if the Red tube has
been replaced.
3.
Adjust the centring rings on the CRT to centre the Red
pattern onto the Green pattern.
4.
Starting with the centreline, adjust the Red icon onto the
Green pattern. Best results are obtained when navigating
from left to right. Two or three passes may be necessary to
obtain satisfactory results.
0 6 2 5 9 7 I+
USE CURSOR KEYS TO HIGHLIGHT
USE MENU KEY TO SELECT
USE STATUS KEY TO RETURN
CONVERGENCE ADJUSTMENTS
SENSOR TEST
MANUAL CONVERGENCE WO VIDEO
MANUAL CONVERGENCE W VIDEO
RESTORE FACTORY
RESTORE DEFAULTS
GREEN
RED TO GREEN
BLUE TO GREEN
GREEN TO RED
BLUE TO RED
SP RED
SP BLUE
MP RED
MP BLUE
STORE
I+
CURSOR RIGHT
MENU
I+
CURSOR KEYS TO ADJUST
MENU TO CHANGE
STEP SIZE
I+ TO RETURN
CURSOR KEYS TO
NAVIGATE
MENU TO ADJUST
I+ TO RETURN
1
2
3
4
SENSORS NOT VERIFIED
AT LOCATIONS______
MENU TO TEST AGAIN
I+ TO RETURN
SENSORS OK
I+ TO RETURN
MENU TO SAVE DATA
I+ TO RETURN
MENU TO SAVE DATA
I+ TO RETURN
I+
I+
MENU
CURSOR RIGHT TO SELECT
I+ TO RETURN
CURSOR RIGHT TO SELECT
POWER OFF TO EXIT CONVERGENCE
E_15000_062.eps
151004
E_15000_063.eps
151004
0
A
B
C
D
E
F
G
H
I
J
K
L
M
1
2
3
4
5
6
7
8
9
10 11 12 13 14 15
Содержание DPTV565 AA
Страница 27: ...Circuit Diagrams and PWB Layouts 27 DPTV565 AA 7 Layout SSB Top Side E_15000_133 eps 191004 8204 000 6507 3 ...
Страница 29: ...Circuit Diagrams and PWB Layouts 29 DPTV565 AA 7 Layout SSB Bottom Side E_15000_134 eps 191004 8204 000 6507 3 ...
Страница 41: ...Circuit Diagrams and PWB Layouts 41 DPTV565 AA 7 Layout SSM Part 1 Bottom Side F_15020_011a eps 110305 Part 1 ...
Страница 42: ...42 DPTV565 AA 7 Circuit Diagrams and PWB Layouts Layout SSM Part 2 Bottom Side Part 2 F_15020_011b eps 110305 ...
Страница 43: ...Circuit Diagrams and PWB Layouts 43 DPTV565 AA 7 Layout SSM Part 3 Bottom Side F_15020_011c eps 110305 Part 3 ...
Страница 44: ...44 DPTV565 AA 7 Circuit Diagrams and PWB Layouts Layout SSM Part 4 Bottom Side F_15020_011d eps 110305 Part 4 ...
Страница 72: ...72 DPTV565 AA 7 Circuit Diagrams and PWB Layouts Personal Notes E_06532_013 eps 131004 ...
Страница 119: ...Revision List EN 119 DPTV565 AA 11 11 Revision List Manual xxxx xxx xxxx 0 First release ...


