background image

H D 2 - D M - A / D M - A M

Operation with the Diagnostic Manager

Subject to reasonable modifications due to technical advances.

Copyright Fuchs, Printed in Germany

Fuchs Group • Tel.: G49 621 776-0 • USA +1 330 4253555 • Sin65 67799091 • Internet http://www.pepperl-fuchs.com

60

187630

#

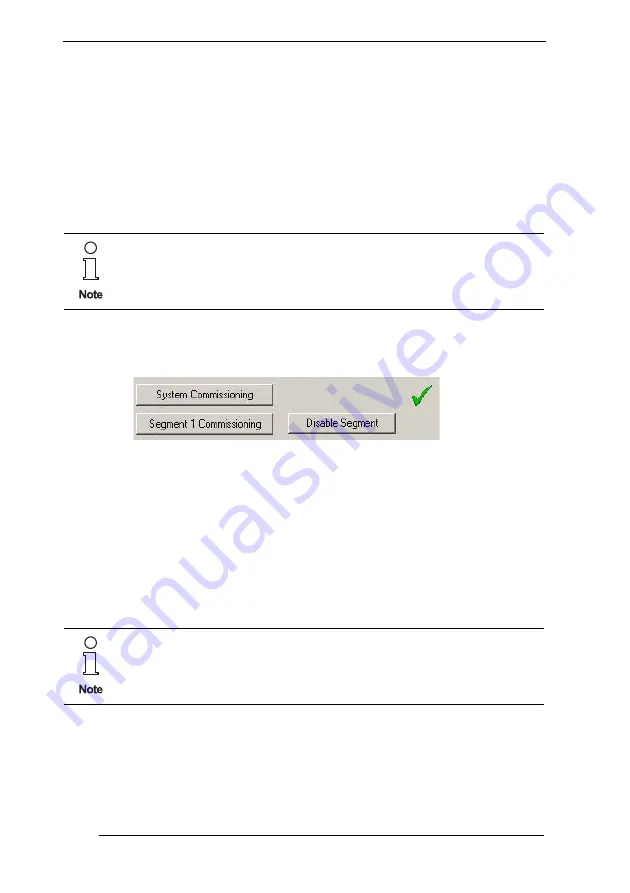
Perform System Commissioning

1.

Open the Commissioning Wizard

2.

Press the button 

System Commissioning

Current motherboard and supply data is shown

3.

Press the button 

Next

Snapshot recording occurs and current system data with automati-
cally calculated maintenance and alarm limits are shown

4.

Press button 

Next

System warning and alarm limit values are now stored to the Diag-
nostic Module

Figure 8.2: System commissioning successful

#

Perform Segment Commissioning

1.

Open the Commissioning Wizard

2.

Perform System commissioning (see above)

3.

Press the button 

Segment Commissioning

Connected field devices are shown

4.

Press the button 

Next

Current segment  and field device data is shown

5.

Press the button 

Next

Snapshot recording occurs and a printable report is generated and
stored within the Snapshot Explorer (see chapter 8.4)

6.

 Press the button 

Next

Current system data with automatically calculated limits are shown

If necessary modify the limit values, before storing them to the Diagnostic
Module.
The out of specification alarm for the primary and secondary power sup-
ply will be enabled automatically by default.

If you are using a National Instruments Card (NI-Card), current Device
tags can be take over by pressing the Read Tags button.

Содержание FieldConnex DM-AM

Страница 1: ...PROCESS AUTOMATION MANUAL HD2 DM A DM AM KT MB DMA ADVANCED DIAGNOSTIC SOLUTIONS ...

Страница 2: ... of the Electrical Industry as published by the Central Association of the Elektrotechnik und Elektroindustrie ZVEI e V including the supplementary clause Extended reservation of title We at Pepperl Fuchs recognise a duty to make a contribution to the future For this reason this printed matter is produced on paper bleached without the use of chlorine ...

Страница 3: ...M AM 17 4 1 Functional Description 17 4 2 Marking 17 4 3 Technical Data 18 4 4 Device Component Overview 18 4 5 LED Indication and Basic Troubleshooting 19 4 6 Order Information 20 4 7 Dimensional Drawings 21 5 Application Engineering HD2 DM A 22 5 1 Schematic Diagnostic Structure HD2 DM A 22 5 2 Typical Applications 24 5 2 1 Local Application Structure 24 5 2 2 Remote Application Structure 25 5 3...

Страница 4: ... 3 1 OPC DA Server Name Space 53 7 3 2 OPC AE Message Data 56 7 4 FDS Network Information 57 8 Operation with the Diagnostic Manager 58 8 1 Commissioning Wizard 59 8 2 Diagnostics 61 8 2 1 System Diagnostics Window 61 8 2 2 Diagnostic Module Diagnostics Window 62 8 2 3 Diagnostic Module Diagnostics Window Overview 62 8 2 4 Alarm Icon Description 63 8 2 5 Diagnostics Filter Function 63 8 3 Segment ...

Страница 5: ...1 Diagnostics During Installation 94 10 2 Troubleshooting 96 10 2 1 Diagnostic Manager Error Messages 96 11 Installation in Hazardous Areas 100 11 1 Safety Instructions 100 11 2 Installation of the HD2 DM A in Conjunction with the Power Hub within Zone 2 or Class I Div 2 or Class I Zone 2 100 11 2 1 Degree of Protection 101 11 3 Installation of the DM AM within Zone 2 Class I Division 2 Area or Cl...

Страница 6: ...ymbols 1 2 Informative Symbols This symbol indicates a warning about a possible danger In the event the warning is ignored the consequences may range from personal injury to death or from damage to equipment to destruction This symbol warns of a possible fault Failure to observe the instructions given in this warning may result in the device and any connected facilities or systems to it develop a ...

Страница 7: ...ed to analyse signal and segment parameters They also let you monitor and measure specific system segment and field device values The continuous live monitoring of all relevant physical layer parameters enables the con stant validation of the signal quality and to proactively detect degradati ons before the segment communication fails The Diagnostic Modules are part of the diagnostic system which ...

Страница 8: ...s are developed and manufactured in com pliance with applicable European standards and guidelines Function HD2 DM A DM AM Preferred type of usage Lifecycle support long term supervision and proactive ser vices of complete Fieldbus plants or parts of it Commissioning vali dation troubleshoo ting lifecycle support and long term super vision for individual segments Device supply via motherboard USB p...

Страница 9: ... integral part of this manual The data sheets contain the electrical data of the Statement of Conformity and the Certificate of Compliance Laws and or regulations governing the use or intended use must be ob served The described devices are only approved for proper professio nal use in accordance with the intended purposes Improper handling will void any claim made under the warranty as well as an...

Страница 10: ... performed in compliance with the applicable laws and guidelines of the correspon ding country The devices contain no batteries which must be disposed of separately from the devices The operator of the system is responsible in terms of planning mounting commissioning operating and maintenance If devices are operated in general electrical systems they must not the reafter be operated in electrical ...

Страница 11: ...king The HD2 DM A is the motherboard mounted diagnostic so lution for four fieldbus segments The preferred type of usage is lifecycle support long term supervision and proactive services of complete Fieldbus plants or parts of it with extended demands on reliability and continuity A special developed FDT DTM based Diagnostic Manager enables fast and easy commissioning and validation of Fieldbus in...

Страница 12: ... mA Power loss max 2 W Fieldbus interface Number of segments 4 Rated voltage 9 to 32 V Ambient conditions Ambient temperature 40 to 60 C 40 to 140 F Storage temperature 40 to 85 C 40 to 185 F Shock resistance 15 g 11 ms Vibration resistance 1 g 10 to 150 Hz Humidity 95 non condensing For complete technical data please refer to the corresponding data sheets 1 LED status segment 1 2 LED status segme...

Страница 13: ... ter minal block connector to the bulk power supply One segment LED is flashing yellow on off with 2 Hz A segment field de vice maintenance re quired alarm is active All segment LED are flashing yellow on off with 2 Hz A system mainte nance required alarm is active One segment LED is flashing red on off with 2 Hz Any segment field de vice alarm is active Connect diagnostic PC and carry out a compl...

Страница 14: ...ven for further information see chapter Fieldbus Power Hub Ba sic Diagnostics at the Fieldbus Power Hub System Manual As the Basic Diagnostic Module the Advanced Diagnostic Module HD2 DM A sets the relay contact too While no alarm occurs the contact is closed It opens when a maintenance alarm limit value is violated The check outs with the corresponding relay status are given in the table below Re...

Страница 15: ...ll as measurement of specific system and field device physical layer values Basic DTM Free of charge Basic Diagnostic Manager with limited functionality Available at www pepperl fuchs com DTM FC AD Professional Diagnostic Manager for up to or including 100 segments per production plant Offers the full func tionality including trending report generation oscillo scope function and an easy to operate...

Страница 16: ... 330 4253555 Singapore 65 67799091 Internet http www pepperl fuchs com 16 187630 3 7 Dimensional Drawings Figure 3 1 HD2 DM A The HD2 DM A Module can be mounted on different Fieldbus Power Hub motherboards For dimensions of the mounted systems please re fer to the corresponding motherboard data sheet All dimensions in millimeters and inches values in brackets and without tolerance indication HD2 D...

Страница 17: ...dule DM AM is a USB powered tool to analyze the physical layer pa rameters of one fieldbus segment at a time The preferred type of usage is com missioning and validation of new or reworked Fieldbus segments as well as the fast troubleshooting of a re spective segment in the case of a failure Specially developed FDT DTM based Diagnostic Manager enables fast and easy commissioning and validation of ...

Страница 18: ...ic Module DM AM Supply Rated voltage 20 to 30 V Rated current 70 to 30 mA Power loss 0 7 W Fieldbus interface Number of segments 1 Rated voltage 9 to 32 V Ambient conditions Ambient temperature 40 to 60 C 40 to 140 F Storage temperature 40 to 85 C 40 to 185 F Shock resistance 15 g 11 ms Vibration resistance 1 g 10 to 150 Hz Humidity 95 non condensing For complete technical data please refer to the...

Страница 19: ...0 mA Use an externally supplied USB Hub Verify that the wiring is secure Tug on the wires ca ble clamps Measure the DC voltage at the termi nal block connector of the bulk power supply or use the de livered AC DC adapter LED COM ERR is flashing yellow on off with 2 Hz A segment field de vice maintenance re quired alarm is active LED COM ERR is flashing red on off with 2 Hz A segment field de vice ...

Страница 20: ...ed Diagnostic Kit scope of delivery Transport case Mobile Advanced Diagnostic Module DM AM USB 2 0 cable Fieldbus cable with test clamps and DM AM Field bus connector Mounting clip Software package DM AM WPS AC DC adapter Wall Power Supply Basic DTM Free of charge Basic Diagnostic Manager comes with the Diagnostic Module This Toolsuite reads generic physical layer information of the fieldbus segme...

Страница 21: ... fuchs com 21 187630 4 7 Dimensional Drawings Figure 4 1 DM AM All dimensions in millimeters and inches values in brackets and without tolerance indication 114 4 5 85 3 3 35 1 4 S Mobile Fieldbus Diagnostic Versorgung supply DC 20 30V 100mA Umgebungstemperatur ambient temperature 20 C Tamb 60 C COM ERR Fieldbus Part No 187225 DM AM D 68307 Mannheim 0621 776 0 PEPPERL FUCHS Singapore 6779 9091 Twin...

Страница 22: ...in the whole composition The real assembly depends on your hardware and plant infrastruture It also depends on your individual requirements It may therefore vary from the diagram shown below You can for example build a local ap plication structure where the diagnostic server and the maintenance ap plication are running on the same PC For further engineering details see chapter 5 2 Figure 5 1 Schem...

Страница 23: ...re running An OPC DA client may run on this Application Maintenance Application Host Application for the FDT Frame applica tion Converter Device that provides serial Ethernet to RS 485 connectivity Because the FieldConnexR Diagnostic Server FDS is working on a serial Com Port only a convert er is required to connect the FDS to the RS 485 Diagnostic Bus in the field cabinets The common solution is ...

Страница 24: ...ager and PACTware TM all software components are running on the same Windows PC maintenance PC The Com Port Converter is addressed via Ethernet It converts the sig nal from Ethernet to the RS 485 powered Diagnostic bus see chapter 5 3 2 The local application structure comprises of Required Software Components PACTware TM 3 0 SP 5 or higher FieldConnexR Diagnostic Manager FDT Field Device Tool is a...

Страница 25: ... and the Diagnostic Manager are running on a Windows PC which is connected to the FDS running on a server or cabinet PC via TCP IP The FDS responds to the Com Port Converter via Ethernet The Com Port Converter supplies the protocol conversion from Ethernet to the RS 485 powered Diagnostic bus see chapter 5 3 2 The remote appli cation structure comprises of Required Software Components PACTware TM ...

Страница 26: ...ed to the HD2 DM A This assignment is performed only via the DIP switch on the device The DIP switch consists of 8 switches positioned next to each other They can be used to assign addresses from 0 to 247 in binary form Assigning the Device Address To assign an address to the HD2 DM A proceed as follows Place the eight individual switches of the DIP switch at the left module side in the correct po...

Страница 27: ...e two con nectors then gently press down the module figure 1 2 Push down the red Quick LOK tabs on each side of the module to fix it to the panel no tools required see figure 2 The module is mounted Dismounting the modules 1 Push the red Quick LOK tabs upwards and 2 Lift off the entire module gently The Diagnostic Module HD2 DM A must only be mounted on the respec tive slot The Mounting slot is ma...

Страница 28: ...Hub motherboards in the field cabinet The Diagnostic Bus between the motherboards is built up with a 2 line wire e g use the additionally ACC MB HDC link cable The maximum length of one complete Diagnostic Bus must not exceed 30 meter and include more than 31 Diagnostic Modules Figure 5 4 Stylized view on the Diagnostic Bus Communication problems Within EMC sensitive areas use shielded wires for t...

Страница 29: ...thin the Com Port Converters administration menu 5 4 Software Installation and Commissioning Software preconditions for successful installation commissioning and operation of the Diagnostic Manager are WindowsTM 2000 or XP FDT frame application PACTware TM 3 0 SP 5 or higher MicrosoftR Net Framework Version 1 1 The latest version of the Diagnostic Manager Use the Pepperl Fuchs installation CD or d...

Страница 30: ...onnex Diagnostic Server by using a remot applica tion structure see chapter 5 2 2 the FieldConnex Diagnostic Server must be installed on the Server Cabinet PC 5 Run PACTware TM 6 Make sure that all PACTware TM projects are closed 7 Update the device catalog Figure 5 6 Update device catalog The window Create a new PACTware TM device catalog appears Figure 5 7 Create a new PACTware TM device catalog...

Страница 31: ...mission a diagnostic project for the first time Manually to build up the diagnostic project before the diagnostic bus is installed or if there is currently no active diagnostic bus Automatically if the diagnostic bus is installed and active 5 5 1 Approved Tags and Tag Values The Tags of FDS Port Diagnostic Module Segment or field device must only contain the following characters and character clas...

Страница 32: ...t the diagnostic devices addresses Set Snapshot archive location see chapter 5 5 4 Build the Diagnostic Topology manually 1 Start PACTware TM 2 Make sure that the FDS is running see chapter 7 3 Make sure that the latest Diagnostic Manager version is installed and that the device catalog is updated 4 Create a new project 5 Open the device catalog View Device catalog or press F3 6 Open folder Pepper...

Страница 33: ...e 5 12 Fieldbus Diagnostic Server Parameter window 10 Enter the appropriate values of the PC on which the FDS is run ning see chapter 7 4 If FDS is running on the same PC as the Diagnostic Manager choose local Figure 5 13 Settings when FDS is running on the same PC 11 Go back to the Device catalog and choose Gateway FDSPort 12 Drag Drop FDS Port into your project to the FDS Figure 5 14 Drag Drop t...

Страница 34: ... catalog and choose Device HD2 DM A 16 Drag Drop the HD2 DM A modules into your project to the FDS Port Now the diagnostic project looks like Figure 5 16 Diagnostic project The COM Port address selects the serial interface to which the Diagnos tic modules are connected For fast creation of projects with a huge number of Diagnostic modules Build up one FDS Port with 31 Diagnostic Modules and use Co...

Страница 35: ...from the DropDown list Figure 5 17 Device address settings 3 Confirm with OK 5 5 3 Commissioning the Diagnostic Project automatically For automatically commissioning you have to perform three steps Parametrize FieldConnexR Diagnostic Server FDS Perform Topology Scan Set Snapshot archive location see chapter 5 5 4 Parametrize FieldConnexR Diagnostic Server FDS 1 Start PACTware TM 2 Make sure that t...

Страница 36: ...55 Singapore 65 67799091 Internet http www pepperl fuchs com 36 187630 Figure 5 18 Device structure PACTware TM 7 Choose Driver FieldConnex Diagnostic Server Figure 5 19 Device structure driver 8 Drag Drop FieldConnex Diagnostic Server into your project window HOST PC Figure 5 20 Drag Drop the FDS 9 Right click on the FieldConnexR Diagnostic Server in your project and select Parameter The paramete...

Страница 37: ... values of the PC on which the FDS is run ning see chapter 7 4 If FDS is running on the same PC as the Diagnostic Manager choose local Figure 5 22 Settings when FDS is running on the same PC Perform Topology Scan 1 Right click on the FieldConnex Diagnostic Server FDS in your project and select Connect 2 Right click on FDS in your project and select Additional functions Topology Scan A list with al...

Страница 38: ...on Per default the generated snapshot files are stored within the Diagnostic Manager project file At large fieldbus installations with many diagnostic devices and lots of snapshots created this project file expands rapidly Such a large project file may cause FDT loading problems so it is ad vised to outsource the snapshots to an external file if the expected number of snapshots reach 4000 Set Snap...

Страница 39: ...com 39 187630 Figure 5 24 FieldConnexR Diagnostic Server Parameter window 2 Choose Manual Configuration and confirm with Enter 3 Enter path and directory 4 Confirm with Enter A file Snapshot mdb containing the snapshot data is stored into the di rectory Make sure that the directory exists and that the path is correct before confirming Data loss After outsourcing the snapshot file it cannot be chan...

Страница 40: ... and configurations or to load current projects out of the FDS the Diagnostic Manager provides the Get To pology function By using this Wizard you are able to load the latest saved configuration out of the FDS after the diagnostic device has been changed or to compare and update an offline created project with the data of the saved FDS configuration Load a prepared Topology and Configuration 1 Sta...

Страница 41: ...tart PACTware TM 2 Open the device cataloge and Drag Drop FieldConnex Diagno stic Server into your project window HOST PC or open a PACTware TM diagnostic project 3 Right click on the FDS in your project and choose Conect 4 Right click on the FDS in your project and choose Additional functions Get Topology 5 Set Read Topology from FDS Server 6 Go forward with Next The wizard shows the loaded confi...

Страница 42: ...atic Diagnostic Structure DM AM In general the diagnostic infrastructure is made up of different hardware e g Diagnostic Module Notebook and software e g FDS DTM com ponents The figure 6 1 gives a stylized overview of all included com ponents and how they interact in the whole composition In ordinary mo bile use cases with the DM AM all software components are installed on one Operator Notebook Fi...

Страница 43: ... is acting as an interface and a data access coordinator between diagnostic device and DTM see chapter 7 2 FDT Field Device Tool FDT Standard is the specification that define how the DTM will interact with a host comput er software A FDT frame application is a PC based software may contain different DTMs for configuration monitoring and pro gramming field devices The Diagnostic DTMs are driven by ...

Страница 44: ...to be in stalled in a DIN rail within a cabinet DM AM Mounting on DIN Rail with Mounting Clip 1 Hook the mounting clip into the DIN mounting rail 2 Press it down until it is locked in place 3 Press the DM AM into the mounting clip until it is locked in place The DM AM is mounted Dismounting of DM AM and the mounting clip is performed in the re verse order The mounting clip and the DM AM must be fi...

Страница 45: ...agnostic Kit that fits into the test points of the Fieldbus plug sockets To simplify con nection to diagnostic devices test points are featured by many Pep perl Fuchs Power Supplies and Segment Protectors As the test points are not an industry standard yet they are not delivered ready to use but with several steps you are able to assemble them by yourself The Test Plugs can be mounted together to ...

Страница 46: ...1 330 4253555 Singapore 65 67799091 Internet http www pepperl fuchs com 46 187630 Assemble the Test Plug 1 Disconnect the three Test Plugs 2 Remove the Metal Part from the Test Plug 3 Stick one lead through the Test Plug into the Metal Part 4 Solder up the lead within the Metal Part 5 Repeat step 3 and 4 with all three leads 6 Screw the Metal Parts back again into the Test Plugs 01 01 Solder up 01...

Страница 47: ...e DM AM Connection and Commissioning 1 Connect the fieldbus cable to the fieldbus segment 2 Plug the connection clamp of the fieldbus cable into the DM AM 3 Connect the DM AM via the USB cable to your Notebook The DM AM starts right away and the LED POWER lights solid red For communication purposes the current supply via USB is necessary the supply current from the Notebook USB interface to the DM...

Страница 48: ...e FieldConnexR Diagnostic Manager proceed as follows 1 Start the setup 2 Choose required software components see readme file 3 Proceed installation with Next and follow the instructions of the in stallation wizard 4 Choose installation for DM AM Diagnostic Manager and Drivers 5 Run PACTware TM 6 Make sure that all PACTware TM projects are closed 7 Update the device catalog Figure 6 3 Update device...

Страница 49: ...ready to run DM AM Commissioning with PACTware TM To commission the DM AM Diagnostic Manager proceed as follows 1 Start PACTware TM 2 Make sure that the latest Diagnostic Manager version is installed and that the device catalog is updated see above 3 Open the corresponding project or create a new one 4 Open the device catalog View Device catalog or press F3 5 Open folder Pepperl Fuchs GmbH Figure ...

Страница 50: ...vice catalog and choose Device DM AM 9 Drag Drop DM AM into your project to the FDS Now the project tree looks like Figure 6 8 Project structure 6 4 1 Diagnostic Manager Connection Diagnostic Manager connection to DM AM Make sure that all parameters e g COM device address are set cor rectly and that the FDS Server is running see chapter 7 2 1 1 Start PACTware TM 2 Open the corresponding project 3 ...

Страница 51: ...trol Center Change FDS Control Center start behavior 1 Right click on the FDS icon in the task bar 2 Choose FDS Control Center 3 Choose Settings The following settings can be made 7 2 FieldConnexR Diagnostic Server FDS The FieldConnexR Diagnostic Server is a background service that acts as an interface and a data access coordinator between the HD2 DM A DM AM and the Diagnostic Manager see chapter ...

Страница 52: ...rol Center appears Figure 7 2 FDS Control Center The following settings can be made Change FDS communication settings To change the FDS communication settings proceed as follows 1 Right click on the FDS icon inside the task bar 2 Choose FDS Control Center window FDS Control Center appears 3 Choose FDS 4 Press the Stop button Setting Behavior Start manually The FDS Control Center has to be started ...

Страница 53: ...t 25061 6 Press the Start button 7 3 OPC Server OPC servers provide a method for many different software packages to access data from a process control device By default an OPC DA and OPC AE server is installed together with the Diagnostic Manager This OPC servers communicates with the FDS and provides data for access from several OPC clients To access the OPC DA server the OPC Package must be ins...

Страница 54: ...pecification 3 Hardware Error 4 Communication Error Meanings see below SummarizedState Provides the highest prior State data value and the highest prior State data quality for the actu al node and all subordinated nodes Priorities see below State value Meaning 0 Good 1 Maintenance required 2 Out of Specification 3 Hardware error 4 Communication error State Data Quality Meaning BAD Comm_FAILURE A c...

Страница 55: ...Pepperl Fuchs Group Tel Germany 49 621 776 0 USA 1 330 4253555 Singapore 65 67799091 Internet http www pepperl fuchs com 55 187630 SummarizedState priority State Data Quality HIGH BAD Comm_FAILURE BAD NON_SPECIFIC UNCERTAIN NON_SPECIFIC LOW GOOD Ignored BAD OUT_OF_SERVICE Failure occured on system level are also shown on the segment level ...

Страница 56: ...he mes sage Chain of tags separated by dots FDS PORT HD2 DM A SEGMENT Type OPC_SIMPLE_EVENT EventCategory Diagnostic Event Servity Weight of the occured alam Message short description of the occured message Alarm Status Message ID Severity Message Value Good 0 101 Status returned to normal Maintenance required 1004 701 Bulk power supply exceeds limits set during commissioning 1005 701 Physical lay...

Страница 57: ...7 187630 7 4 FDS Network Information The menu System Info shows network information of the PC the FDS is running on The host name and or the IP addresses is are needed if you work with a remote application structure see chapter 5 2 2 They must be entered within the Parameter window at the Diagnostic Manager dur ing commissioning see chapter 5 5 If the FDS is currently used by an other client the I...

Страница 58: ... Commissioning Wizard chapter 8 1 Comfortable tool for fast and easy start up with the Diagnostic Module The wizard leads you step by step through a complete system and segment check out with individual system and segment data calculation and value take over Diagnostics chapter 8 2 Shows all systems segments or field devices an alarm has occurred at a glance Segment Monitoring chapter 8 3 Smart to...

Страница 59: ...s the comfortable tool for fast and easy start up with the Diagnostic Module By leading you step by step through a complete system and segment check out all necessary indi vidual system and segment data of your plant are determined Based on this individual plant data the Commissioning Wizard proposes limit values for all system segment and device maintenance and failure alarm values If necessary y...

Страница 60: ...ag nostic Module Figure 8 2 System commissioning successful Perform Segment Commissioning 1 Open the Commissioning Wizard 2 Perform System commissioning see above 3 Press the button Segment Commissioning Connected field devices are shown 4 Press the button Next Current segment and field device data is shown 5 Press the button Next Snapshot recording occurs and a printable report is generated and s...

Страница 61: ...stic Module are shown The alarm data is collected with in a circular buffer You can launch the Diagnostic function separated for the whole production plant System Diagnostic window or each single Diagnostic Module 8 2 1 System Diagnostics Window The System Diagnostic window shows all alarm status of each moni tored segment sorted by Diagnostic Module Press Open to display the Diagnostics window fo...

Страница 62: ... Diagnostics Window Within the Diagnostic Module Diagnostics window a history of all oc curred Segment and Device alarms is shown by setting the Alarm focus on a Segment the actual Alarms of this Segment are analyzed in depth and proposals for solutions are given Open Diagnostic Module Diagnostics Window 1 Right click on the Diagnostic module in the project tree 2 Choose Diagnostics The Diagnostic...

Страница 63: ...pes to narrow the history down For each segment the complete alarm history list can be exported The failure types are sorted within the Alarm Type DropDown menu in four categories as you can see on figure 8 5 filters for the system specific alarms filter for the segment specific alarms filters for the field device specific alarms and common filters to choose non all or only the current present ala...

Страница 64: ... 776 0 USA 1 330 4253555 Singapore 65 67799091 Internet http www pepperl fuchs com 64 187630 Figure 8 5 Filter default settings Export Alarm History 1 Enable Segment Focus for the appropriate segment 2 Chose directory filename and type 3 Press the Save button If you are creating a Alarm History Export file for the fist time add or choose the document extension txt for a Character Separated Value ...

Страница 65: ... idea of all relevant segment and field device data as well as the actual minimum and maximum values that have occured Addi tionally the Snapshot function captures snapshots from all relevant data to create Physical Layer measurement reports Figure 8 6 Segment Monitoring function screen overview The Export Alarm History function always saves the complete alarm his tory data filter settings do not ...

Страница 66: ... the field device data table and the segment data table The field device data table shows the current noise jitter and communi cation level values as well as the polarity of each field device and whose bus address Figure 8 7 Field Device Data table overview The Segment Data table summarizes the field device values and shows the current highest noise jitter max signal level and lowest min sig nal l...

Страница 67: ...es the quality of the minimum and maximum values that have occurred and indicates the results by icons If a value is rated as Out of Specification the violated limit is shown in the Info column Figure 8 9 Max Signal Level violated Icon overview Green monitored Value is excellent Grey monitored Value is good Yellow monitored Value is out of specification Real life plant installations typically have...

Страница 68: ...Measurement report containing the current min max Noise Jitter and Signal level values of each device and the rated seg ment values can be exported or printed as an image Text or PDF file Open Segment Monitoring Function 1 Right click on the Diagnostic Module in the project tree 2 Choose Additional functions Segment Monitoring Start a new Physical Layer Value Recording Snapshot To start the data r...

Страница 69: ...ged default tem plate and the compact template which contains the same information within less space Furthermore the report can be directly launched with MicrosoftR Excel A special prepared Excel sheet containing all data allows you to create diagrams and to undertake several calculations Figure 8 10 Snapshot screen overview Open Snapshot Explorer 1 Right click on the Diagnostic Module in the proj...

Страница 70: ... 2 Click on the Excel icon in the preview navigation panel 8 5 Detail Parameterization Interfaces The Diagnostic Manager offers three different Detail user interfaces the Offline parameterization interface the Online parameterization interface the Measured value interface All settings made in the Offline interface have no direct influence on the Diagnostic Module s current measurements All data is...

Страница 71: ...the Diagnostic Module in the project tree 2 Choose Parameter Offline parametrization Figure 8 12 Labeling in title bar Open Measured Value Interface Make sure that Diagnostic Manager is connected to the Diagnostic Module and the FDS is running 1 Right click on the Diagnostic Module in the project tree 2 Choose Parameter Measured value Figure 8 13 Labeling in title bar A small rhombus next to the d...

Страница 72: ...ed to the Diagnostic Module 1 Right click on the Diagnostic Module in the project tree 2 Choose Parameter Online parametrization Figure 8 14 Labeling in title bar A small rhombus next to the device icon in the project tree indicates that the Diagnostic Manager is connected to the Diagnostic Module 8 5 1 Diagnostic Manager User Interface Description The following chapter describes the user interfac...

Страница 73: ...a contains an Explorer like structure for fast naviga tion within the Diagnostic Manager s detail parameterization interfaces the structure is shown below Figure 8 17 Menu structure HD2 DM A 1 Actual value column 2 Maintenance alarm columns 3 Out of Specification alarm columns 4 Hysteresis column 5 Reset column HD2 DM A Bulk Power Supply Board Type Power Supply Alarms Physical Layer Alarms SEG 1 S...

Страница 74: ...Focus pro vides special live monitoring functionalities e g oscilloscope monitor ing of the bus signal If Segment Focus is enabled for a segment background operations of the other segments may slow down or even be disabled current data is frozen Segment Focus can only be activat ed for one segment at a time While Segment Focus is disabled the background mode is always ac tive and monitors the stat...

Страница 75: ...ny 49 621 776 0 USA 1 330 4253555 Singapore 65 67799091 Internet http www pepperl fuchs com 75 187630 Enable Segment Focus Click the corresponding Segment Focus button in the Information Panel Segment Focus is enabled for segment 1 indicated by bold letters in Navigation Area tree Disable Segment Focus Click the Segment Focus button in the Information Panel of the corresponding segment ...

Страница 76: ...nter face At the Online and Offline interface alarm and maintenance limits can be adjusted for each of them FOUNDATION Fieldbus field devices with unknown not configured bus addresses when connected for the first time to the segment are also stored in the Unconfigured Field Device table PROFIBUS field device handling see below Devices stored in the Unconfigured Field Device table cannot be loaded ...

Страница 77: ...th the Online and the Offline interface 1 Highlight Field Devices in the Label area 2 Press the button Add to target in the Unconfigured Field Device table Remove a Field Device from the Target Configuration You can do this action in both the Online and the Offline interface 1 Highlight Field Devices in Label area 2 Press the button Remove in the field device target configuration table Remove all ...

Страница 78: ...anded to the other segments too like in a PROFIBUS PA segment coupler SK2 application The Measured configured Field Device only check box allows to enter the addresses of those field devices only that are physically connected to the monitored segment 8 5 6 Failure and Maintenance Alarm Handling The Diagnostic Manager provides two different physical layer alarm cat egories Maintenance alarms Out of...

Страница 79: ...dvances Copyright Pepperl Fuchs Printed in Germany Pepperl Fuchs Group Tel Germany 49 621 776 0 USA 1 330 4253555 Singapore 65 67799091 Internet http www pepperl fuchs com 79 187630 Identification area Green Monitored values healthy Blue Maintenance alarm active Yellow Monitored value is Out of Specification ...

Страница 80: ...0 4253555 Singapore 65 67799091 Internet http www pepperl fuchs com 80 187630 Navigation area Green Monitored values healthy Blue Maintenance alarm active Yellow Monitored value is Out of Specification Process area Grey cell value within limits fixed values Yellow cell monitored value is Out of Specification White cell maintenance value within limits adjustable value Blue cell maintenance value be...

Страница 81: ...eset the alarm Figure 8 20 Hysteresis and alarms Reset alarm announcement To clear the alarm announcement while the measured value is within hysteresis range proceed as follows Press button Reset within the measured value row 8 6 Long Term History The Long Term History function allows to collect and store data for pre set time intervals After expiration of an interval the minimum and max imum valu...

Страница 82: ... History Data Export function lets you convert the collected and stored Long Term History data to a different document format so that you can edit them by yourself or use them to carry out your own calcu lations The data sets can be exported as an Exel txt and his file Export History Data 1 Right click on the Diagnostic Module in the project tree Choose Additional functions History Data Export 2 S...

Страница 83: ...lt in oscilloscope is a powerful tool to analyze the physical con dition when a specific telegram type is detected or communication er rors occur In this case the signal level during the sampled period is analysed and shown afterwards Open Fieldbus Oscilloscope 1 Right click on the Diagnostic Module in the project tree 2 Choose Additional functions Fieldbus Oscilloscope 8 7 1 Oscilloscope Screen O...

Страница 84: ...ing on the system a reac tion delay of up to 5 sec is possible 2 Recording length default value 32 768 ms sample rate 2 MSample 64 KB 8 Bit if you extend the recording length the sample rate is reduced 3 Sampled amplitude 4 Trigger events see chapter Trigger events FF PA 5 Trigger address usage of the Trigger events on a specific physi cal bus address field device address 6 Pretrigger time selecti...

Страница 85: ...tions To make sure that the triggered frame is valid every trigger event occurs at the end of the frame Trigger events for FOUNDATION Fieldbus segments are Pass Token to address Probe node to address Token usage from address Missing Token usage next valid bus address is triggered Probe response from address Missing probe response to address Claim LAS from address Transfer LAS to address Trigger ev...

Страница 86: ... com 86 187630 Save Oscilloscope Graph as Image 1 Execute Fieldbus Oscilloscope measurement 2 Press Button Save As Image 3 Chosse location and confirm Export Oscilloscope Values as XML For data exchange with Pepperl Fuchs and more detailed analysis out side of the Diagnostic Manager the Fieldbus Oscilloscope features to export current Oscilloscope results as an XML File 1 Execute Fieldbus Oscillos...

Страница 87: ...of the Diagnostic Modules Firmware Update Before performing Firmware update make sure that all Diagnostic Manager windows are closed and the appropriate Diagnostic module is connected and online 1 Right click on the Diagnostic Module in the project tree 2 Choose Additional functions Firmware Update 3 Choose the directory of the Firmware File 4 Press button Next A Firmware verification takes place ...

Страница 88: ...Module is measured H1 Segment Current The current supplied to the segment is measured H1 Segment Communication Communication activity is detected if any valid frames Preamble SOF EOF are detected Loss of communication is detected if no valid signal is recognized for at least 4 seconds Segment Field Device Noise Monitors the current field device noise level To minimize alarm indica tions activated ...

Страница 89: ...nts including bad wiring practice bad shielding grounding practice a non regulated supply can pass supply voltage glitches onto the bus a DC power supply injecting noise into the bus a regulated FOUNDATION Fieldbus supply injecting switching noise into the bus Segment or Field Device Jitter Monitors the current maximum jitter of all active devices attached to the segment H1 jitter level is a value...

Страница 90: ...itted signal curve during the nominal bit duration measured with respect to the pre vious zero crossing reference event Figure 9 2 Bit cell jitter Causes Jitter is composed of many factors e g cross talk electromagnetic interferences EMI simultaneous switching outputs device dependency bad wiring practice Value definition A high jitter level may cause communication problems and a lack of op Type V...

Страница 91: ...f any segment belonging to the same isolation group has a DC earth unbalance e g short circuit from one signal line to shield Definition A DC unbalance is the result of a capacitive or resistive connection be tween the Fieldbus signal wires and the ground cable shield Causes Miswiring incorrect installation In the installation scenario illustrated in figure 9 3 several devices have been incorrectl...

Страница 92: ...of EMC stability In the worst case an undetected DC un balance may harm the communication Communication Errors Statistic Segment and field device specific error counters for example CRC er rors framing errors etc Field Device Polarity Detects the polarity of the communication signal for every field device A single pole to shield fault is not absolutely critical but if a second pole to shield fault...

Страница 93: ...nal level of all network field de vices is measured H1 communication signal level is a value derived from the device signal levels this data is important for termination fault indication The actual signal level peak to peak value of the field device is measured History Trending Function Segment and field device specific physical layer values are stored and time stamped for a time period of up to 2...

Страница 94: ...81 or the Pep perl Fuchs Wiring and Installation Guide for FOUNDATION Fieldbus Initial Cable Checkout Requirements Cables and junction boxes are installed No power supplies and field devices are connected to the seg ment Possible Measurements Checkouts Using an external LCD meter or a Checkbox you can measure Connection between signal lines and cable shield missing Terminator exceeded cable capaci...

Страница 95: ...e number of transmitted telegrams number of Cyclic Redundancy Check faults CRC number of Pass Token Misses Oscilloscope monitoring of the bus signal Oscilloscope triggering of CRC or framing faults If the Segment Focus is enabled for one segment only the checks mea surements described at point 2 for the other three segments are possi ble If the Oscilloscope monitor is enabled parallel to them only...

Страница 96: ... in connection with hazardous areas may not be changed or manipulated In case of defect the device must be removed and replaced with a new one If devices are operated in general purpose electrical systems they must not thereafter be operated in electrical systems that are connected with hazardous areas Fault Type Fault Clearance Bulk Power supply voltage errors Check bulk power supply status Check...

Страница 97: ...ded to use a changed module config uration adapt the module configuration Segment voltage alarms Check that the correct power supply module type is used 17 V 23 V 30 V Check that the power supply modules work cor rectly Modify the module configuration if it is intended to use a changed module configuration Segment current warnings Check that the setup current is correct for the connected slaves Ch...

Страница 98: ... segments to find out which segment has caused the error using a re dundant system it is possible to exchange pow er conditioner modules segment by segment isolated power supply modules running without shutting down the bus to find out which bus seg ment is affected Segment field de vice level high alarm Check if the bus segment is terminated correctly one terminator at each end of the bus segment...

Страница 99: ...n Noise level high alarm Check that the shielding and grounding of the bus cable is correct Check if a correct potential equalization ground ing system is installed Check that a correct bus cable type is used Check that there are no cables with high AC cur rents 50 60 Hz or pulsed near by the bus ca bling as per good engineering practices Check if there is an oscillation on the bus seg ment caused...

Страница 100: ...es at the switch compo nents on the motherboard are only allowed if the area is known to be non hazardous 11 2 Installation of the HD2 DM A in Conjunction with the Power Hub within Zone 2 or Class I Div 2 or Class I Zone 2 As a part of the Fieldbus Power Hub system the Advanced Diagnostic Module may be installed in Zone 2 and Class I Div 2 or Class I Zone 2 hazardous areas The type of protection i...

Страница 101: ...DM AM may be installed in Zone 2 and Class I Division 2 hazardous areas The type of protection is EEx nA nL non arcing for Zone 2 Gas Groups IIC IIB IIA and non incendive for use in Class I Division 2 Gas Groups A B C and D Before connecting the DM AM to energy limited circuits take the respec tive peak values into account from an explosion protection standpoint For fixed installation the DM AM mu...

Страница 102: ...ideline Version 2 2 February 2003 IEC 61158 2 Digital data communication for measurement and control Fieldbus for use in industrial control systems IEC 61158 ED 3 2002 IEC 60079 14 Electrical installatons in hazardous areas third edi tion 2002 10 EN 60079 15 Type of protection n second edition 2001 02 Ger man version EN 60079 15 203 IEC 60079 17 Inspection and maintenance of electrical installatio...

Страница 103: ... working with the stand alone Diagnostic Kit in comparison to the Power Hub mounted Diagnostic Module described in the former document Observe the following chapter for fast start up with the Stand alone Diangnostic Kit further information about safety issues and workings with the Diagnostic Manager you will find within the detailed sections For technical data please refer to the data sheet Scope ...

Страница 104: ... contact 3 Diagnostic bus connection 4 Power connection 5 Screen ground connection clamp 6 Mounting slot for the Advanced Diagnostic Module 7 Advanced Diagnostic Module Moduladresse 1 Bit ADRESSAUSWAHL ADDRESS SELECTION 0 module address Moduladresse Bit 7 6 5 4 3 2 1 0 1 0 module address 2 3 246 247 7 6 5 4 3 2 1 0 Note The module addresses are only valid in the range from 1 to 247 binary coded 0 ...

Страница 105: ...nts Wire the segment connections of the stand alone Diagnostic Motherboard in parallel to the segment output lines trunks of your Fieldbus power supplies Connection to the Bulk Power Supply If monitoring of the bulk supply of the Fielbus power supplies is desired connect the Stand alone Diagnostic Motherboard in parallel to the same bulk power supply as the Fieldbus power supplies 1 Fieldbus power...

Страница 106: ... up Settings Before continuing with the start up settings be certain that PACTwareTM as well as the Diagnostic manager is properly installed 1 Perform the initial commisioning of the diagnostic project with PACTwareTM 2 Choose Connect in the Diagnostic Manager to get a connection to the Diagnostic Device 3 Open the Online parametrization interface 4 Go to table Motherboard Properties and choose St...

Страница 107: ... of the Electrical Industry as published by the Central Association of the Elektrotechnik und Elektroindustrie ZVEI e V including the supplementary clause Extended reservation of title We at Pepperl Fuchs recognise a duty to make a contribution to the future For this reason this printed matter is produced on paper bleached without the use of chlorine ...

Страница 108: ...perl fuchs com Worldwide Headquarters Pepperl Fuchs GmbH 68307 Mannheim Germany Tel 49 621 776 0 E mail info de pepperl fuchs com For the Pepperl Fuchs representative closest to you check www pepperl fuchs com pfcontact PROCESS AUTOMATION PROTECTING YOUR PROCESS 187630 03 2008 ...

Отзывы: