background image

148

5

Edi
tin

g an

d Pri

n

ti

ng
 Ima
g

es

5

Use the four-way controller (

23

) to choose a digital 

filter.

The preview image of the results of the filter effect appears.

6

Press the 

4

 button.

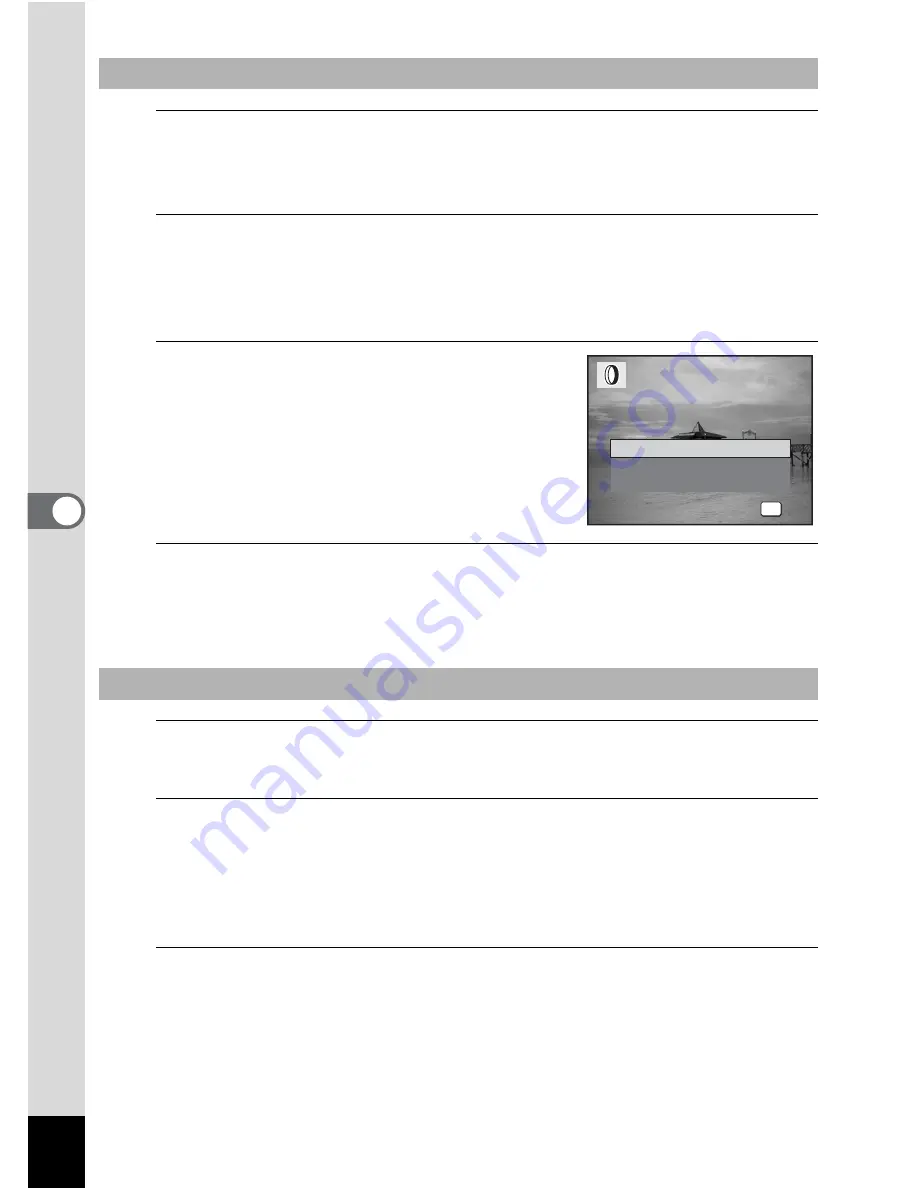
A confirmation dialog for overwriting the image appears.
When an image is protected, the image will be saved as a new image 
without the following confirmation dialog displayed on the screen.

7

Use the four-way controller (

23

to select [Overwrite] or [Save as].

8

Press the 

4

 button.

Images processed with the filter are recorded with the same number of 
recorded pixels and quality level as the original image.

5

Use the four-way controller (

23

) to choose a digital 

filter.

6

Use the four-way controller (

45

) to adjust the effect.

The color filter changes in the following sequence each time you press 
the four-way controller (

5

): Red, Pink, Purple, Blue, Green, Yellow.

The color extraction filter changes in the following sequence each time 
you press the four-way controller (

5

): Red, Green, Blue.

7

Press the 

4

 button.

A confirmation dialog for overwriting the image appears.
When an image is protected, the image will be saved as a new image 
without the following confirmation dialog displayed on the screen.

To Select a B&W Filter, Sepia Filter or Soft Filter

To Select a Color Filter or Color Extraction Filter

OK

O K

O K

O K

O v e r w r i t e

S a v e   a s

C a n c e l

O v e r w r i t e  

O v e r w r i t e  

o r i g i n a l   i m a g e ?

o r i g i n a l   i m a g e ?

O v e r w r i t e  

o r i g i n a l   i m a g e ?

Содержание OPTIO L60

Страница 1: ...Digital Camera Operating Manual To ensure the best performance from your camera please read the Operating Manual before using the camera...

Страница 2: ...n the recorded image There is a possibility that the illustrations and the display screen in this manual are different from the actual product In this manual both an SD Memory Card and an SDHC Memory...

Страница 3: ...mediately if a card is accidentally swallowed Wrapping the strap of the camera around your neck is also dangerous Please take care that small children do not hang the strap around their necks Use an A...

Страница 4: ...140 F 60 C Remove the battery from the camera immediately if it becomes hot or begins to smoke Be careful not to burn yourself during removal Some portions of the camera heat up during use so please...

Страница 5: ...vy objects to drop onto it or allow the AC plug cord to become damaged due to excessive bending If the AC plug cord becomes damaged consult a PENTAX Service Center Do not short or touch the output ter...

Страница 6: ...in water or any other liquid Storing the camera where pesticides and chemicals are handled should be avoided Remove the camera from its case and store in a well ventilated place to prevent the camera...

Страница 7: ...ss forcefully on the display This could cause breakage or malfunction Be careful not to sit down with the camera in your back pocket as this may damage the exterior of the camera or the display When u...

Страница 8: ...ling the SD Memory Card 33 Number of Images Recordable on an SD Memory Card 36 Turning the Camera On and Off 37 Playback Mode 38 Initial Settings 39 Setting the Display Language 39 Setting the Date an...

Страница 9: ...ital Wide Mode 84 Taking Panoramic Pictures Digital Panorama Mode 86 Setting the Shooting Functions 89 Selecting the Flash Mode 89 Selecting the Focus Mode 91 Selecting the Recorded Pixels 94 Selectin...

Страница 10: ...nd Sound Files 136 Recovering Deleted Images 137 Protecting Images and Sound Files from Deletion Protect 138 Connecting the Camera to AV Equipment 141 Editing and Printing Images 143 Editing Images 14...

Страница 11: ...he Display Language 181 Changing the Naming Rule of the Folder 182 Changing the USB Connection Mode 183 Changing the Video Output Format 184 Adjusting the Brightness of the Display 185 Using the Power...

Страница 12: ...t is useful to know indicates precautions to be taken when operating the camera A mode This is the mode for capturing still pictures and recording movies and sound files In this manual the mode for ta...

Страница 13: ...how to view still pictures and movies on the camera or on a TV and how to delete images from the camera 5 Editing and Printing Images This chapter explains the various ways of printing still pictures...

Страница 14: ...and exposure for the faces It can recognize up to 32 people per shot so it will help you take perfect group shots too It will automatically release the shutter when people are smiling or if anyone bli...

Страница 15: ...ith only a few buttons Simply by choosing the appropriate icon you can select the shooting mode p 60 and choose the optimal settings for the situation or the playback mode p 122 p 144 and enjoy the va...

Страница 16: ...t The camera is all you need to take and edit still pictures and movies p 144 And no more worries about accidentally deleting images because now with the Optio L60 you can recover them again p 137 Dis...

Страница 17: ...set Battery Charger Kit K BC78 For other optional accessories refer to Optional Accessories p 205 Checking the Contents of the Package Camera Optio L60 Strap O ST51 Software CD ROM S SW81 USB cable I...

Страница 18: ...16 Front Back Names of Parts Self timer lamp Microphone Lens Speaker Flash Battery Card cover Tripod socket Display Terminal cover PC AV terminal Power switch Shutter release button Strap lug...

Страница 19: ...fer to Understanding the Button Functions p 46 p 49 for an explanation of the function of each button Shutter release button 4 W button Four way controller Q button Zoom w x f y button Green i button...

Страница 20: ...ress the shutter release button halfway when camera shake is likely to occur To prevent camera shake use a tripod and or the self timer function p 81 When the shooting mode is set to 9 Green mode the...

Страница 21: ...the shooting mode 1 Shooting mode p 60 10 Memory status p 37 2 Face Priority icon p 63 11 Remaining image storage capacity 3 Camera shake warning 4 Shutter speed 12 Battery level indicator p 30 5 Aper...

Страница 22: ...ng on the shooting mode A1 Shooting mode p 60 A12 Battery level indicator p 30 A2 Face Priority icon p 63 A13 Recorded pixels p 94 A3 Camera shake warning A14 Quality level p 96 A4 Flash mode p 89 A15...

Страница 23: ...utton Normal Display Histogram Info No Info Display in Q Mode OK OK OK 07 07 2008 07 07 2008 07 07 2008 14 25 14 25 14 25 100 100 0026 0026 100 0026 F3 5 F3 5 1 250 1 250 F3 5 1 250 07 07 2008 07 07 2...

Страница 24: ...s performed for two seconds When no operation is performed for two seconds in Normal Display or Histogram Info only Edit disappears A1 Playback mode A10 Captured date and time p 43 Q Still Picture Pla...

Страница 25: ...u need to use EV compensation and take the picture again Understanding Brightness If the brightness is correct the graph peaks in the middle If the image is too dark the peak is on the left side and i...

Страница 26: ...frame that is so bright it appears white the indicated area blinks red as a warning Similarly when there is an area that is so dark it appears black the indicated area blinks yellow as a warning Under...

Страница 27: ...1 Getting Started Attaching the Strap 26 Powering the Camera 27 Installing the SD Memory Card 33 Turning the Camera On and Off 37 Initial Settings 39...

Страница 28: ...ting Started Attaching the Strap Attach the strap O ST51 supplied with the camera 1 Pass the narrow end of the strap through the strap lug 2 Pass the other end of the strap through the loop and pull t...

Страница 29: ...cord rated 125 V 7A minimum 6ft 1 8m 1 Connect the AC plug cord to the battery charger 2 Plug the AC plug cord into the power outlet 3 Place the battery in the battery charger so that the PENTAX logo...

Страница 30: ...ry charger may overheat or be damaged The battery has reached the end of its service life when it starts to run down soon after being charged Replace with a new battery If the battery is inserted corr...

Страница 31: ...rectly oriented malfunction may result Removing the Battery This camera uses a rechargeable lithium ion battery D LI78 Use of any other type of battery may damage the camera and cause malfunction Inse...

Страница 32: ...n check the battery level by the indicator on the display Image Storage Capacity 1 flash used for 50 of shots Movie Recording Time 2 Sound Recording Time 2 Playback Time 2 Approx 210 pictures Approx 8...

Страница 33: ...pen close the battery card cover and remove the battery 3 Insert the DC coupler Using the side of the DC coupler to press the battery card cover lock lever insert the DC coupler Confirm the DC coupler...

Страница 34: ...ilt in memory Use the AC adapter with due care to avoid fire or electric shock Be sure to read About the Battery Charger and the AC Adapter p 2 before using the AC adapter Be sure to read the operatio...

Страница 35: ...other cameras or digital devices Refer to Formatting an SD Memory Card p 174 for instructions on formatting Make sure that the camera is turned off before inserting or removing the SD Memory Card The...

Страница 36: ...mera the side with the lens Push the card in all the way Images and sound may not be recorded correctly if the card is not inserted all the way 3 Close the battery card cover Close the battery card co...

Страница 37: ...s ejected or the battery is removed while the data on the card is being recorded or accessed If it is not used for a long time the data on the card may become unreadable Be sure to regularly make a ba...

Страница 38: ...r still pictures on the A Rec Mode menu Choose the appropriate number of recorded pixels and frame rate in Movie on the A Rec Mode menu For an approximate guide to the number of images or the length o...

Страница 39: ...n The display turns off the lens closes and the camera turns off The memory card is checked when the camera turns on and the memory status is displayed a The SD Memory Card is inserted Images and soun...

Страница 40: ...ures 1 Press the power switch while holding down the Q button The display turns on with the lens retracted and the camera turns on in the playback mode Playback Mode To switch from the playback mode t...

Страница 41: ...Use the four way controller 2345 to choose the display language Language Date and Time can be changed later Refer to the pages below for instructions To change the language follow the steps in Changi...

Страница 42: ...for Hometown and DST Daylight Saving Time appear press the 4 button again to display the Date Adjust screen Go to Setting the Date and Time p 43 Go to Step 3 in To Set Hometown and DST p 42 if the de...

Страница 43: ...n Another Language 1 Press the 4 button 2 Press the 3 button 3 Press the four way controller 5 4 Use the four way controller 32 to select Language 5 Press the four way controller 5 The Language screen...

Страница 44: ...he four way controller 3 The frame moves to DST Daylight Saving Time 7 Use the four way controller 45 to select O On or P Off 8 Press the 4 button The Initial Setting screen appears 9 Press the 4 butt...

Страница 45: ...way controller 23 to select 24h 24 hour display or 12h 12 hour display 5 Press the four way controller 5 The frame returns to Date Style 6 Press the four way controller 3 The frame moves to Date 7 Pre...

Страница 46: ...g the World Time 1p 179 When the Initial Setting or Date Adjust screen is displayed you can cancel the setting operation and switch to the capture mode by pressing the 3 button In this case the Initia...

Страница 47: ...2 Common Operations Understanding the Button Functions 46 Setting the Camera Functions 51...

Страница 48: ...9 Takes the still picture when pressed down fully p 59 Starts and stops movie recording in C Movie mode p 109 Starts and stops sound file recording in O Voice Recording mode p 168 3 I button Switches...

Страница 49: ...p 82 3 Displays the Capture Mode Palette p 60 4 Changes the flash mode p 89 5 Changes the focus mode p 91 23 Adjusts in mode p 92 7 4 W button Changes the information on the display p 18 8 Green butto...

Страница 50: ...o nine image display Returns to the previous display when y is pressed p 120 Enlarges the image when y is pressed during single image display Returns to the previous display when f is pressed p 128 Pr...

Страница 51: ...anges the information on the display p 18 Returns zoom display or nine image display to single image display p 120 p 128 Changes to nine image display of the selected folder during folder display p 12...

Страница 52: ...he built in memory turn the camera off and remove the SD Memory Card or follow the procedure below to use the Built in memory display function Viewing images in the built in memory while the SD Memory...

Страница 53: ...etting menu Menus for playing back and editing images and sound files are displayed from the Playback Mode Palette Press the 3 button in A mode to display the A Rec Mode menu Press the 3 button in Q m...

Страница 54: ...3 Rec Mode 1 3 Setting 1 3 Setting MENU Exit 1 3 07 07 2008 07 07 2008 07 07 2008 07 07 2008 AWB Auto Recorded Pixels Quality Level White Balance Sensitivity AE Metering Focusing Area AWB Auto Recorde...

Страница 55: ...e the setting The quality level changes each time the four way controller 23 is pressed 6 Press the 4 button or the four way controller 4 The setting is saved and then the camera is ready for setting...

Страница 56: ...nd the screen returns to Step 3 To Save the Setting and Start Taking Pictures When the W Setting menu is displayed from Q mode you can switch to A mode by pressing the Q button To Save the Setting and...

Страница 57: ...nsitivity p 101 EV Compensation For adjusting the overall brightness of the picture p 97 Movie Recorded Pixels For choosing the number of recorded pixels of movies p 111 Frame Rate For setting the fra...

Страница 58: ...tination p 179 Language For setting the language in which menus and messages appear p 181 Folder Name For choosing how names are assigned to folders for storing images and sound files p 182 USB Connec...

Страница 59: ...3 Taking Pictures Taking Still Pictures 58 Setting the Shooting Functions 89 Recording Movies 109 Saving the Settings Memory 115...

Страница 60: ...shooting information on the display The focus frame in the middle of the display indicates the zone of automatic focusing When the camera recognizes a face the Face Recognition function is activated a...

Страница 61: ...lfway This refers to pressing the shutter release button gently to the first position This locks the focus setting and the exposure The green focus frame lights on the display when the shutter release...

Страница 62: ...and press the shutter release button fully Objects that lack contrast such as a blue sky or white wall Dark places or objects or conditions that prevent light being reflected back Horizontal lines or...

Страница 63: ...oting modes other than R A C c g O X and F saturation contrast sharpness white balance etc are automatically set to the optimal settings for the selected mode Some functions may not be available or ma...

Страница 64: ...ghter and look healthy p 73 Q Surf Snow For capturing images with dazzling backgrounds snowy scenes or beaches p 76 Sport For fast moving subjects Keeps the camera in focus until the shutter release p...

Страница 65: ...ich automatically releases the shutter when your subject smiles p 64 W Blog For capturing blog images and the like Recorded pixels fixed at 640x480 X Digital Wide Composites two images to capture a wi...

Страница 66: ...ion Function The Face Recognition function cannot be set to off in b Auto Picture B Night Scene Portrait O Half length Portrait P Portrait R Kids or V Natural Skin Tone mode You can select either Face...

Страница 67: ...e subject the selected shooting mode is displayed on the top left of the screen When the camera recognizes a face the Face Recognition function is activated and the face recognition frame appears p 63...

Страница 68: ...e Recognition function off The Focusing Area setting is fixed at J Multiple The Flower mode cannot be selected when using Digital Zoom or Intelligent Zoom If the Night Scene mode is selected when the...

Страница 69: ...he shutter release button fully The picture is taken In the 9 Green mode you can enjoy easy picture taking using standard settings regardless of the settings in the A Rec Mode menu 9 mode settings are...

Страница 70: ...green when the camera focuses on the subject at the correct distance 3 Press the shutter release button fully The picture is taken Assign 9 mode to the Green Button on the A Rec Mode for using 9 mode...

Страница 71: ...he button is released and pressed again the camera switches to Digital Zoom The zoom bar is displayed as follow 1 You can zoom in to a maximum of 5 optically 2 The Intelligent Zoom range differs depen...

Страница 72: ...x 8 9 M Approx 9 5 l Approx 17 8 m Approx 28 5 Same as 28 5 Digital Zoom It is recommended to use a tripod to prevent camera shake when taking pictures at a high magnification rate Pictures taken in t...

Страница 73: ...ne Night Scene Portrait Digital SR Blur Reduction Fireworks Candlelight Mode A Night Scene Used for night scenes Use a tripod etc to prevent image shake B Night Scene Portrait For portraits in night s...

Страница 74: ...ress the shutter release button halfway The focus frame on the display turns green when the camera focuses on the subject at the correct distance 5 Press the shutter release button fully The picture i...

Страница 75: ...the camera recognizes a face the Face Recognition function is activated and the face recognition frame appears p 63 If the camera recognizes a person s face in O mode an orange frame appears showing t...

Страница 76: ...duces healthy and bright skin tone Face Recognition p 63 operates automatically for this mode making it easier to emphasize the subject s face when taking pictures 1 Press the four way controller 3 in...

Страница 77: ...ving pet in focus while you take the picture and capture the color of your pet s coat Choose the appropriate icon depending on what color your pet is closer to black or white or in between 1 Press the...

Страница 78: ...nd the face recognition frame appears p 63 6 Press the shutter release button halfway The focus frame on the display turns green when the camera focuses on the subject at the correct distance The focu...

Страница 79: ...n is activated and the face recognition frame appears p 63 4 Press the shutter release button halfway The focus frame on the display turns green when the camera focuses on the subject at the correct d...

Страница 80: ...rs 2 Use the four way controller 2345 to select c 3 Press the 4 button The Text mode selection screen appears 4 Use the four way controller 23 to select c d c or d Taking Pictures of Text Text Mode c...

Страница 81: ...subject at the correct distance 7 Press the shutter release button fully The picture is taken In g Frame Composite mode you can take pictures using the frames stored in the camera 1 Press the four wa...

Страница 82: ...he frame appears on the display When the camera recognizes a face the Face Recognition function is activated and the face recognition frame appears p 63 6 Press the shutter release button halfway The...

Страница 83: ...s are reset or if the built in memory files are deleted with a computer To reload the optional frames into the built in memory copy the files from the CD ROM S SW81 supplied with the camera p 153 Addi...

Страница 84: ...while the self timer lamp is blinking when taking still pictures In C Movie mode recording will start after ten seconds or two seconds Press the shutter release button halfway while the self timer is...

Страница 85: ...ma mode In j mode you can continue shooting until the memory capacity of the SD Memory Card or the built in memory is full The interval of j Continuous Shooting varies according to the Recorded Pixels...

Страница 86: ...te appears 2 Use the four way controller 2345 to select X 3 Press the 4 button The camera enters the X mode Turn the camera 90 counterclockwise and align your first picture When the camera recognizes...

Страница 87: ...nd Instant Review and then saved to the built in memory or the SD Memory Card 1 When the shooting screen for the second image is displayed in Step 5 press the 4 button or the four way controller 3 A c...

Страница 88: ...Panorama mode you can stitch two or three captured frames to create a panoramic photograph with the camera 1 Press the four way controller 3 in A mode The Capture Mode Palette appears 2 Use the four...

Страница 89: ...ully The screen for taking the second frame is displayed after you take the first frame If you select right 5 in Step 4 The right edge of the first frame appears in semi transparent form on the left e...

Страница 90: ...he first and the second frames are stitched and saved as a panoramic photograph Discard Discards the captured image s and you can retake the first frame Cancel Returns to the previous shooting screen...

Страница 91: ...red eyes caused by the light from the flash being reflected in the subject s eyes The flash discharges regardless of the light conditions b Soft Flash This mode reduces the intensity of the flash so t...

Страница 92: ...his phenomenon occurs when the light from the flash is reflected in the subject s eyes It can be reduced by illuminating the area around the subject or moving closer to the subject and zooming out to...

Страница 93: ...ct is approx 10 cm to 50 cm 4 in to 20 in The camera is focused on the subject in the autofocus area when the shutter release button is pressed halfway 3 Pan Focus This mode is used when you ask someo...

Страница 94: ...ser focus In 9 Green mode you can only select q or 3 In S Fireworks mode the focus mode is fixed at s When Standard is selected and the subject is closer than 40 cm the camera automatically focuses fr...

Страница 95: ...controller 5 A pull down menu appears 4 Use the four way controller 23 to change the Focusing Area setting 5 Press the 4 button The setting is saved Shooting mode and drive mode cannot be changed whil...

Страница 96: ...aries depending on the quality level setting p 96 Refer to the table on the next page for the appropriate settings according to use The default setting is N 3648 2736 In C Movie and g Frame Composite...

Страница 97: ...he right The number of recorded pixels for images captured in 9 Green mode is fixed at N The number of recorded pixels for images captured in O Half length Portrait or g Frame Composite is fixed at h...

Страница 98: ...y controller 5 A pull down menu appears 4 Use the four way controller 23 to change the quality level 5 Press the 4 button The setting is saved 6 Press the 3 button The camera returns to capture status...

Страница 99: ...f 2 0 EV to 2 0 EV in 1 3 EV steps 4 Press the 3 button The camera returns to capture status Setting the Exposure EV Compensation When the histogram is displayed in Still Picture Capture Playback mode...

Страница 100: ...e camera adjusts the white balance automatically G Daylight Use this mode when taking pictures outside in sunlight H Shade Use this mode when taking pictures outside in the shade I Tungsten Light Use...

Страница 101: ...at the blank sheet of paper or other material so that it fills the frame displayed in the center of the screen 3 Press the shutter release button fully The white balance is automatically adjusted 4 Pr...

Страница 102: ...6 Press the 3 button The camera returns to capture status Setting the AE Metering L Multi segment metering The camera divides the image into 256 areas meters the brightness and determines the exposure...

Страница 103: ...ose your picture again and press the shutter release button fully Depending on the selected shooting mode the AE metering setting may not be changed Refer to Functions Available for Each Shooting Mode...

Страница 104: ...to 3200 or 6400 the number of recorded pixels is fixed at f When set to 9 Green or C Movie mode only Auto sensitivity 64 800 is available When set to c Digital SR Blur Reduction mode only Auto sensiti...

Страница 105: ...0 5 sec and Off no display 1 Press the 3 button in A mode The A Rec Mode menu appears 2 Use the four way controller 23 to select Instant Review 3 Press the four way controller 5 A pull down menu appea...

Страница 106: ...45 to change the sharpness level F Soft G Normal H Sharp 4 Press the 3 button The setting is saved and the camera returns to capture status Instant Review 1p 60 If the Blink Detection function worked...

Страница 107: ...he setting is saved and the camera returns to capture status You can set the image contrast level 1 Press the 3 button in A mode The A Rec Mode menu appears 2 Use the four way controller 23 to select...

Страница 108: ...e Imprint 3 Press the four way controller 5 A pull down menu appears 4 Use the four way controller 23 to select the Date Imprint details Choose from Date Date Time Time or Off 5 Press the 4 button The...

Страница 109: ...the display style set in the Date Adjust screen p 43 Note that if the printer or the image editing software is set to print the date and the images to be printed already have the date and or time imp...

Страница 110: ...assigned to the Green button is called up 2 Use the four way controller 45 to change the settings and press the 4 button The camera returns to capture status To Assign a Function to the Green Button T...

Страница 111: ...mode icon 2 Recording indicator blinks during recording 3 Remaining recordable time 4 Focus frame does not appear during recording 5 Movie shake reduction function icon You can change the captured are...

Страница 112: ...ording starts You can use the optical zoom only before recording while the digital zoom is available both before and during recording Changing the display mode by pressing the 4 W button while recordi...

Страница 113: ...way controller 5 The Movie screen appears 4 Use the four way controller 23 to select Recorded Pixels 5 Press the four way controller 5 A pull down menu appears 6 Use the four way controller 23 to cha...

Страница 114: ...Movie 3 Press the four way controller 5 The Movie screen appears 4 Use the four way controller 23 to select Frame Rate 5 Press the four way controller 5 A pull down menu appears 6 Use the four way co...

Страница 115: ...he four way controller 23 to select Color Mode 5 Press the four way controller 5 A pull down menu appears 6 Use the four way controller 23 to choose a color 7 Press the 4 button The setting is saved 8...

Страница 116: ...four way controller 23 to select Movie 3 Press the four way controller 5 The Movie screen appears 4 Use the four way controller 23 to select Movie SR 5 Use the four way controller 45 to select O On o...

Страница 117: ...ault setting for each item is on or off Item Description Default Setting Page Face Priority A Face Recognition mode set by using the I button P p 63 Flash Mode The flash mode set with the four way con...

Страница 118: ...y controller 5 The Memory screen appears 4 Use the four way controller 23 to choose an item 5 Use the four way controller 45 to select O On or P Off 6 Press the 4 button The setting is saved 7 Press t...

Страница 119: ...4 Playing Back and Deleting Images Playing Back Images 118 Deleting Images 132 Connecting the Camera to AV Equipment 141...

Страница 120: ...on while the image is displayed to display the Delete screen Press the four way controller 2 to select Delete and press the 4 button p 132 Playing Back Still Pictures To Play Back the Previous or Next...

Страница 121: ...er 4 Plays back in reverse Four way controller 2 Pauses playback Zoom w x button x Increases the volume Zoom w x button w Reduces the volume The following operations can be performed while playback is...

Страница 122: ...Similarly if you choose image 2 and press the four way controller 35 the next page appears The icons that appear on the images indicate the following No icon Still picture without sound P Still pictur...

Страница 123: ...age recorded on a date is displayed for that date on the calendar O appears for dates on which a sound file was the first recorded file Use the four way controller 2345 to move the frame to a differen...

Страница 124: ...08 07 07 2008 14 25 14 25 14 25 100 100 0038 0038 100 0038 38 38 38 14 25 14 25 14 25 07 07 2008 07 07 2008 07 07 2008 07 07 2008 OK OK OK OK Cancel Cancel Cancel Quality Level Quality Level Quality L...

Страница 125: ...er For modifying images with a Color filter or Soft filter p 147 Movie Edit Save as Still Image For saving one frame from a movie as a still picture p 154 Divide Movies For dividing a movie into two Y...

Страница 126: ...ing the slideshow pauses the slideshow To resume the slideshow press the 4 button again 5 Press any button other than the 4 button The slideshow stops You can set the playback interval and also a scre...

Страница 127: ...ars with the following items Use the four way controller 23 to select an item and press the 4 button 8 Use the four way controller 23 to select Sound Effect 9 Use the four way controller 45 to select...

Страница 128: ...rmally be played through to the end before the next picture is played back regardless of the interval setting However pressing the four way controller 5 while playing back a movie or a picture with so...

Страница 129: ...ion selection screen 0 Right 90 Left 90 or 180 appears 4 Use the four way controller 2345 to choose the rotation direction and press the 4 button The rotated image is saved Panoramic images and movies...

Страница 130: ...image at a maximum of 10 simply by pressing y once You can use the mark of the guide at the bottom left of the screen to check which portion of the image is magnified The following operations can be...

Страница 131: ...e I icon is displayed in the image and press the I button The image is magnified around the face first recognized when the image was taken If multiple faces were recognized when the image was taken th...

Страница 132: ...e magnification ratio for Face close up playback may differ depending on the conditions such as the size of the face recognized when shooting Press y on the Zoom f y button during Face close up playba...

Страница 133: ...ory Card If you overwrite the image the shake information is lost and you cannot perform shake correction again Even where an image has P on the screen it may not be possible to correct the camera sha...

Страница 134: ...ages and sounds can be recovered with the Optio L60 p 137 Deleted images and sounds can be recovered even if the camera has been turned off after deletion as long as the SD Memory Card has not been re...

Страница 135: ...A confirmation screen appears 3 Use the four way controller 23 to select Delete Sound If you press the i button during Instant Review the screen in Step 2 appears enabling you to delete the image you...

Страница 136: ...Zoom f y button Nine thumbnail images appear 2 Press the i button P appears on the images and sound files Select Delete in Step 3 above to delete both the image and sound file You cannot delete only...

Страница 137: ...ng you to check whether you really want to delete it or not The display returns to the nine image display when you release the button However protected images cannot be displayed in single image displ...

Страница 138: ...the four way controller 23 to select Delete All 4 Press the 4 button All the images and sound files are deleted Deleting All Images and Sound Files Protected images and sound files cannot be deleted...

Страница 139: ...ons to write data such as taking pictures recording movies protecting images saving DPOF settings resizing images cropping images or formatting have been performed or the SD Memory Card has been remov...

Страница 140: ...Protect this image sound appears To protect another image or sound file use the four way controller 45 to select another image or sound file 6 Use the four way controller 23 to select Protect Protect...

Страница 141: ...l Images Sounds appears 4 Use the four way controller 23 to select All Images Sounds 5 Press the 4 button To cancel the Protect setting select Unprotect in Step 6 Y appears below the file number on pr...

Страница 142: ...the images and sound files are protected Protected images and sound files will be deleted when the SD Memory Card is formatted p 174 To cancel the Protect setting on all your images and sound files s...

Страница 143: ...ra 2 Connect the other ends of the AV cable yellow video white audio to the video input terminal and audio input terminal of the AV device When using stereo sound equipment insert the sound terminal i...

Страница 144: ...on the country or region images and sound files may fail to be played back if the video output format is set different from the one in use there If this happens change the video output format setting...

Страница 145: ...5 Editing and Printing Images Editing Images 144 Setting the Printing Service DPOF 158 Printing Using PictBridge 161...

Страница 146: ...ur way controller 45 to choose the image you want to resize 2 Press the four way controller 3 The Playback Mode Palette appears 3 Use the four way controller 2345 to select n Resize 4 Press the 4 butt...

Страница 147: ...r way controller 23 to select Overwrite or Save as 8 Press the 4 button The resized image is saved You can delete the unwanted part of a picture and save the cropped image as a separate image 1 Enter...

Страница 148: ...een Zoom f y button Changes the size of the cropped section Four way controller 2345 Moves the cropping position up down left and right Green button Rotates the cropping frame 6 Press the 4 button The...

Страница 149: ...er Using the Digital Filters B W filter Processes the image using the B W filter Sepia filter Processes the image using the sepia filter Color filter Processes the image using the selected color filte...

Страница 150: ...e four way controller 23 to choose a digital filter 6 Use the four way controller 45 to adjust the effect The color filter changes in the following sequence each time you press the four way controller...

Страница 151: ...ontroller 5 and decreases each time you press the four way controller 4 7 Press the 4 button A confirmation dialog for overwriting the image appears When an image is protected the image will be saved...

Страница 152: ...riting the image appears When an image is protected the image will be saved as a new image without the following confirmation dialog displayed on the screen 5 Use the four way controller 23 to select...

Страница 153: ...way controller 2345 to select Y Frame Composite 4 Press the 4 button A 9 frame display of the frame selection screen appears 5 Use the four way controller 2345 to choose a frame The red eye compensat...

Страница 154: ...the image and use the Zoom f y button to make the image larger or smaller 8 Press the 4 button A confirmation dialog for overwriting the image appears When an image is protected the image will be save...

Страница 155: ...ction Manual for instructions on connecting the camera to a computer 3 When the device detection window opens click Cancel 4 Insert the CD ROM S SW81 into the CD ROM drive 5 When the installer window...

Страница 156: ...Movie Edit 4 Press the 4 button The movie edit selection screen appears You can proceed to the following steps To Use a New Frame Extract the downloaded frame and copy it to the FRAME folder in the b...

Страница 157: ...creen for choosing the dividing position appears 7 Use the four way controller 2345 to determine the dividing position 2 Plays or pauses the movie 3 Stops the movie and returns to the first frame 4 Re...

Страница 158: ...he four way controller 3 in Q mode The Playback Mode Palette appears 2 Use the four way controller 2345 to select p Image Sound Copy 3 Press the 4 button The copying method selection screen appears Pr...

Страница 159: ...select 2 5 Press the 4 button 6 Use the four way controller 45 to select the image sound file you want to copy 7 Press the 4 button The selected image sound file is copied To Copy Files from the Built...

Страница 160: ...mage 1 In Q mode press the four way controller 3 The Playback Mode Palette appears 2 Use the four way controller 2345 to select r DPOF 3 Press the 4 button The screen for selecting Single Image or All...

Страница 161: ...way controller 45 to choose another image and repeat Steps 6 and 7 8 Press the 4 button The setting is saved and the screen returns to the DPOF menu Depending on the printer or printing equipment at...

Страница 162: ...ether to insert the date or not Refer to Steps 6 and 7 in Printing Single Images p 159 for details of how to make the settings 5 Press the 4 button The settings for all the images are saved and the ca...

Страница 163: ...s connected to the printer The printer may not work properly or the image data may be lost if the battery runs out of power while the camera is connected to the printer Do not disconnect the USB cable...

Страница 164: ...ay controller 45 to choose an image to print 4 Use the four way controller 23 to choose the number of copies You can print up to 99 copies 5 Use the Green button to choose whether to insert the date o...

Страница 165: ...s supported by your printer 10 Press the 4 button The Paper Size setting is saved and the screen returns to the print settings screen 11 Use the four way controller 23 to select Paper Type and press t...

Страница 166: ...s the 3 button The screen returns to the confirmation dialog 14 Press the 4 button The image is printed according to the settings Press the 3 button to cancel printing 1 In the printing mode selection...

Страница 167: ...selection screen use the four way controller 23 to select DPOF AUTOPRINT 2 Press the 4 button The DPOF settings you have made appear Use the four way controller 45 to check the number of copies for e...

Страница 168: ...according to the settings Press the 3 button to cancel printing Disconnect the USB cable from the camera and printer when you have finished printing 1 Turn off the camera and printer 2 Disconnect the...

Страница 169: ...6 Recording and Playing Back Sound Recording Sound Voice Recording Mode 168 Adding a Voice Memo to Images 171...

Страница 170: ...aim the camera at the sound source to obtain the best sound quality 1 Press the four way controller 3 in A mode The Capture Mode Palette appears 2 Use the four way controller 2345 to select O Voice R...

Страница 171: ...ing an index is added to the current sound file 5 Press the shutter release button fully Recording stops If you press and hold down the shutter release button for more than one second in Step 4 record...

Страница 172: ...ay controller 4 Reverses playback Four way controller 5 Fast forwards playback If there are recorded indexes Four way controller 4 Plays back starting from the previous index Four way controller 5 Pla...

Страница 173: ...Memo 4 Press the 4 button Recording starts You can record a voice memo continuously for up to 24 hours 5 Press the 4 button Recording stops Recording a Voice Memo A voice memo cannot be added to an i...

Страница 174: ...2 Press the four way controller 2 Playback starts The following operations can be performed during playback Zoom w xbutton x Increases the volume Zoom w xbutton w Reduces the volume 3 Press the four w...

Страница 175: ...7 Settings Camera Settings 174...

Страница 176: ...ss the four way controller 5 The Format screen appears 4 Use the four way controller 23 to select Format Formatting an SD Memory Card Do not remove the SD Memory Card during formatting as this may dam...

Страница 177: ...oller 23 to select Sound 3 Press the four way controller 5 The Sound screen appears 4 Use the four way controller 23 to select Operation Volume 5 Use the four way controller 45 to adjust the volume Se...

Страница 178: ...way as in Steps 4 to 7 9 Press the 3 button The screen returns to the W Setting menu You can change the initial date and time settings You can also set the style in which the date appears on the came...

Страница 179: ...four way controller 5 The frame moves to 24h 7 Use the four way controller 23 to select 24h 24 hour display or 12h 12 hour display 8 Press the four way controller 5 The frame returns to Date Style 9...

Страница 180: ...eld Use the four way controller 23 to change the day After changing the day change the year in the same manner 13 Change the time in the same way as in Steps 8 to 11 If you selected 12h in Step 7 the...

Страница 181: ...the four way controller 23 to select World Time 3 Press the four way controller 5 The World Time screen appears 4 Use the four way controller 23 to select X Destination 5 Press the four way controlle...

Страница 182: ...appears When you press the 3 button in A mode press the four way controller 5 once 2 Use the four way controller 23 to select World Time 3 Press the four way controller 5 The World Time screen appear...

Страница 183: ...which the menus error messages etc are displayed The camera supports the following 20 languages English French German Spanish Portuguese Italian Dutch Japanese Danish Swedish Finnish Polish Czech Hun...

Страница 184: ...xx_mmdd 3 digit folder number_month day xxx_ddmm 3 digit folder number_day month when the date style is set to dd mm yy Standard xxxPENTX where xxx is the 3 digit folder number MENU Cancel English Ned...

Страница 185: ...d with the USB cable 1 Press the 3 button in Q mode W Setting menu appears When you press the 3 button in A mode press the four way controller 5 once 2 Use the four way controller 23 to select USB Con...

Страница 186: ...W Setting menu appears When you press the 3 button in A mode press the four way controller 5 once 2 Use the four way controller 23 to select Video Out 3 Press the four way controller 5 A pull down me...

Страница 187: ...djust the brightness F Dark G Normal H Bright Depending on the country or region images and sound files may fail to be played back if the video output format is set different from the one in use there...

Страница 188: ...mode W Setting menu appears When you press the 3 button in A mode press the four way controller 5 once 2 Use the four way controller 23 to select Power Saving 3 Press the four way controller 5 A pull...

Страница 189: ...Choose from 5min 3min or Off 5 Press the 4 button The setting is saved Power Saving does not function in the following situations while taking pictures in Continuous Shooting mode in the playback mod...

Страница 190: ...er 45 to select O On or P Off O On The Quick Zoom is available P Off The Quick Zoom is not available 4 Press the 3 button The camera returns to A mode or Q mode Auto Power Off does not function in the...

Страница 191: ...e an image for the start up screen Only images suitable for the start up screen are displayed You can also choose one of the 3 Optio logos or the Guide Display Start up Screen already stored in the ca...

Страница 192: ...roller 5 once 2 Use the four way controller 23 to select Reset 3 Press the four way controller 5 The Reset screen appears 4 Use the four way controller 23 to select Reset 5 Press the 4 button The sett...

Страница 193: ...Functions Available for Each Shooting Mode 192 Messages 194 Troubleshooting 197 Default Settings 199 List of World Time Cities 204 Optional Accessories 205 Main Specifications 206 WARRANTY POLICY 210...

Страница 194: ...Yes Yes Yes No Yes K HS Cont Shooting Focus Mode Standard Yes Yes Yes Yes Yes Yes Yes Yes q Macro 3 Pan Focus s Infinity Yes No Yes Yes Yes Yes Yes Yes Manual Focus Yes No Yes Yes Yes Yes Yes Yes Rec...

Страница 195: ...q Macro 3 Pan Focus Yes Yes Yes No Yes Yes Yes Yes s Infinity Yes No Yes No Yes Yes Yes Yes Manual Focus No 3 Yes No 2 No Yes No 4 No 5 No Recorded Pixels p 94 Yes Yes Yes No Yes Yes Yes Yes Quality L...

Страница 196: ...ra p 174 Card locked The SD Memory Card is write protected p 35 Compression error This message occurs when the camera fails to compress an image Change the quality level or recorded pixels of the imag...

Страница 197: ...when no SD Memory Card is inserted The built in memory is not enough to copy images sounds Displayed when there is insufficient built in memory to perform copying Cannot process correctly Displayed w...

Страница 198: ...dix Print Canceled Displayed when printing is canceled No image to be processed Displayed when there are no images to print Wrong DPOF setting Displayed when DPOF printing cannot be performed Message...

Страница 199: ...el in Brightness Level in the W Setting menu p 185 Power Saving function is on When the Power Saving function is on the display automatically darkens after a certain amount of time Press a button to r...

Страница 200: ...amera to recompose The flash does not discharge The flash mode is set to a flash off Set to Auto or b Flash On p 89 The drive mode is set to j or K The focus mode is set to s The shooting mode is set...

Страница 201: ...lt setting with the Reset function p 190 No The setting is saved even after reset N A A Rec Mode Menu Items Item Default Setting Last Memory Setting Reset Setting Page Recorded Pixels N 3648 2736 Yes...

Страница 202: ...P Off Yes Yes p 98 Sensitivity P Off Yes Yes p 101 EV Compensation P Off Yes Yes p 97 AE Metering P Off Yes Yes p 100 Digital Zoom O On Yes Yes p 70 DISPLAY P Off Yes Yes p 18 File No O On Yes Yes Gr...

Страница 203: ...1 2008 Yes No Time According to initial setting Yes No World Time Select time Same as W Hometown Yes Yes p 179 Destination City According to initial setting Yes No Destination DST P Off Yes No Hometow...

Страница 204: ...Depending on the picture taken p 145 Image Sound Copy Built in memory SD Memory Card p 156 Image Rotation Normal p 126 Digital Filter B W No p 147 Movie Edit Save as Still image p 154 Divide Movies Fr...

Страница 205: ...wide angle No p 69 Four way controller 2 Drive Mode 9 Standard Yes p 81 p 82 3 Shooting Mode b Auto Picture Yes Yes p 60 4 Flash Mode Auto Yes p 89 5 Focus Mode Standard Yes p 91 3 button Menu Displa...

Страница 206: ...le PAL New York NTSC Delhi PAL Halifax NTSC Colombo PAL Central and South America Mexico City NTSC Kathmandu PAL Lima NTSC Dacca PAL Santiago NTSC East Asia Yangon NTSC Caracas NTSC Bangkok PAL Buenos...

Страница 207: ...rgeable lithium ion battery D LI78 Battery charger kit K BC78 Battery charger D BC78 AC plug cord AC adapter kit K AC78 AC adapter D AC64 DC coupler D DC78 AC plug cord The battery charger and AC plug...

Страница 208: ...ses h 2048 1536 Fixed at i 1600 1200 for one frame in Digital Panorama mode Fixed at f 2592 1944 when the sensitivity is set to 3200 or 6400 Fixed at f 2592 1944 in HS Cont Shooting mode Movie m 640 4...

Страница 209: ...s 29 pictures 377 pictures f 2592 1944 14 pictures 188 pictures 27 pictures 355 pictures 38 pictures 503 pictures h 2048 1536 22 pictures 293 pictures 44 pictures 570 pictures 63 pictures 816 pictures...

Страница 210: ...6 m 1 0 m Telephoto It is possible to switch to Pan Focus Infinity and Manual Focus Face Recognition AF is available only while the camera recognizes the subject s face Focus Lock By half pressing the...

Страница 211: ...e Actual performance may vary according to operating conditions Playback Time approx 215 min According to the result of in house testing Actual time may differ depending on usage conditions Movie Reco...

Страница 212: ...facturer If there is no representative of the manufacturer in your country send the equipment to the manufacturer with postage prepaid In this case it will take a considerable length of time before th...

Страница 213: ...rs in some countries can supersede this warranty policy Therefore we recommend that you review the warranty card supplied with your product at the time of purchase or contact the PENTAX distributor in...

Страница 214: ...nterference to radio communications However there is no guarantee that interference will not occur in a particular installation If this equipment does cause harmful interference to radio or television...

Страница 215: ...mpliant with the standards Records maintained continue to reflect the equipment being produced can be expected to be within the variation accepted due to quantity production and testing on the statist...

Страница 216: ...In some countries your local retailer may also take back your old product free of charge if you purchase a similar new one Please contact your local authority for further details By disposing of this...

Страница 217: ...Memo...

Страница 218: ...duction 71 P Digital SR Camera Shake Reduction 130 R Kids 74 Y Pet 75 K Food 62 S Fireworks 71 g Frame Composite 79 O Voice Recording 168 V Natural Skin Tone 73 U Candlelight 71 c Text 78 W Blog 63 X...

Страница 219: ...71 Digital SR Camera Shake Reduction 130 Digital Wide Mode 84 Digital Zoom 69 70 Display brightness 185 Display Language 181 Dividing movies 155 DPOF printing 165 DPOF settings 158 Drive mode 81 82 E...

Страница 220: ...49 Opening screen 189 Operating the Menus 51 Optional accessory 205 P PAL 184 Pan Focus 3 91 Panoramic Pictures 86 PC 184 Pet Mode 75 Photo processing lab 158 PictBridge 161 184 Playback 118 119 170 1...

Страница 221: ...hooting Mode 60 Shutter release button 46 48 59 Slideshow 124 Smile Capture 63 Soft Flash b 89 Sound settings 175 Sound types 176 Specifications 206 Sport Mode 76 Spot AE metering N 100 Standard 91 St...

Страница 222: ...Memo...

Страница 223: ...Memo...

Страница 224: ...fr Hotline 0826 103 163 0 15 la minute Fax 01 30 25 75 76 Email http www pentax fr _fr photo contact php photo contact PENTAX Italia S r l Via Dione Cassio 15 20138 Milano ITALY http www pentaxitalia...

Отзывы: