Unusually tight construction is defined as
Construction with:
a. Walls and ceilings exposed to the outdoors have a continuous, sealed vapor barrier. Openings are gasketed or sealed and
b. Doors and openable windows are weatherstripped and
c. Other openings are caulked or sealed. These include joints around window and door frames, between sole plates and floors, between
wall-ceiling joints, between wall panels, at penetrations for plumbing, electrical and gas lines, etc.
NOTE:
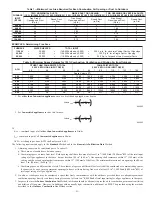
In determining the free area of an opening, the blocking effect of the louvers, grilles, and screens must be considered. If the free area of
a louver or grille design is unknown, it may be assumed that wood louvers have a 20 percent free area, and metal louvers or grilles have a 60 percent
free area. Screens, when used, must not be smaller than 1/4-in. mesh. Louvers and grilles must be constructed so they cannot be closed.
When combustion air ducts are used, they must be of the same cross sectional area as the free area of the openings to which they connect. The
minimum dimension of ducts must not be less than 3 in. (80mm).
INSTALLATION
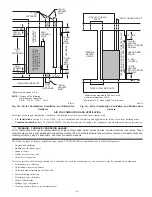
PROCEDURE 1—LEVELING LEGS (IF DESIRED)
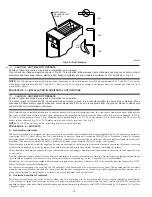
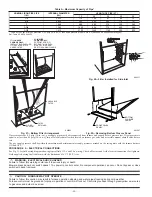
When furnace is used in upflow position with side inlet(s), leveling legs may be desired. (See Fig. 20.) Install field-supplied, corrosion-resistant
5/16-in. machine bolts and nuts.
NOTE:
The maximum length of bolt should not exceed 1-1/2 in.
1. Position furnace on its back. Locate and drill a 5/16-in. diameter hole in each bottom corner of furnace. (See Fig. 20.) Holes in bottom
closure panel may be used as guide locations.
2. For each hole, install nut on bolt and then install bolt and nut in hole. (Install flat washer if desired.)
3. Install another nut on other side of furnace base. (Install flat washer if desired.)
4. Adjust outside nut to provide desired height, and tighten inside nut to secure arrangement.
NOTE:
Bottom closure must be used when leveling legs are used. See Bottom Closure Panel section.
PROCEDURE 2—INSTALLATION IN UPFLOW OR DOWNFLOW APPLICATIONS
NOTE:
For downflow applications, this furnace is approved for use on combustible flooring when manufacturer’s accessory floor base Part No.
KGASB0201ALL is used. Manufacturer’s accessory floor base in not required when this furnace is installed on manufacturer’s Coil Assembly Part
No. CD5, CK5, or Coil Box Part No. KCAKC is used.
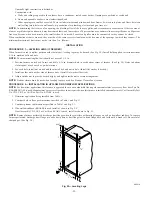
1. Determine application being installed from Table 3.
2. Construct hole in floor per dimensions specified in Table 3 and Fig. 21.
3. Construct plenum to dimensions specified in Table 3 and Fig. 21.
4. If downflow subbase (KGASB) is used, install as shown in Fig. 22.
If coil assembly CD5, CK5 or Coil Box KCAKC is used, install as shown in Fig. 23.
NOTE:
Remove furnace perforated, discharge duct flanges when they interfere with mating flanges on coil on downflow subbase. To remove
furnace perforated, discharge duct flange, use wide duct pliers or duct flange tool to bend flange back and forth until it breaks off. Be careful of
sharp edges. (See Fig. 24.)
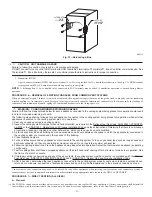
Fig. 20—Leveling Legs
A89014
1
3
⁄
4
″
1
3
⁄
4
″
1
3
⁄
4
″
1
3
⁄
4
″
5
⁄
16
″
5
⁄
16
″
5
⁄
16
″
5
⁄
16
″
—22—
Содержание PG9MAA
Страница 70: ... 70 ...
Страница 71: ... 71 ...
Страница 72: ... 2005 Payne Heating Cooling 7310 W Morris St Indianapolis IN 46231 72 impg9m10 Catalog No 53PG 9M29 ...

