


17
SmartNode 1000 and 2000 Series Getting Started Guide
About this guide
Typographical conventions used in this document
This section describes the typographical conventions and terms used in this guide.
General conventions
The procedures described in this manual use the following text conventions:
Mouse conventions
The following conventions are used when describing mouse actions:
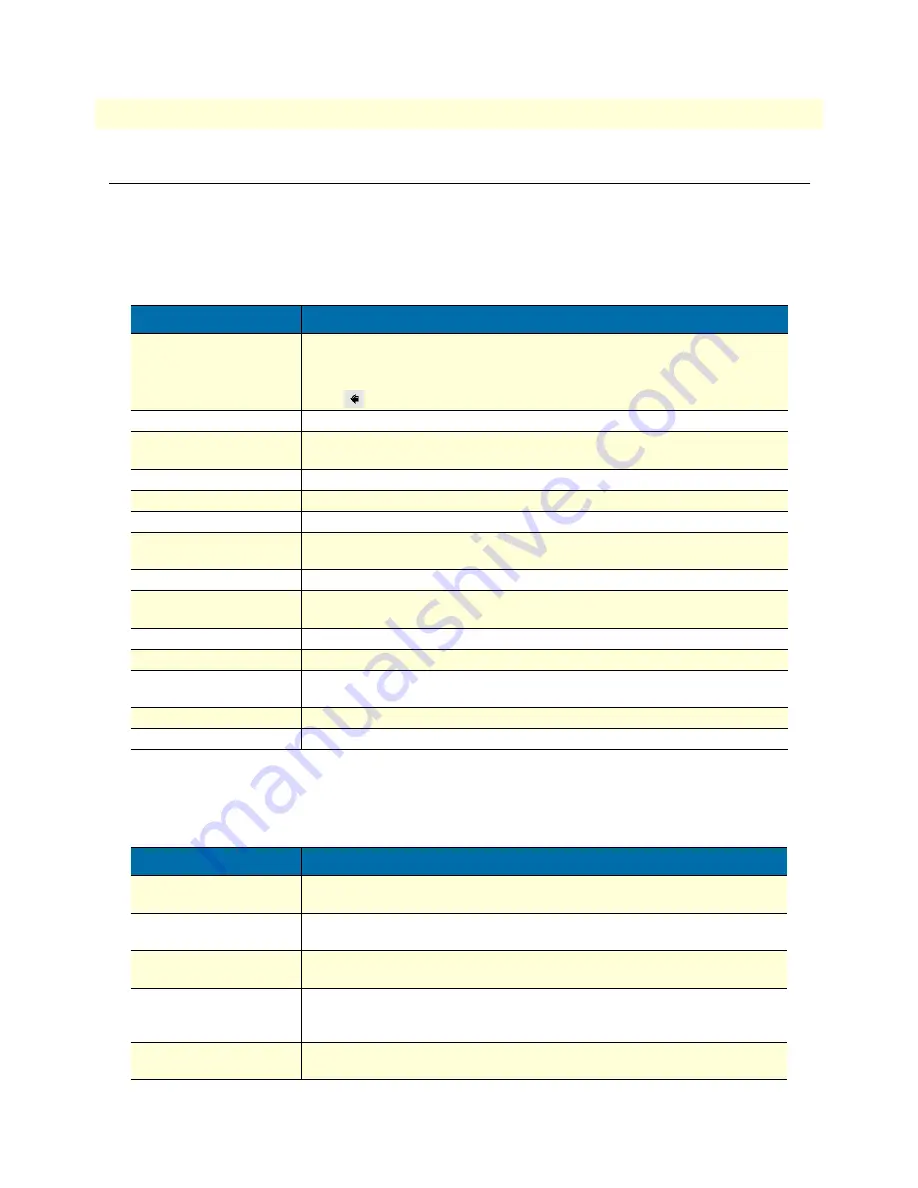
Table 1. General conventions
Convention
Meaning
Garamond blue type
Indicates a cross-reference hyperlink that points to a figure, graphic, table, or sec-
tion heading. Clicking on the hyperlink jumps you to the reference. When you
have finished reviewing the reference, click on the
Go to Previous View
button
in the Adobe® Acrobat® Reader toolbar to return to your starting point.
Futura bold type
Commands and keywords are in
boldface
font.
Futura bold-italic type
Parts of commands, which are related to elements already named by the user, are
in
boldface italic
font.
Italicized Futura type
Variables for which you supply values are in
italic font
Futura type
Indicates the names of fields or windows.
Garamond bold type
Indicates the names of command buttons that execute an action.
< >
Angle brackets indicate function and keyboard keys, such as <SHIFT>, <CTRL>,
<C>, and so on.
[ ]
Elements in square brackets are optional.
{a | b | c}
Alternative but required keywords are grouped in braces ({ }) and are separated
by vertical bars ( | )
blue screen
Information you enter is in
blue screen
font.
screen
Terminal sessions and information the system displays are in
screen font
.
node
The leading IP address or nodename of a SmartNode is substituted with
node
in
boldface italic
font.
SN
The leading
SN
on a command line represents the nodename of the SmartNode
#
An hash sign at the beginning of a line indicates a comment line.
Table 2. Mouse conventions
Convention
Meaning
Left mouse button
This button refers to the primary or leftmost mouse button (unless you have
changed the default configuration).
Right mouse button
This button refers the secondary or rightmost mouse button (unless you have
changed the default configuration).
Point
This word means to move the mouse in such a way that the tip of the pointing arrow
(referred to as the
cursor) on the screen ends up resting at the desired location.
Click
Means to press and release the left or right mouse button one time quickly (as
instructed in the procedure). Make sure you do not move the cursor while clicking
a mouse button.
Double-click
Means to press and release the same mouse button two times quickly. Make sure
you do not move the cursor while clicking a mouse button.
Содержание 1000
Страница 12: ...Compliance Information SmartNode 1000 and 2000 Series Getting Started Guide 12 Compliance...
Страница 52: ...2 Product Overview SmartNode 1000 and 2000 Series Getting Started Guide 52...
Страница 62: ...3 Planning the installation SmartNode 1000 and 2000 Series Getting Started Guide 62...
Страница 68: ...3 Planning the installation SmartNode 1000 and 2000 Series Getting Started Guide 68 Where to go next...
Страница 70: ...4 SmartNode 1200 installation SmartNode 1000 and 2000 Series Getting Started Guide 70...
Страница 80: ...4 SmartNode 1200 installation SmartNode 1000 and 2000 Series Getting Started Guide 80 Connecting cables...
Страница 82: ...5 SmartNode 1400 installation SmartNode 1000 and 2000 Series Getting Started Guide 82...
Страница 92: ...6 SmartNode 2300 installation SmartNode 1000 and 2000 Series Getting Started Guide 92...
Страница 110: ...7 SmartNode 2400 installation SmartNode 1000 and 2000 Series Getting Started Guide 110...
Страница 124: ...7 SmartNode 2400 installation SmartNode 1000 and 2000 Series Getting Started Guide 124 Connecting cables...
Страница 126: ...8 Line power module installation SmartNode 1000 and 2000 Series Getting Started Guide 126...
Страница 134: ...9 Interface card installation SmartNode 1000 and 2000 Series Getting Started Guide 134...
Страница 138: ...9 Interface card installation SmartNode 1000 and 2000 Series Getting Started Guide 138 Installing interface cards...
Страница 140: ...10 Getting Started with the SmartNode Device SmartNode 1000 and 2000 Series Getting Started Guide 140...
Страница 151: ...151 Chapter 11 Monitoring Status Chapter contents Status LEDs 153...
Страница 152: ...11 Monitoring Status SmartNode 1000 and 2000 Series Getting Started Guide 152...
Страница 154: ...11 Monitoring Status SmartNode 1000 and 2000 Series Getting Started Guide 154 Status LEDs...
Страница 156: ...12 Contacting Patton for assistance SmartNode 1000 and 2000 Series Getting Started Guide 156...
Страница 160: ...A Specifications SmartNode 1000 and 2000 Series Getting Started Guide 160...
Страница 166: ...B Cabling SmartNode 1000 and 2000 Series Getting Started Guide 166...
Страница 172: ...B Cabling SmartNode 1000 and 2000 Series Getting Started Guide 172 BRI Figure 102 Connecting a BRI to an NT...
Страница 175: ...T1 PRI 175 SmartNode 1000 and 2000 Series Getting Started Guide B Cabling...
Страница 176: ...B Cabling SmartNode 1000 and 2000 Series Getting Started Guide 176 T1 PRI...
Страница 178: ...C Port pin outs SmartNode 1000 and 2000 Series Getting Started Guide 178...


