


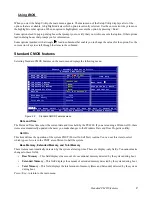
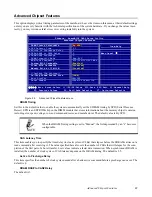


Integrated Peripherals
17
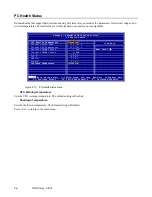
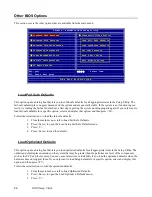
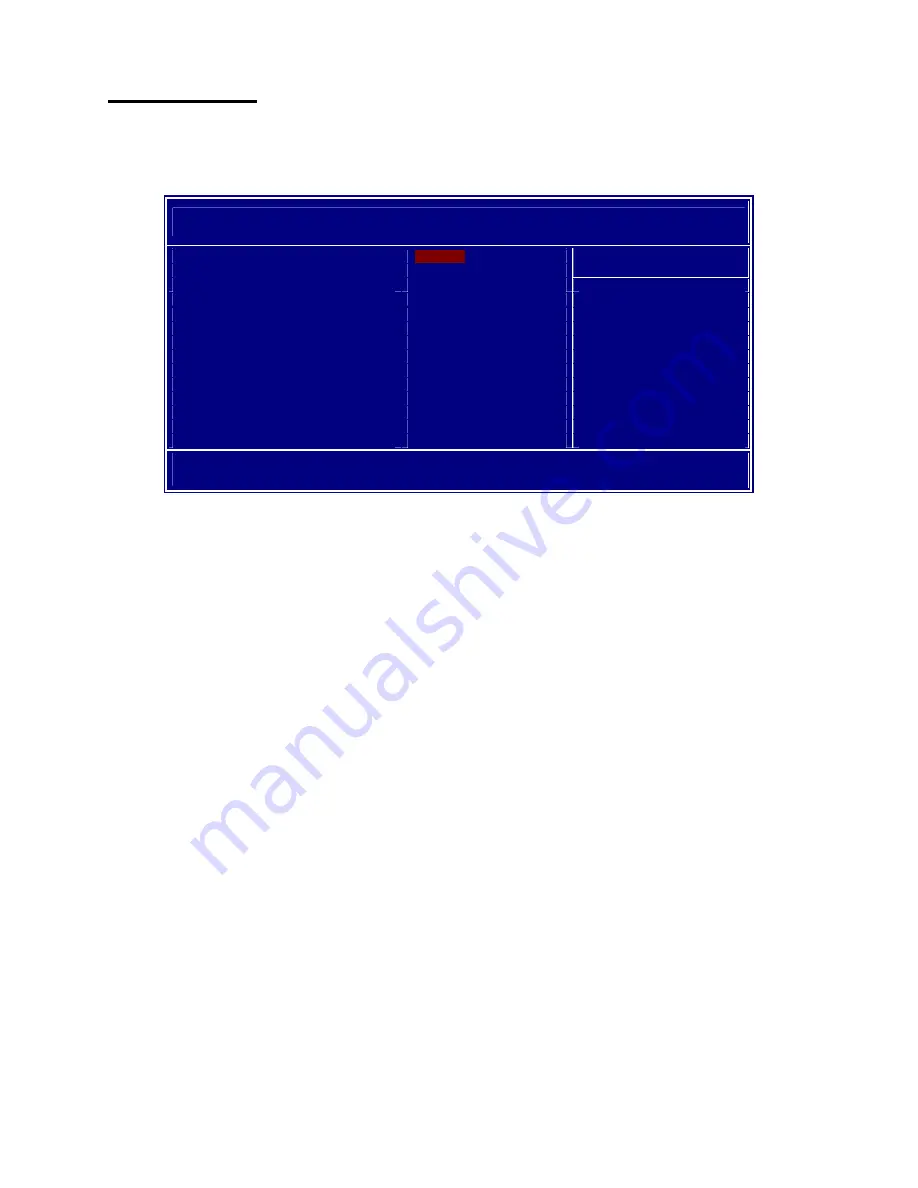
Onboard Device
Use this item to enable or disable the PCI devices that are integrated on the mainboard. Select the item and press
<Enter> to open the following menu:
Figure 2.9
Onboard Device menu
USB Controller
This item must be enabled to use the Universal Serial Bus ports on the mainboard. The default setting is Enabled.
USB 2.0 Controller
The USB 2.0 Controller item allows USB 2.0 functionality. The default setting is Enabled.
USB Keyboard Support
Enable this item if you plan to use a keyboard connected through the USB port in a legacy operating system (such as
DOS) that does not support Plug and Play. The default setting is Disabled.
AC97 AUDIO
Enables and disables the onboard audio chip. Disable this item if you are going to install a PCI audio add-in card. The
default setting is Auto.
AC97 Modem
Enables and disables the onboard modem chip. Disable this item if you are going to install a PCI audio add-in card.
The default setting is Auto.
Init Display First
Use this item to specify whether the graphics adapter is installed in one of the PCI slots or is integrated on the main-
board. The default setting is Onboard/AGP.
Press <Esc> to return to the Integrated Peripherals menu.
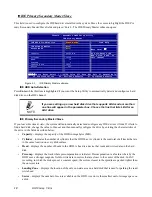
P
hoenix – AwardBIOS CMOS Setup Utility
Onboard Device
USB Controller
[Enabled]
USB 2.0 Controller
[Enabled]
Item Help
USB Keyboard Support
[Disabled]
AC97 Audio
[Auto]
Menu Level
``
AC97 Modem
[Auto]
Init Display First
[Onboard/AGP]
ÇÈÅÆ
:Move Enter:Select +/-/PU/PD:Value F10:Save ESC:Exit F1:General Help
F5: Previous Values F6: Fail-Safe Defaults F7: Optimized Defaults
Содержание PT-6900
Страница 1: ...PT 6900 Service Manual...
Страница 2: ......
Страница 7: ...v List of Parts FRUs 92 Display Parts and Cables 94...
Страница 8: ...vi...
Страница 10: ...viii...
Страница 16: ...6 Getting Started...
Страница 38: ...28 BIOS Setup Utility...
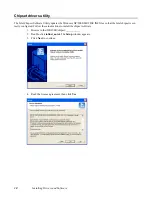
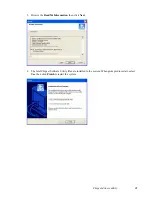
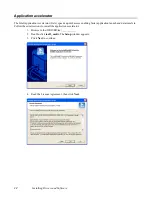
Страница 52: ...42 Installing Drivers and Software 5 When installation is completed click Finish...
Страница 66: ...56 Locating the Problem...
Страница 83: ...Replacing Parts 73 6 Remove the touch panel 7 Remove the waterproof seal...
Страница 88: ...78 Replacing Field Replaceable Units FRUs...
Страница 96: ...86 Appendix Optional Components Exploded Diagram and Parts List...
Страница 106: ...96 Appendix Optional Components Exploded Diagram and Parts List...