background image

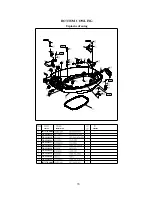
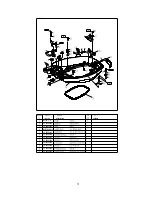
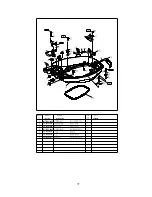
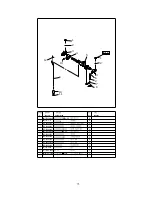
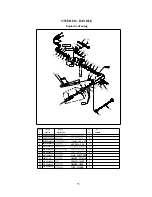
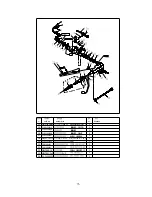
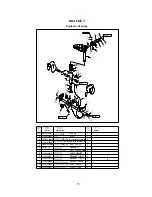
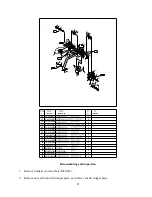
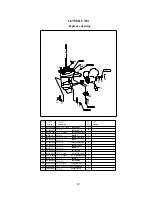
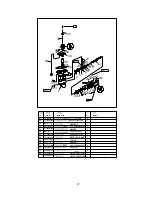
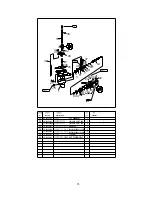
BRACKET


Explosive drawing


REMARKS

PART NO.

DESCRIPTION

1
2
3
4
5

6
7
8
9

10

DOUBLE HOLE SHOCK ABSORBER ASSY

BRACKET ,HELM

PLATE ,LOCK

BUSH ,ABOVE

WASHER ,ABOVE

BRACKET ,HELM

LARGE WASHER

SEAL ,WATER TUBE

WASHER 6

BOLT M6×25

BOLT ,DOUBLE HEAD M8×50

PLATE

NUT M8

S

L

F15-01020001S

1

操舵托架

1

1

1

上衬套锁紧块

旋转支架上衬套

旋转支架上垫圈

F15-01000002

F15-01000001

F15-01000003

3

1

3

2

2

2

1

1

1

水管密封圈上

操舵托架

特大垫圈

平垫圈6

六角螺栓M6×25

双孔减震器组件

双头螺栓M8×50

垫板

六角螺母M8

GB/T5783-M6x25

GB/T6170-M8

F15-01020001

F15-00000016

F15-02010003

GB/T97.1-6

F15-02010000

GB/T900-M8x50

F15-00000004

12

11

12 Nm

12 Nm

3 Nm

2.5 Nm

32 Nm


79

Содержание F15/F9.9BM

Страница 1: ...PARSUN OUTBOARD ENGINE SERVICE MANUAL F15 F9 9BM F15 F9 9W SUZHOU PARSUN POWER MACHINE CO LTD...

Страница 2: ...ompany will distribute the manual revision to dealers In this Service Manual particularly important information is distinguished in the following ways please ready the manual carefully and perform the...

Страница 3: ...ATIONS 9 MAINTENANCE INFORMATION 10 Power unit 10 Lower unit 11 Ignition system 11 Charge system 12 TIGHTENINGTORQUE 12 Specified torque 12 General torque 13 PERIODIC SERVICE 14 MAINTENANCE TIME TABLE...

Страница 4: ...SPARK PLUG IGNITION 35 SPARK PLUG CAP 36 FLYWHEELMAINTENANCE 36 CDI INSPECTION 36 IGNITION COILINSPECTION 36 PULSED COILINSPECTION 37 CHARGE COILINSPECTION 37 FUELSYSTEM 38 NOTICE 38 EXPLOSIVE DRAWING...

Страница 5: ...cover 61 CRANKCASE 61 Disassembling 61 Piston 62 Cylinder bore 62 Piston pin diameter 63 Piston ring 63 Crankshaft 63 Crankpin oil clearance 63 Main journal oil clearance 64 Cylinder body and crankcas...

Страница 6: ...bling and inspection 88 LOWER UNIT 89 Explosive Drawing 89 Disassembling and inspection 94 Propeller shaft and clutch block 94 Dog clutch installation 95 Lower casing cover 95 Lower casing cover oil s...

Страница 7: ...itable Conversely a large pitch propeller is more suitable for a smaller operating load as it enables the correct engine speed to be maintained When the engine is running at full throttle position the...

Страница 8: ...t of the cable in the notch of flywheel rotor and wind the cable around flywheel several rounds in clockwise direction 5 Pull the manual starter handle slowly until you feel resistance 6 Give a strong...

Страница 9: ...hing which has become contaminated with lubricants should be changed as soon as practicable and washed before further use 3 Avoid skin contact with lubricants 4 Hands and any other part of the body wh...

Страница 10: ...ipe is connected firmly and if the fuel tank is filled with fuel CAUTION Do not use pre mixed fuel for this 4 stoke outboard engine 2 CHECKING OIL LEVEL 1 Check the engine oil level Remove oil cap che...

Страница 11: ...le 7 BREAKING IN RUNNING 1 Initial 1 hour operate the engine at 2000 r min or about a half throttle The second hour operate the engine at 3000 r min or about 3 4 throttle The following 8 hours operate...

Страница 12: ...eople and outboard engines SPECIAL TOOLS Piston slider Flywheel gripper and puller Bearing puller Valve spring compressor Housing oil seal installer Lower casing cover bearing installer Lower casing c...

Страница 13: ...DETECTION DEVICE Digital tachometer Digital circuit tester Peak voltage adaptor 7...

Страница 14: ...NG IMPELLER PIN DOWEL SEAL BOLT HEXAGON 4 2 1 1 2 1 1 1 1 GB T5783 2000 JASO F404 96 M8x45 mm 18 Nm L 1277 G F15 02000004 1 Parts explosive drawing Screw specification and specified torque Oil fluid s...

Страница 15: ...min Recommended engine oil API SE SF SG SH SJ SAE 10W30 10W40 3 5L h 5500 r min 7 3Kw Max fuel consumption 5 3L h 5500 r min 11Kw Engine oil quantity 1 2L Performance Idle speed Neutral 950 50 r min...

Страница 16: ...e 0 035 0 065mm Intake 5 475 5 490mm Piston Pin boss inside diameter 14 004 14 015mm Stem outside diameter Exhaust 5 460 5 475mm Piston pin outside diameter 13 996 14 000mm Intake Thickness 1 17 1 19m...

Страница 17: ...learance 0 030 0 090mm Lower unit Item Description Item Description Drive gear to forwarder gear 0 19 0 86mm Forwarder gear shim 0 10 0 12 0 15 0 18 0 30 0 40 0 50mm Drive gear to back gear 0 95 1 65m...

Страница 18: ...ntake manifold Bolt M6 4 8 Nm Cylinder head cover Bolt M6 4 8 Nm 1st tightening 15 Nm 2nd tightening Bolt M8 4 30 Nm 1st tightening 6 Nm Cylinder head 2nd tightening Bolt M6 3 12 Nm Oil filter 1 18 Nm...

Страница 19: ...olt Bolt M8 1 9 Nm Oil filler hole Bolt M8 2 9 Nm Pinion Nut M8 1 25 Nm Lower unit Propeller nut Nut M10 1 17 Nm Steering handle mounting Bolt M8 1 18 Nm Shift lever bracket Bolt M6 1 4 5 Nm Clamp bra...

Страница 20: ...ction adjustment Start in gear projection Inspection adjustment Engine oil Replacement Oil filter Replacement Valve clearance OHC Inspection adjustment Ignition timing Inspection Thermostat Inspection...

Страница 21: ...cessary 2 CHECK FUEL COCK AND FUEL JOINT Check if fuel cock and fuel joint are cracked damaged or leaking Replace if necessary 3 CHECK FUEL FILTER Check if fuel filter is cracked damaged or has dirt i...

Страница 22: ...L After changing oil filter Oil type API SE SF SE SF SG CD SAE 10W30 10W40 4 Install oil level plug 5 Check engine oil level Valve clearance 1 Remove stopper hang rope from engine stop switch assy Re...

Страница 23: ...if the electrodes are corroded or have deposit or if the washer is damaged If necessary change the spark plug Spark plug type DPR7HS 4 Inspect if the spark plug gap is within specification If necessa...

Страница 24: ...the cable joint 1 cotter pin 2 cable joint 3 lock nut 2 1 3 4 Adjust the joint position to make the joint hole align with the pin on the throttle accelerograph enforce CAUTION The cable joint must be...

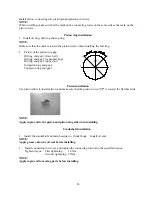
Страница 25: ...ing speed if necessary you can adjust the throttle cable again Start in gear protection Set the shift lever in neutral and check if the tightwire end of the arrester aligns with the marking of the sta...

Страница 26: ...ecessary If the gear oil contains metal chippings check the gear and bearing CAUTION Must change drain plug washer each time Lower unit leakage check Connecting the leakage tester to the oil level plu...

Страница 27: ...water passage inlet 1 2 Place the outboard engine in the water and ensure the water level is above the anti vortex plate then start the engine 3 Check if water overflows at the cooling water checking...

Страница 28: ...tures If out of order change it Water temperature Valve open height Under 62 0 1mm Over 70 Over 3mm 5 Fit on the thermostat and thermostat cover then tighten the screws to specification RECOIL STARTER...

Страница 29: ...26 25 17 18 16 19 20 21 22 23 24 28 27 30 M6x20 mm 8Nm G G WASHER SPRING COVER HANDLE STARTER NUT M6 BOLT M6x90 BOLT M6x25 COLLAR FRAME STARTER CASE STARTER STARTER ASSY 1 F4 04130102 F4 04130101 1 1...

Страница 30: ...F15 07130107 F15 07130202 F15 07130204 M6x20 8 1 1 1 1 1 1 1 1 1 3 ARRESTER TIGHTWIRE ASSY BOLT M6x20 GROMMET SEAL FROTHY RUBBER LINK PAWL WHEEL START UP CIRCLIP 8 SPRING VOLUTE PAWL DRIVE FRAME ARRE...

Страница 31: ...205 4x1 78 1 M6x16 ARRESTER BUSH SHOULDER SPRING ARRESTER WASHER PLATE TIGHTWIRE SPRING BOLT M6x16 START LING SPRING TENSION SPRING DRIVE PLATE PLATE DRIDE PART NO DESCRIPTION REMARKS 30 29 28 27 26 2...

Страница 32: ...14W F15 07130309W 5 F15 07130311W 5 F15 07130312W 1 6 12 GB T91 1 6x12 F15 07130310W GB T845 85 B F15 07130307W F15 07130308W F15 05010001 B F15 07130306W WASHER SPRING SADDLE LINK ROD ASS Y TIE IN RO...

Страница 33: ...e notch of the start up wheel Turn the start up clockwise until the volute spring is free 2 Pull the starter rope out completely 3 Remove the starter handle cover from the starter handle and remove th...

Страница 34: ...ive plate and drive plate spring 3 Remove the start up wheel WARNING Uninstall the start up wheel carefully to ensure that the volute spring does not pop out to hurt people 4 Remove the volute spring...

Страница 35: ...the arrester tightwire end with the marking of the starter case 1 marking 2 Arrester tightwire 3 Adjusting nut 1 2 3 IGNITION SYSTEM NOTICE When checking and repairing the ignition system keep your ha...

Страница 36: ...EXPLOSIVE DRAWING REMARKS PART NO DESCRIPTION 30...

Страница 37: ...REMARKS DESCRIPTION PART NO 110 Nm O M6x20 mm 8Nm O 18 Nm 31...

Страница 38: ...PART NO DESCRIPTION REMARKS 18 Nm O M6x20 mm 8Nm O 110 Nm 32...

Страница 39: ...Electric start type PART NO DESCRIPTION REMARKS 30 Nm 33...

Страница 40: ...PART NO DESCRIPTION REMARKS 34...

Страница 41: ...ight Wire beam color W White O Orange Y R Yellow Red B Black L Blue R W Red White R Red G Green Y Yellow Br Brown SPARK PLUG IGNITION 1 Remove spark plug cap from spark plug 2 Connect the ignition tes...

Страница 42: ...e If below the specification check the lead wire and measure the impulse and peak voltage output of the charge coil Digital circuit tester Peak voltage adaptor Start load 155V 1500r min 170 V CDI peak...

Страница 43: ...e Replace if out of specification replace Resistance 234 348 Tester pole red white wire Tester pole black wire CHARGE COIL INSPECTION 1 Charge coil peak voltage Use the digital circuit tester and peak...

Страница 44: ...3 4 5 6 14 8 9 2 2 2 11 13 14 12 15 16 17 2 7 2 10 19 20 21 22 23 29 2021 18 24 25 28 26 27 30 1 2 3 4 5 6 7 8 9 10 11 12 F4 05000200 F4 04000030 F15 07080000 F15 05000016 GB T5783 M6x20 GB T6170 M8 F...

Страница 45: ...1 32 5x1 8 F15 07080002 GB T818 M4x30 F4 04090004 F4 04090005 GB T309 3x12 F15 07140002 F15 07140100 6 6 32 5x1 8 M4x30 3x12 2 3 1 1 1 4 1 2 M3x5 F4 04090011 2 1 1 1 WASHER SPRING 6 WASHER PLATE 6 EL...

Страница 46: ...21 22 23 29 2021 18 24 25 28 26 27 30 25 26 27 28 29 30 F15 07140003 F15 07140004 F15 07140005 GB T6170 20000 F4 04090003 F15 07140001 1 1 1 4 1 1 SPRING DIAP HRAGEM SPRING PLUNGER PLUNGER SEAT FUEL P...

Страница 47: ...ER INSULATOR CARBURETOR GASKET CARBURETOR PIN DOWEL 6x12 GASKET MANIFOLD MANIFOLD INTAKE GB T5782 M6x100 6 20 12 19 18 17 15 16 6 7 8 1 2 2 1 1 1 1 1 2 1 1 6x12 M6x100 0 35 5x1 8 6 GB T97 1 6 GB3452 1...

Страница 48: ...010017 F15 07000022 A B 2 1 1 1 1 8 7 6 16 15 17 18 F15 07090000 1 19 1220 1 19 20 GB T5783 M6x40 F15 07000009 M6 40 4 BUSHER INTAKE SILENCER PLATE INTAKE SILENCER PIPE BREATHER CLAMP B CLAMP A CARBUR...

Страница 49: ...7 6 5 4 3 2 1 1 CARBURETOR F15 07090000W 9 2 WASHER 6 6 GB T97 1 6 8 2 M6X12 GB T5783 M6x12 7 1 IRON CORE ASSY HOOK IRON CORE LINK RAD IRON CORE IRON CORE F15 11030300W 6 SEAL SHAFT 1 1 1 1 1 F4 0200...

Страница 50: ...the fuel joint exit with a vacuum pressure gauge 5 Check whether the negative pressure can be maintained for over 10 minutes under the prescribed pressure Replace if necessary Prescribed pressure 50k...

Страница 51: ...seat and align the notch with the notch on the plunger Take the roller needle out 11 Inspect the diaphragm for crack and valve for damage Replace if necessary 12 Reverse above step 8 to step 10 to in...

Страница 52: ...OIL PUMP ASSY MAT QIRPROOF CAMSHAFT ASSY OIL SEAL 18X35X7 R WASHER BELT PULLEY DRIVEN BIG WASHER 6 BOLT M6x16 RING RUBBER A COVER DUST BELT TIMING NUT WASHER BELT PULLEY TIMING RUBBER RING B KEY WOOD...

Страница 53: ...7000012 GB T96 6 GB T97 1 6 GB T5782 M6x55 F15 07000016 F15 07000015 5 1 1 1 1 1 1 1 1 1 10 6 9 8 7 5 4 3 2 1 11 13 12 16 17 14 15 M6x10 mm 8 Nm M6x55 mm 8 Nm M6x10 mm 8 Nm G O 16 17 F15 00000012 1 GB...

Страница 54: ...E BUSH GASKET CYLINDER HEAD HOLLW PIN CYLINDER HEAD ASSY GB T5783 M6x20 DPR7HS 4 7 1 1 6 3 4 4 1 2 1 1 1 6 M6X20 M8X75 M6X25 10x 8 4x14 0 F15 07000028 F15 07050004 GB T97 1 6 F15 07000001 F15 07000100...

Страница 55: ...UST A BUSHER VALVE EXHAUST B SPRING ROCKER A SHAFT ROCKER VALVE INTAKE 1 1 2 1 1 3 4 4 4 8 4 4 4 4 2 2 B A B A F15 07040001 F15 07040006 F15 07040007 F15 07040005 F15 07040304 F15 07040303 F15 0704030...

Страница 56: ...KCASE ASSY 8 4 1 GB T97 1 8 33 32 31 30 29 28 15 26 25 24 23 22 20 15 21 15 20 19 18 17 16 15 14 13 M5X12 5 1 1 1 1 1 2 4 6 2 1 4 11 3 M8X55 M6X35 10x14 GB T97 1 5 GB T5783 M5x12 F15 07010009 F15 0701...

Страница 57: ...ERMOSTAT BREATHER GASKET WASHER 6 BOLT M6X20 COVER BREATHER M4X12 1 4 17 1 1 7 2 1 1 1 1 1 4x12 M6X30 6 M6X20 13 14 15 16 17 18 19 20 21 22 23 24 REMARKS PART NO DESCRIPTION M8x55mm 1st 15 Nm 2nd 30 N...

Страница 58: ...000012 F15 05000013 F15 05000014 F15 07010003 F15 07010023 F15 00000014 F15 05000011 1 34 F15 07010007 10x 5x70 HOSE RETURN OIL A 10x 5x67 B 10x 5x172 C 10x 5x300 O 34 8 7 6 1512 14 10 9 26 26 33 32 3...

Страница 59: ...RANK ASSY 3 3 1 1 1 4 1 2 2 1 1 2 1 1 1 F15 07020004 F15 07020003 F15 07030006 F15 07020100 F15 07010024 F15 07030007 F15 07020002 F15 07020005 F15 07020006 F15 07030000 F15 07020103 F15 07020001 F15...

Страница 60: ...he spark plug notch to prevent dust and other foreign matter from entering cylinder 4 Open the choke completely and rotate the crankshaft with starter When the pressure gauge readings become stable ch...

Страница 61: ...uge equipped with 1 8in pitch thread adapter 3 Check the oil pressure Oil pressure reference data 110kPa idling speed OIL PRESSURE SWITCH INSPECTION 1 Remove the oil pressure switch and attach the vac...

Страница 62: ...valve system will be damaged 2 Remove timing belt pulley nut with the special timing belt pulley nut barrel NOTE Please don t turn camshaft while unscrewing the timing belt pulley 3 Remove timing belt...

Страница 63: ...e slack of timing belt pulley Check whether alignment marks are aligned well 12 Tighten bolt and nut Locking torque Driven belt pulley bolt 13 4 Nm Timing belt pulley nut 54 Nm NOTE Remove driven belt...

Страница 64: ...ve guide bush The inside diameter of the valve guide bush 5 500 5 512mm CAUTION When replacing the valve use a new valve guide bush and valve oil seal Valve spring 1 Measure the free length of valve s...

Страница 65: ...ce if out of specification Valve guide bush replacement 1 Knock out the valve guide bush from the direction of combustion room 2 Knock in the new valve guide bush from the direction of the top of cyli...

Страница 66: ...red on the valve face but it s too wide to reduce the valve seat width use 30 o cutter to adjust the top edge of the seat and use 60o cutter to adjust the bottom edge of the seat 3 If the valve seat i...

Страница 67: ...the valve cotter Assembling cylinder cover 1 Install new oil seal with special tool 2 Install camshaft into cylinder cover from the direction of oil pump 3 Check whether spline position is facing the...

Страница 68: ...od cover remove the crank and remove connecting rod and piston assy 7 Remove piston pin circlip with pliers and remove piston pin and piston 8 Remove oil seal pin and main bearing Piston Measure pisto...

Страница 69: ...ng 0 2 0 7mm 3 Install piston ring to piston and measure side clearance between piston ring and its slot by space gauge If out of specification replace the piston ring Side clearance Top ring 0 04 0 0...

Страница 70: ...crankshaft NOTE Don t put plastic space gauge on the oil hole of main journal 4 Install main bearing onto crankcase and install crankcase onto cylinder body 5 Following the numbering sequence on the...

Страница 71: ...gap 3 upper rail 2nd piston ring end gap 4 Top piston ring end gap 5 Piston installation Use piston slider to install piston and make sure that the piston crown UP is toward the flywheel side NOTE App...

Страница 72: ...f oil cleaner and tighten it to the specified torque Tighten torque 40 Nm 4 Install breather 5 Install exhaust outer cover thermostat and thermostat cover Tighten bolts twice according to priority as...

Страница 73: ...et and accelerograph enforce 13 For electric start models install gear shift limitative rod firstly 14 Install oil pressure switch ignition coil C D I unit assy and rectifier and regulator assy 15 Ins...

Страница 74: ...OWLING Explosive drawing 5Nm REMARKS PART NO DESCRIPTION F15 08000000 F15 00000001 F15 08000004 GB T845 ST5 5x19 F4 06000004 F15 08000003 F15 08000002 F15 08000005 GB T6170 M5 GB T97 1 5 F4 06000006 G...

Страница 75: ...muffle cover 4 Remove locking hook and pothook 5 Inspect top cowling for crack or damage Replace if necessary 6 Inspect rubber seal for crack or damage Replace if necessary 7 Inspect top cowling muffl...

Страница 76: ...DESCRIPTION PART NO REMARKS F15 05000019 F15 05000018 F15 05010002 F15 05000017 F15 05000007 F15 05000006 F15 01000015 F15 05000015 F15 05000008 F15 05000003 GB T5783 M6x25 GB T5783 M6x30 10 Nm 10 Nm...

Страница 77: ...Nm 10 Nm 8 Nm 10 Nm 10 Nm GB T5783 M6x12 F15 05000004 F15 05000005 GB T91 7 6 F15 05020000 F15 05000022 F15 05000024 F15 05000025 F15 05000026 F15 05000023 F15 05000036 F15 05030000 REMARKS PART NO D...

Страница 78: ...8 Nm 10 Nm 10 Nm 10 Nm 8 Nm 10 Nm 10 Nm REMARKS PART NO DESCRIPTION F15 05000033 F15 05000009 F15 05000021 F15 05000001 F15 05000002 GB T7583 M6x20 GB T5783 Mx35 72...

Страница 79: ...4 2 5 GB T97 1 6 GB T5783 M6x25 F15 05040002 F15 05040001 GB T5783 M6x20 F15 05040100 6 M6 25 M6 20 REMARKS PART NO DESCRIPTION GB T5783 2000 F15 05000035 F15 05000031 1 1 1 1 1 1 GB T879 2 3x20 3x20...

Страница 80: ...ixing bolt of shift rod bracket 7 Remove cotter pin of shift rod 8 Remove shift rod spring pin and stopping rocker 9 Remove spring and stopper spring 10 Inspect bottom cowling for crack or damage Repl...

Страница 81: ...0x1 25 F15 01000013 F15 01000011 F15 00000007 F15 00000011 GB T97 1 6 F15 00000012 F15 00000008 F15 00000009 6 LOCKNUT M10 1 25 NUT M10 1 25 LINK SHIFT ROD WASHER PLAIN 6 SPRING CLAMP WASHER WAVE TUBE...

Страница 82: ...1 6x12 F15 01030200 GB T848 10 F4 01090301 GB T5783 M6x30 M6 30 1 6 12 10 HEXAGON BOLT M6 30 WASHER NYLON WASHER WASHER WAVE BUSH HANDLE PIN COTTER 1 6 1 SMALL WASHER 10 BOLT 1 2 1 2 1 1 1 1 1 1 1 1...

Страница 83: ...01090303 1 1 1 1 1 2 1 FRICTION HANDLE STEERING HEXAGON BOLT M6 20 STAY BUSH M6 20 GB T5783 M6x20 F4 01090006 F4 01090003 F15 01030001 F15 01030100 F15 01030005 F4 01090007 1 1 SCREW M5 25 RUBBER HAND...

Страница 84: ...ngine stop switch 9 Inspect shift handle for crack or damage Replace if necessary 10 Inspect steering handle for crack or damage Replace if necessary 11 Inspect bush bush washer and wave washer for cr...

Страница 85: ...BRACKET HELM LARGE WASHER SEAL WATER TUBE WASHER 6 BOLT M6 25 BOLT DOUBLE HEAD M8 50 PLATE NUT M8 S L F15 01020001S 1 1 1 1 F15 01000002 F15 01000001 F15 01000003 3 1 3 2 2 2 1 1 1 6 M6 25 M8 50 M8 G...

Страница 86: ...GB T97 1 8 GB T5783 M6x20 JB T 7940 1 M6 GB T3452 1 30x3 55 GB T6177 M8 GB T5782 M8x105 GB T5782 M8x85 M6 20 M6 8 M8 105 M8 85 M8 B 1 1 1 1 1 1 1 1 2 4 2 4 2 2 SEAL LOCK BOLT BOLT M6 20 OILER BUSH BE...

Страница 87: ...1 1 2 1 F15 01010301 F15 01010302 F15 01010308 F15 01010309 M6 8 A F15 01010201 GB T818 M6x8 F15 01010002 F15 01010202 F15 01010104 F15 01010105 F15 01010103 F15 01010001 F15 01010003 4 1 2 2 2 1 1 1...

Страница 88: ...010311 F15 01010402 F15 01010006 GB T896 4 GB T818 M8x10 F15 01010316 GB T896 5 F15 01010304 F15 01010306 GB T818 M5x6 GB T5782 M6x145 F15 01010400 M6 145 4 5 M5 6 1 1 1 1 1 1 1 1 2 1 2 1 1 1 2 F15 01...

Страница 89: ...13 F15 01010312 F15 01010305 F4 01010004 F15 01010102 6 M6 F4 01010003 GB T6170 M6 GB T848 6 F15 01010317 1 F15 01010317 2 F15 01010317 3 F15 01010307 44 43 42 41 40 39 38 33 37 36 35 34 32 31 30 Disa...

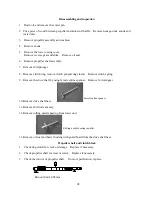
Страница 90: ...on lever 7 Remove orientation bushing and nylon bush 8 Remove lock angle long shaft and short shaft 9 Remove lock angle bracket torsion spring tension spring and inner bracket 10 Inspect rotary bracke...

Страница 91: ...03000002 F15 00000006 WASHER SPRING UPPER CASING UPPER CASING MANTLE UPPER CASING HEXAGON BOLT M6X16 PIN DOWEL SEAL GASKET RUBBER PIPE EXHAUST CLAPBOARD EXHAUST SEAL CLAPBOARD BOLT NUT HEXAGON BOLT HE...

Страница 92: ...bolt oil drain jacket and exhaust pipe seal 4 Remove double hole shock absorber assy water pipe quadrate seal and water pipe 5 Check the upper casing for crack or wear Replace if necessary 6 Check wa...

Страница 93: ...ON PART NO REMARKS F15 06060002 F15 00000013 F15 06060001 F15 06060004 F15 06000014 F15 06050000 F15 06000007 M8X45 4X12 OUTER PLATE O RING 31 45 IMPELLER PIN DOWEL 4X12 SEAL BOLT HEXAGON M8X45 4 2 1...

Страница 94: ...sing 3 Remove impeller and water pump inner shell 4 Remove woodruff key and outer plate 5 Check water pump housing and outer plate for crack crank or damage Replace if necessary 6 Check inner water pu...

Страница 95: ...0000 F15 06000015 GB T97 1 6 F15 06000003 M5X25 A 4X12 8 M8X30 2 5X20 M6X30 6 10 6 B WATER INLET A NUT LOCKING M5 PIN DOWEL 4X12 SCREW M5X25 WATER INLET B BOLT HEXAGON M6X30 WASHER 6 WASHER LOCKING 6...

Страница 96: ...2 F15 06000010 3 F15 06000010 4 F15 06000010 5 F15 06000010 6 F15 06000010 7 F15 06070005 F15 06070003 F15 06070004 F15 06010000 NTN 4T 30205 1L PLUG OIL HOSE BEARING GEAR FORWARD PIN CLUTCH CLUTCH DO...

Страница 97: ...1 KOYO 17BM2312 GB T276 6005 1 1 1 1 1 1 1 1 1 1 BEARING 17BM2312 COVER LOWER CASING O RING B COVER O RING A COVER BEARING 6005 GEAR REVERSE WASHER REVERSE GEAR SHAFT PROPELLER SPRING CLUTCH PLUNGER S...

Страница 98: ...Y LOWER CASING BEARING OIL SEAL DRIVE SHAFT 20X30X6 DRIVE SHAFT ASSY DRIVE SHAFT ASSY 2 1 1 1 1 1 2 2 2 BOLT HEXAGON M8X25 M8X25 F15 06080000 NSK F1420 F15 06000005 GB T5783 M6x20 GB T97 1 6 2 F15 060...

Страница 99: ...13 12 11 10 9 8 7 6 5 4 3 2 2 3 1 9 Nm 8 Nm 25 Nm 35 36 37 38 39 40 1 1 1 1 1 1 1 1 F15 06030000S F15 06000020 SHIM PINION t 1 20MM SHIM PINION t 1 13MM CAM ASSY SHIFT ROD BEARING PINION NUT PINION M8...

Страница 100: ...dog clutch Remove clutch spring 9 Remove the drive shaft by using female spline spanner Remove forward gear Female spline spanner 10 Remove drive shaft base 11 Remove shift rod cam assy 12 Remove rol...

Страница 101: ...eedle bearing by using special tool NOTE Use new parts when reinstalling the oil seal and rolling needle bearing 4 Clean casing cover by a soft brush and solvent 5 Check casing cover for crack or dama...

Страница 102: ...f necessary Forward gear bearing Inspect bearing for rust or rumbling when rotating Replace if necessary NOTE Adjust the shim when install new bearing Lower casing inspection Check lower casing for cr...

Страница 103: ...ler shaft assy 8 Install lower casing cover 9 Check if gearshift works normally 10 Install water pump assy 11 Install anode and water inlet 12 Install propeller and hexagon nut Put a piece of wood bet...

Страница 104: ...t position if necessary Tighten the nut thoroughly 4 Add gear oil using the pressure filling device Shim selection T1 M1 M2 T2 M3 T3 T1 T2 T3 Shim thickness M1 Reverse gear thickness M2 Forward gear t...

Страница 105: ...are faulty Replace Engine stop switch lanyard is not attached Attach lanyard Engine will not start Engine inner parts are damaged Repair Spark plug s fouled or of incorrect type Inspect spark plug s...

Страница 106: ...ith clean fresh fuel Spark plug clearance is incorrect Inspect and adjust as specified Ignition wiring is faulty Check wires Tighten all loose connections Replace worn or broken wires Ignition parts h...

Отзывы: