


Chapter 2: Installing the Monitor
Mounting the Monitor in an Enclosure
PHM/PM User Guide
2-9
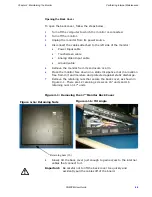
Figure 2-4: Mounting the Clamp Diagram
3
Slide the feet of the mounting clip into the slot, then slide the clip
over to properly mount the unit.
4
Tighten each of the mounting screws against the front of the
enclosure.
5
Torque the screws to 7 in/lbs.
Caution: Do not over-tighten the screw/clamp assemblies or you
may damage the monitor. However, under-tightening
may not guarantee a Type 4 seal.
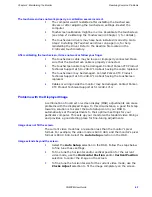
6
Tighten the screws in a crosswise sequence to ensure a good seal
and prevent damage. Tightening the bracket assembly may not
ensure that the gasket seal is totally depressed by the bezel. You
may see a small gap between the bezel and the enclosure.
After you have mounted the monitor, you are ready to connect the monitor
to a computer, start up your system, and if necessary, set up the monitor.
Instructions for these activities are described in Chapter 3, Connecting to a
Computer.


