Operation
3-23
3163-A2-GB20-10
March 1999
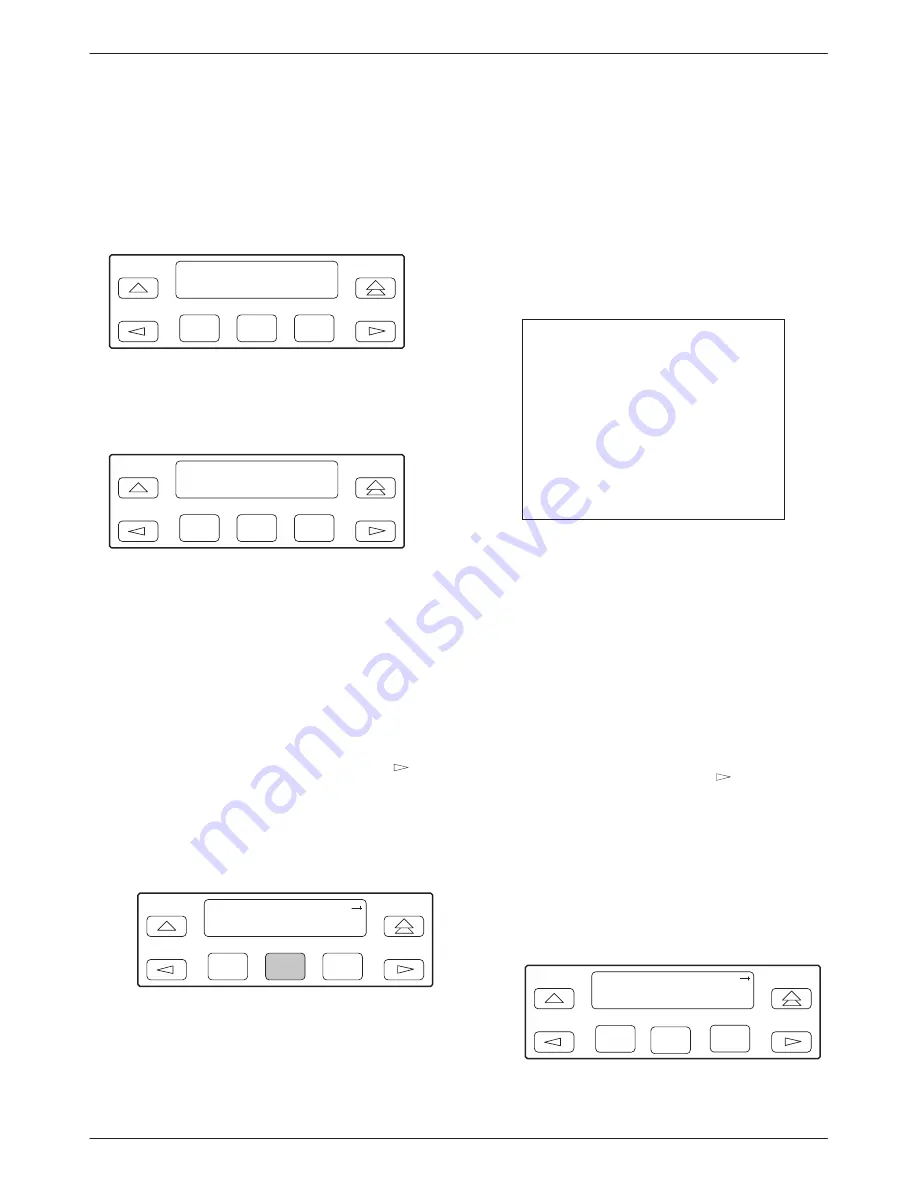
The inactive interface displays the following message
when a Function key is pressed or a connection is made
on the inactive user interface and control cannot be
switched because the currently active interface is in use.
On the screen, either Ft. Panel (front panel), Com Port, or
Modem is displayed in the user interface (User I/F ) field.
F1
DSU ESF
User I/F active
F2
F3
The inactive interface displays the following message
after control has been released from the previously active
interface and another interface has not become active.
F1
DSU ESF
User I/F idle
F2
F3
Releasing the Active User Interface
To release the current active user interface, either allow
five minutes to elapse without pressing any key or use the
Release command.
"
Procedure
To use the Release command:
1. From the top-level menu screen, press the
key
until the Ctrl selection appears on the screen.
2. Select Ctrl.
3. From the Control screen, select Rel (Release).
F1
Control:
Call
Rel
LED
F2
F3
The active user interface is released. The message
Released appears. No user interface is active until
input is received from a user interface.
Enabling/Disabling the Front
Panel
You can enable or disable the display of information on
the front panel. This feature is useful for ensuring that
other users do not inadvertently change the device’s
configuration options while you are using an external
device (e.g., a PC or async terminal). The factory default
is Enable.
NOTE
If you disable the front panel, be
sure not to alter the configuration
options for using an external
device (e.g., a PC or async
terminal). If this happens, you
lose the ability to communicate
with the device. You will need to
contact your service
representative.
"
Procedure
To enable or disable the front panel:
1. From the top-level menu screen, select Cnfig.
2. Select the configuration option set to be copied
into the Edit area by using the appropriate
Function key. Use the scroll keys, if necessary.
3. Select Edit.
4. From the Edit screen, press the
key until the
User selection appears on the screen.
5. Select User.
6. Press F1 (Next) until the FP Access configuration
option appears.
7. Press F2 to enable the front panel or F3 to disable
the front panel.
F1
FP Access:
Next
Enab
Disab
F3
F2
Содержание 3163
Страница 1: ...ACCULINK 3163 DSU CSU USER S GUIDE Document No 3163 A2 GB20 10 March 1999...
Страница 6: ...ACCULINK 3163 DSU CSU E March 1999 3163 A2 GB20 10...
Страница 22: ...ACCULINK 3163 DSU CSU 2 8 March 1999 3163 A2 GB20 10...
Страница 52: ...ACCULINK 3163 DSU CSU 3 30 March 1999 3163 A2 GB20 10...
Страница 72: ...ACCULINK 3163 DSU CSU 4 20 March 1999 3163 A2 GB20 10...
Страница 74: ...ACCULINK 3163 DSU CSU A 2 March 1999 3163 A2 GB20 10...
Страница 140: ...ACCULINK 3163 DSU CSU G 18 March 1999 3163 A2 GB20 10...
Страница 142: ...ACCULINK 3163 DSU CSU H 2 March 1999 3163 A2 GB20 10...
Страница 150: ...ACCULINK 3163 DSU CSU Glossary 8 March 1999 3163 A2 GB20 10...


