


BA_PH_245-100-300_EN_06-22.docx
34
12.
Before the milling spindle can be started again, follow the instructions in section
Never clamp with the pin spanner if there is no milling arbor in the holder or if it is not inserted
correctly! This may result in the destruction of the clamping cartridge.
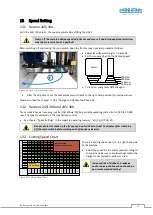
11.2.1.1
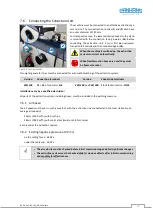
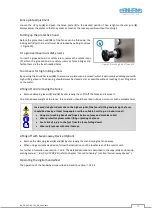
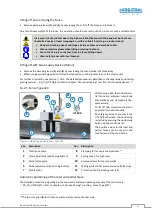
Security check for pin spanner
For safety reasons, the SW8 pin spanner must be re-
turned into the tray on the right of the machine, after
the HSK 80 milling arbor has been clamped (the tray
also serves to store the optional "Zero-master").
The control checks whether the spanner has been cor-
rectly deposited by means of an end switch in the tray.
The milling spindle can only be restarted
after the spanner has been placed cor-
rectly. Otherwise, a warning appears on
the touchscreen.
Figure 20: Storage tray for pin spanner
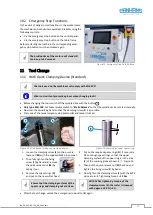
11.3
With HSK 63 and HSK 85 Tool Changers (Option for 245|200 and 300)
Before changing the tool, switch off the spindle drive with the button !
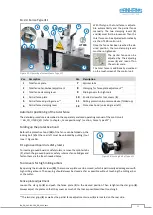
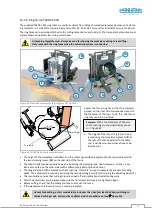
The HSK 63 and HSK 85 POWERLOCK quick-tool chang-
ers are used to change and clamp the complete milling
arbor without the need for tools. The loosening as well
as the clamping of the milling arbor is completely elec-
tromechanical, which allows a very fast tool change.
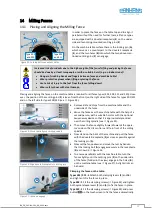
How it works:
A clamping set with a mechanical spring assembly is in-
stalled in the milling spindle. This spring assembly gen-
erates the necessary clamping force (up to 40 KN) to
clamp the milling tool. The clamping of the tool is guar-
anteed even in the event of a power failure.
Figure 21: Detached clamping cartridge with milling arbor
The spring assembly is released via an electromechanical release unit and the tool can be removed from the
spindle or inserted. Both variants (HSK63 and HSK85) differ only in their dimensions, but the procedure for chang-
ing the tool is absolutely identical:
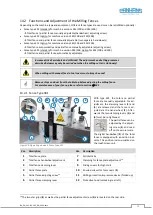
Set the rotary switch on the control panel briefly to the zero position (centre).
Set the switch to the release position (left)
The tool clamping is released electromechanically.
After a dwell time of approx. 10 seconds, the milling arbor can be removed.
Then insert the new milling arbor (collet chuck arbours are also possible).
Set the rotary switch on the control panel back to “normal operation” (right).