Advanced
HDMI1/2
20
21
How to Use Menu Functions
■
Menu list
•
Displaying PC Screen on
TV
•
How to Use Menu Functions (picture, sound quality
, etc.)
Menu
Item
Adjustments / Con
fi
gurations (alternatives)
Setup menu
Q-Link
Selects which AV terminal is to be used for data communication between this TV and a
compatible recording equipment
(AV2 / AV3)
(p. 30)
AV2/AV3 out
Chooses the signal to be transmitted from the TV to Q-Link
(TV / AV1 / AV2 / AV3 /
AV4 / Monitor)
•
Monitor: Image displayed on screen
•
Component, PC and HDMI signals cannot be outputted
Control with HDMI
Control with HDMI function
(Off / On)
(p. 32)
Teletext
Teletext display mode
(FASTEXT / List)
(p. 14)
Off timer
Sets the time the unit automatically turns Off.
(Off / 15 / 30 / 45 / 60 / 75 / 90)
(minutes)
Volume correction
Adjusts volume for AV, PC, HDMI and component mode
Side panel
Increases the brightness of the side panel
(Off / Low / Mid / High)
•
The recommended setting is "High" to prevent panel "after-image"
Power save
Reduces brightness of picture to economise on power consumption
(Off / On)
Power on preference
Set to "TV" to view picture from TV tuner.
Set to "AV" to view input from an external equipment connected to a SCART terminal,
e.g. satellite receiver
(TV / AV)
•
The external equipment must be switched on and sending a control signal for
automatic switching at power on to occur
Tuning menu
Programme edit
Edits channels (p. 23)
Auto setup
Sets channels automatically (p. 23)
Manual tuning
Sets channels manually (p. 23)
Fine tuning
Fine tuning of channels (during rain, etc.)
Owner ID
Inputs the owner ID (p. 25)
Shipping condition
Resets all settings, for example, when moving house (p. 24)
•
A different menu will be displayed while PC or SD Card is used.
(p. 21 and p. 27)
•
In AV mode, the Setup menu gives a reduced number of options.
■
To return to TV
yellow
(Press twice)
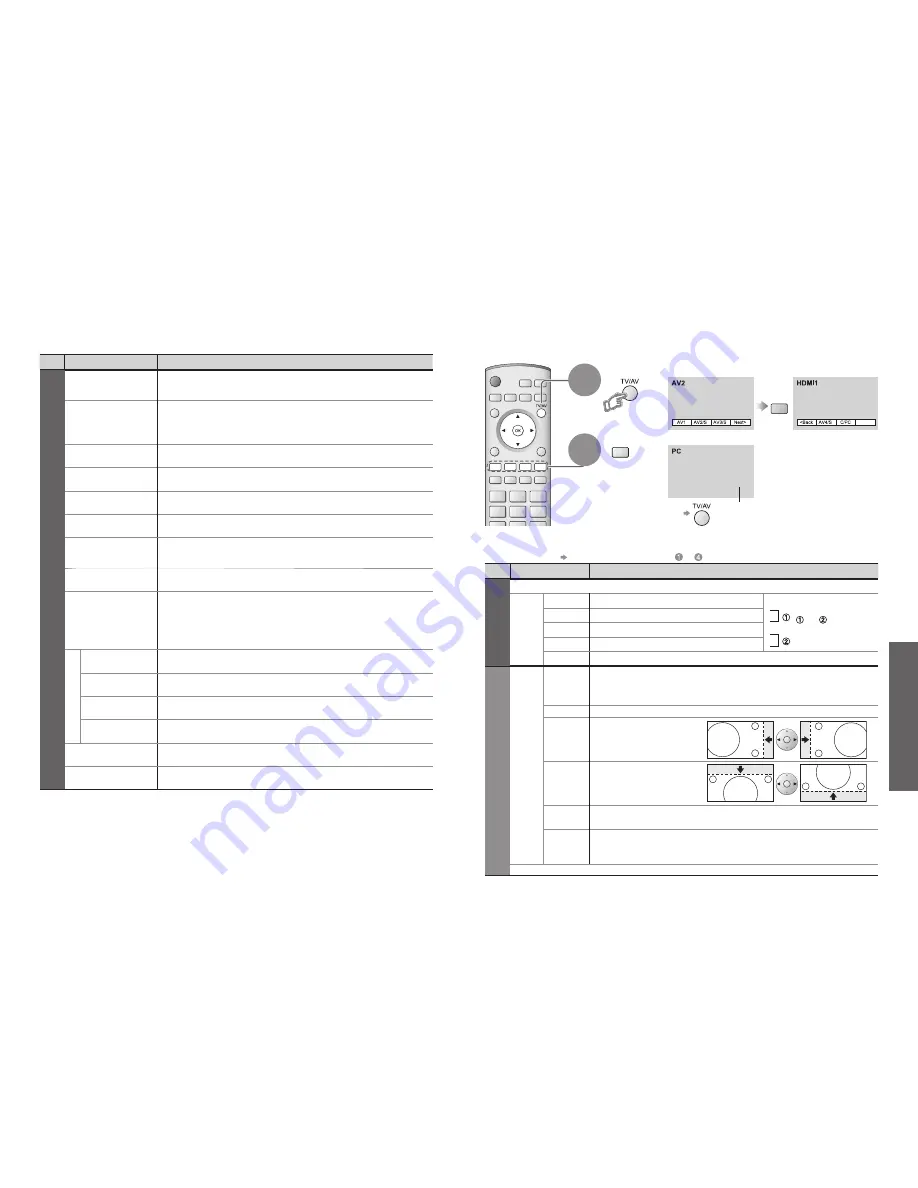
Displaying PC Screen on TV
Select the external input
Select "PC"
The screen of the PC connected to the unit can be displayed on the TV.
You can also listen to PC sound with the audio cable connected. To connect PC
(p. 34)
Displays PC screen
•
Corresponding signals
(p. 37)
•
If "H-freq." or "V-freq."
is shown in red, the
signals may not be
supported.
■
PC menu setting
(changed as desired)
•
To make settings "How to Use Menu Functions"
to
(p. 18)
Menu
Item
Adjustments / Con
fi
gurations (options)
Picture menu
Viewing mode, Contrast, Brightness, Sharpness, Colour balance (p. 19)
Advanced
setting
W/B High R
White balance of bright red area
and
repeatedly adjusted
W/B High B
White balance of bright blue area
W/B Low R
White balance of dark red area
W/B Low B
White balance of dark blue area
Gamma
(2.0 / 2.2 / 2.5 / S Curve)
Setup menu
PC
setup
Input
resolution
Switches to a wide view
•
VGA (640 x 480 dots), WVGA (852 x 480 dots),
XGA (1,024 x 768 dots), WXGA (1,366 x 768 dots)
•
Options change depending on signals
Clock
Set to the minimum level if noise occurs
H-pos
Adjusts horizontal position
V-pos
Adjusts vertical position
Clock phase
Eliminates
fl
icker and distortion
•
Adjust after Clock adjustment
•
Set to the minimum level if noise occurs
Sync
Chooses another synchronous signal if the image is distorted
(H&V / On G)
•
H&V : by the horizontal and vertical signals from your PC
On G : by the green signal from your PC (if available)
Volume correction, Side panel, Power save (p. 20)
•
Sound menu
(p. 19)
blue
To
next
page
1
2