Panasonic Viera TX-32LXD85, Operating Instructions Manual
The Panasonic Viera TX-32LXD85 is a high-quality television with a sleek design and impressive features. Enhance your viewing experience with its HD picture quality and vibrant colors. For those seeking assistance, a comprehensive Service Manual is available for free download, ensuring easy access to all required information and troubleshooting tips. Obtain your manual from manualshive.com, elevating your TV experience.
Share
Download


Reviews:
No comments
Related manuals for Viera TX-32LXD85

TX-50DXW804
Brand: Panasonic Pages: 88

TC-32LX85 Operating Manual (English
Brand: Panasonic Pages: 50

P749
Brand: TCL Pages: 20

RadioStreamer
Brand: Doro Pages: 32

QLTK1
Brand: Secura Pages: 20

AB-LED32L32D 3D
Brand: CRISTOR Pages: 18

TM501XX
Brand: VONROC Pages: 36

i-T15
Brand: AMC Pages: 2

MTM82PL
Brand: Kanto Pages: 16

TV
Brand: Blaupunkt Pages: 60

GJ0A0090
Brand: Gladiator Joe Pages: 4

Mimo 15 SAT
Brand: Loewe Pages: 34

CTV 4910 DVB-T
Brand: AEG Pages: 51

CTV 4842
Brand: AEG Pages: 60
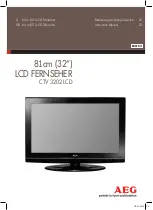
CTV 3202 LCD
Brand: AEG Pages: 40

CTV 4818 ST/VT LCD
Brand: AEG Pages: 58

CTV 1902 LED/DVB-T
Brand: AEG Pages: 76

CTV 2201
Brand: AEG Pages: 60


