15
Installation
(continue)
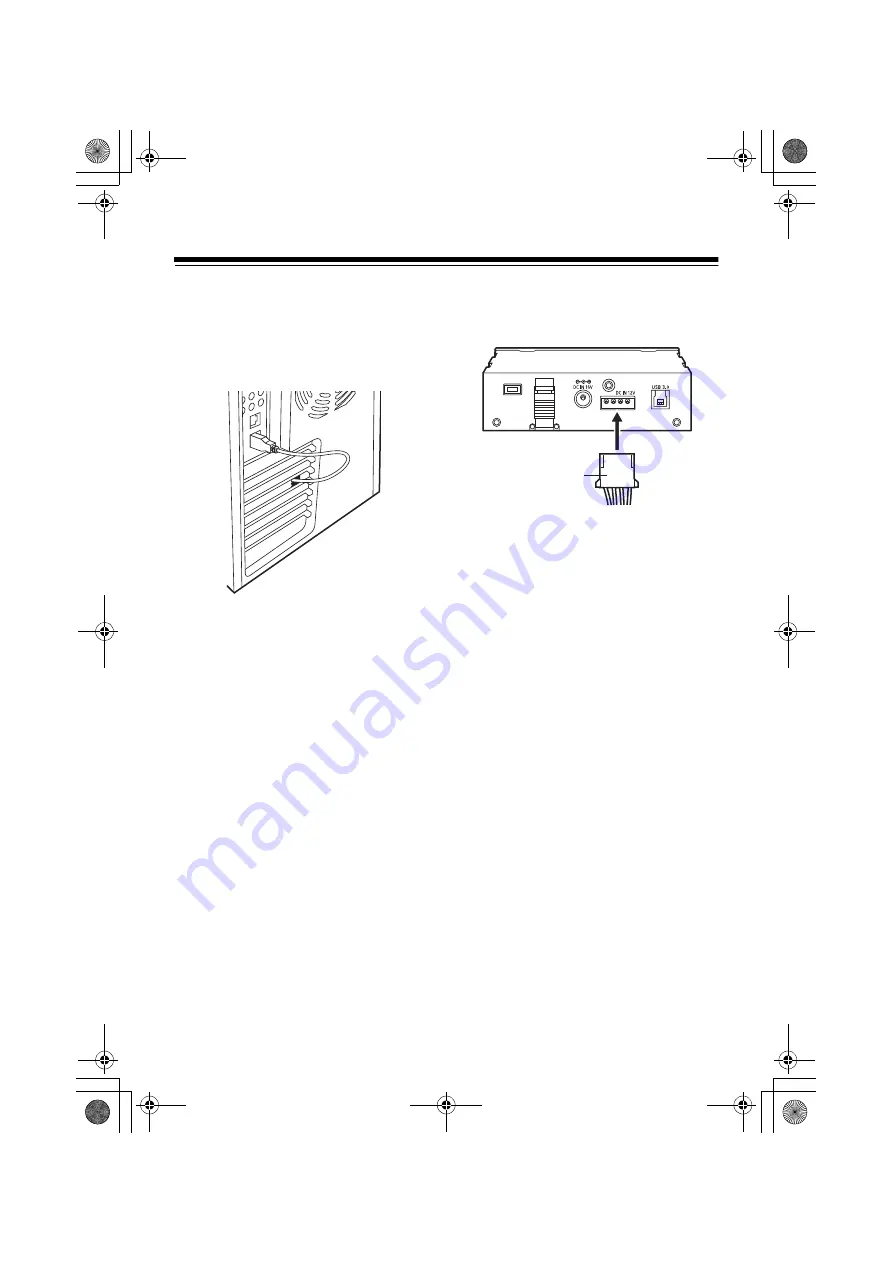
Connect the USB 3.0 cable to the USB 3.0
port (A connector) on the back panel of your
PC.
USB cable running outside your PC should
be bent so as to describe a shallow curve.
Sharp bending of the cable may break the
wires.
To be connected by USB 2.0
Connect the B connector of the USB 2.0
cable to the USB 3.0 connector of the device
and then connect the other end of the cable
to the USB 2.0 port on the motherboard of
your PC.
<Notes>
z
When there is no internal USB 2.0
connector in your PC, run part of the
USB 2.0 cable outside your PC once, and
connect the USB 2.0 cable to the USB 2.0
connector on the back panel. For a
detailed procedure for connection using
USB 3.0, refer to “To be connected by
USB 3.0” (page 14).
z
The pin arrangement of the USB 2.0
connector differs depending on the
motherboard of your PC. After checking
the user manual of your PC, prepare a
commercially available (shielded) USB 2.0
cable.
5
Connect the power connector (4 pin) inside
your PC to the DC IN 12 V terminal of the
device.
6
Start the personal computer and verify that it
recognises the device.
<Notes>
z
Use a USB cable with a flammability rating
of VW-1. For the flammability rating, check
the printed part of the cover of the USB
cable.
Recommended USB 3.0 cables (based on
information as of August 2011)
Elecom U3C-10BK (1.0 m)
StarTech.com USB3SAB3 (0.91 m)
Recommended cables are listed on the
Panasonic website.
http://pro-av.panasonic.net/
z
In Windows XP, some card slots of the
device may be assigned drive names that
have already been assigned to existing
networks. Reassign network drive names
if your personal computer does not display
all three card slots.
z
Arrange the USB cable so that it does not
directly contact the heat sink fan or fins
inside your PC.
power connector
AJ-PCD30P_E-VQT3R23-2_E.book 15 ページ 2013年3月6日 水曜日 午後6時1分


