11
Basic Operation
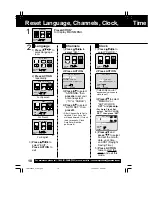
Clock, Time Zone Adjust
3) Press
to
select TIME ZONE
ADJUST and
press or to
subtract or add
hour(s) as
necessary.
4) Press ACTION
twice to exit.
(Only when Auto Clock is set.)
Add or Delete a Channel
Time Zone Adjust
1) Press
to
select “CLOCK.”
M A I N MENU
VCR
CLOCK
C H
SET : ACT I ON
SELECT :
T V
EX I T
C H
LANGUAGE
2) Press ACTION.
AUTO CLOCK SET
MANUAL
T I ME
E ZO
ZONE
ADJUS
JUST
T : 0
SELECT :
SET :
END : ACT I ON
SET CLOCK
AUTO CLOCK SET
MANUAL
T I ME
E ZO
ZONE
ADJUS
JUST
T : +1
+1
SELECT :
SET :
END : ACT I ON
SET CLOCK
CHANNEL 08 ADDED
To add channel:
Select channel with
number keys and
press ADD/DLT.
CHANNEL 08 DELE TED
To delete channel:
Select channel with
CH
or number keys
and press ADD/DLT.
ACTION key on
the unit
Using
keys
: CH UP
: CH DOWN
: VOLUME UP
: VOLUME DOWN
Whenever the menu or
program screen is displayed,
CHANNEL UP/DOWN function
as
and VOLUME UP/
DOWN function as only.
On Remote
On Unit
On Unit
You can operate the
menu screen using
unit buttons. To display
the menu, press STOP/
EJECT and REW
together with no tape
inserted. To exit the
menu, repeat above
with or without tape
inserted until normal
screen appears.
POWER
ACTION
ADD/DLT
NUMBER Keys
SELECT/SET
:CH UP
:CH DOWN
:VOL UP
:VOL DOWN
STOP/EJECT
STOP/EJECT REW/
REW/
ACTION
ACTION
*Important:
If a remote control button does not
work when pressed, press the
COMBO button on the remote and
try the button again.
VOL
VOL
CH
CH
Model PV-C2062
remote shown.
LSQT0582A_P10-21.p65
12/14/2001, 2:04 PM
11
Содержание Omnivision PV-C2542
Страница 22: ...6 1 2 Disassembly Method Fig D2 22 ...
Страница 23: ...Fig D3 23 ...
Страница 24: ...6 1 2 1 Notes in chart 1 Removal of VCR Unit Fig D4 24 ...
Страница 28: ...6 2 2 Inner Parts Location Fig J1 1 28 ...
Страница 29: ...6 2 3 EJECT Position Confirmation Fig J1 2 29 ...
Страница 30: ...6 2 4 Full Erase Head and Cylinder Unit Fig J2 30 ...
Страница 70: ...70 ...
Страница 73: ...11 2 MECHANISM BOTTOM SECTION 73 ...
Страница 74: ...11 3 CASSETTE UP COMPARTMENT SECTION 74 ...
Страница 75: ...11 4 CHASSIS FRAME SECTION 1 75 ...
Страница 76: ...11 5 CHASSIS FRAME SECTION 2 76 ...
Страница 77: ...11 6 PACKING PARTS AND ACCESSORIES SECTION 77 ...
Страница 84: ...121 LSPG1279 PACKING CASE PAPER F 6 84 ...
Страница 97: ...R5317 ERDS2TJ101 CARBON 1 4W 100 97 ...
Страница 99: ...R6045 ERJ6GEYJ102V MGF CHIP 1 10W 1K 99 ...
Страница 118: ...R5401 ERJ6GEYJ561V MGF CHIP 1 10W 560 118 ...
Страница 120: ...R6049 ERJ6GEY0R00V MGF CHIP 1 10W 0 120 ...


