


Note
•
If the manual settings screen is displayed,
press
[B]
to return to the auto settings
screen.
5.
Press
[G]
.
•
A dialogue box to confirm the saving of settings
is displayed.
6.
Use
[
][
]
to select
"Yes"
and press
[Enter]
.
•
The system settings screen is displayed.
Note
•
Depending on how many Boundary
Microphones are connected, the output
settings differ as follows:
–
2 or more Boundary Microphones:
Monaural output
–
1 Boundary Microphone: Stereo output
7.
Press
[Home]
.
•
The Home screen is displayed.
Setting the Mic Position manually
1.
Press
[Menu]
.
•
The Menu screen is displayed.
2.
Use
[
][
]
to select
"Settings"
and press
[Enter]
.
•
The system settings screen is displayed.
3.
Press
[
]
.
•
The next page is displayed.
4.
Use
[
][
]
to select
"MIC Setting"
and press
[Enter]
.
•
The auto settings screen is displayed.
Note
•
If the manual settings screen is displayed,
proceed to step
6
.
5.
Press
[B]
.
•
The manual settings screen is displayed.
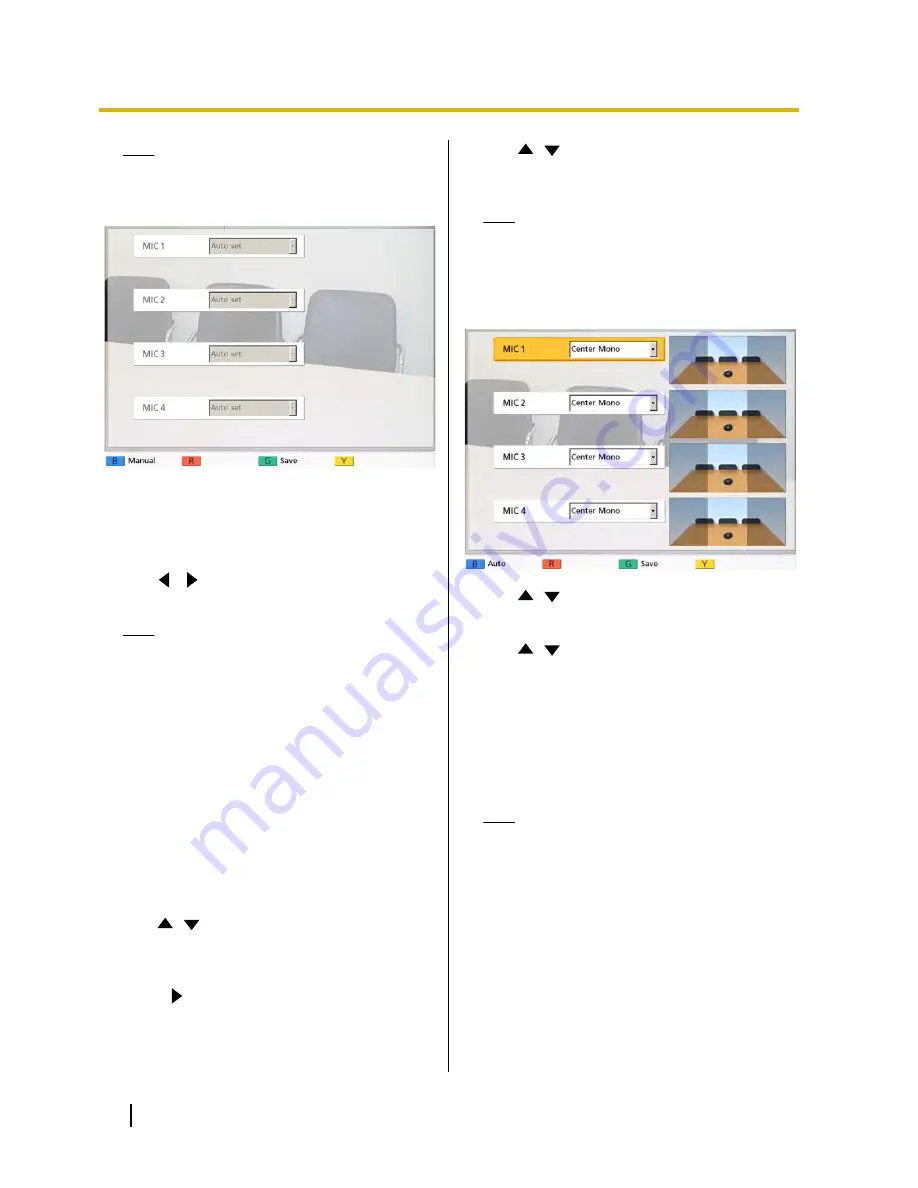
6.
Use
[
][
]
to select the Boundary Microphone
you want to configure and press
[Enter]
.
7.
Use
[
][
]
to select the Boundary Microphone’s
relative position.
"Left side"
: Sounds on left side are played.
"Right side"
: Sounds on right side are played.
"Center Mono"
: All sounds are played through
both the left and right speakers at the same volume.
"Center stereo"
: Sounds centred on the
microphone are played through both the left and
right speakers at the same volume.
Note
•
When a Boundary Microphone is set to
"Center stereo"
, make sure that it is placed
with its connector facing the display.
•
For the settings shown in the following
diagrams, the left/right channels are
displayed as viewed from the side of the
main video camera.
Here are examples of the relative position of
Boundary Microphones.
66
User Manual
Contacts and Settings
Содержание KX-VC500
Страница 101: ...User Manual 101 Notes ...


